
>>

Soft, fudgy red velvet crinkle cookies made in one bowl — ready in about 20 minutes and rolled in sugar for a dramatic, snowy crackle.
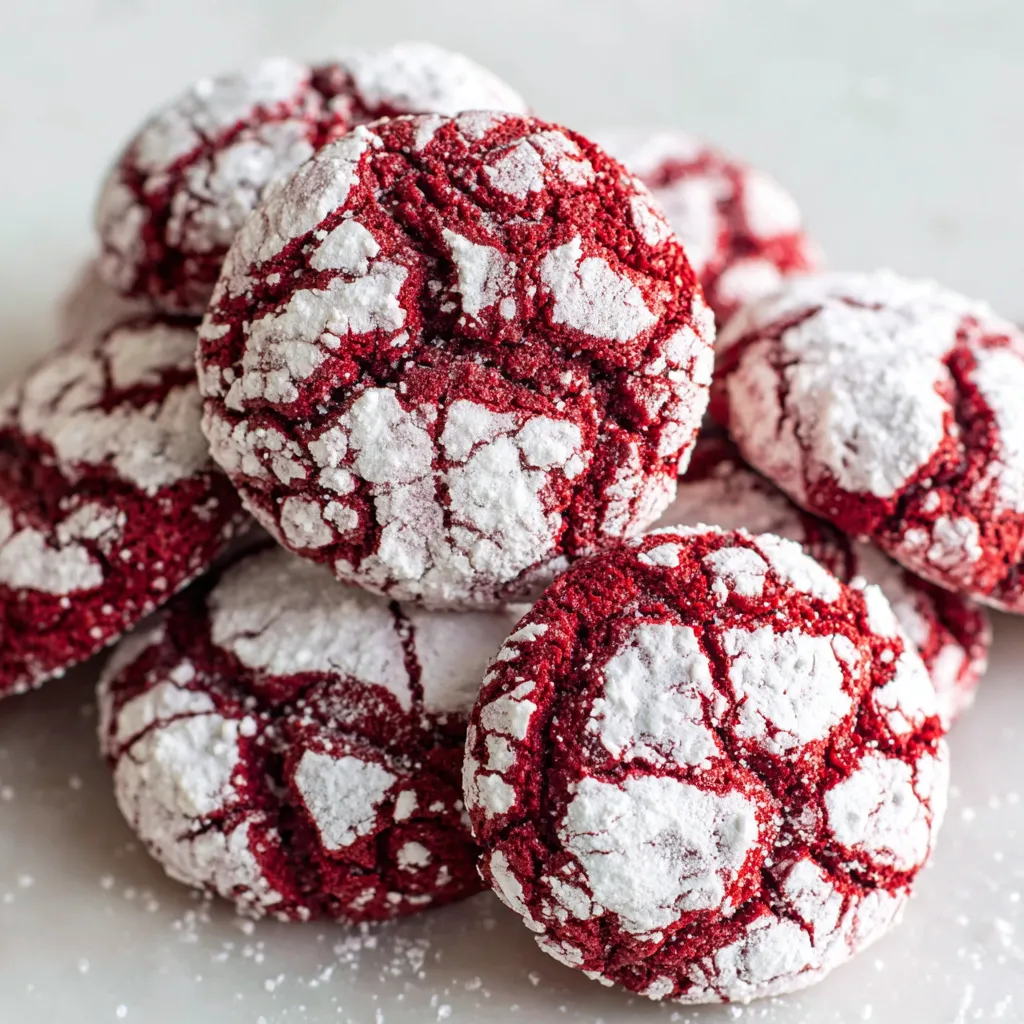
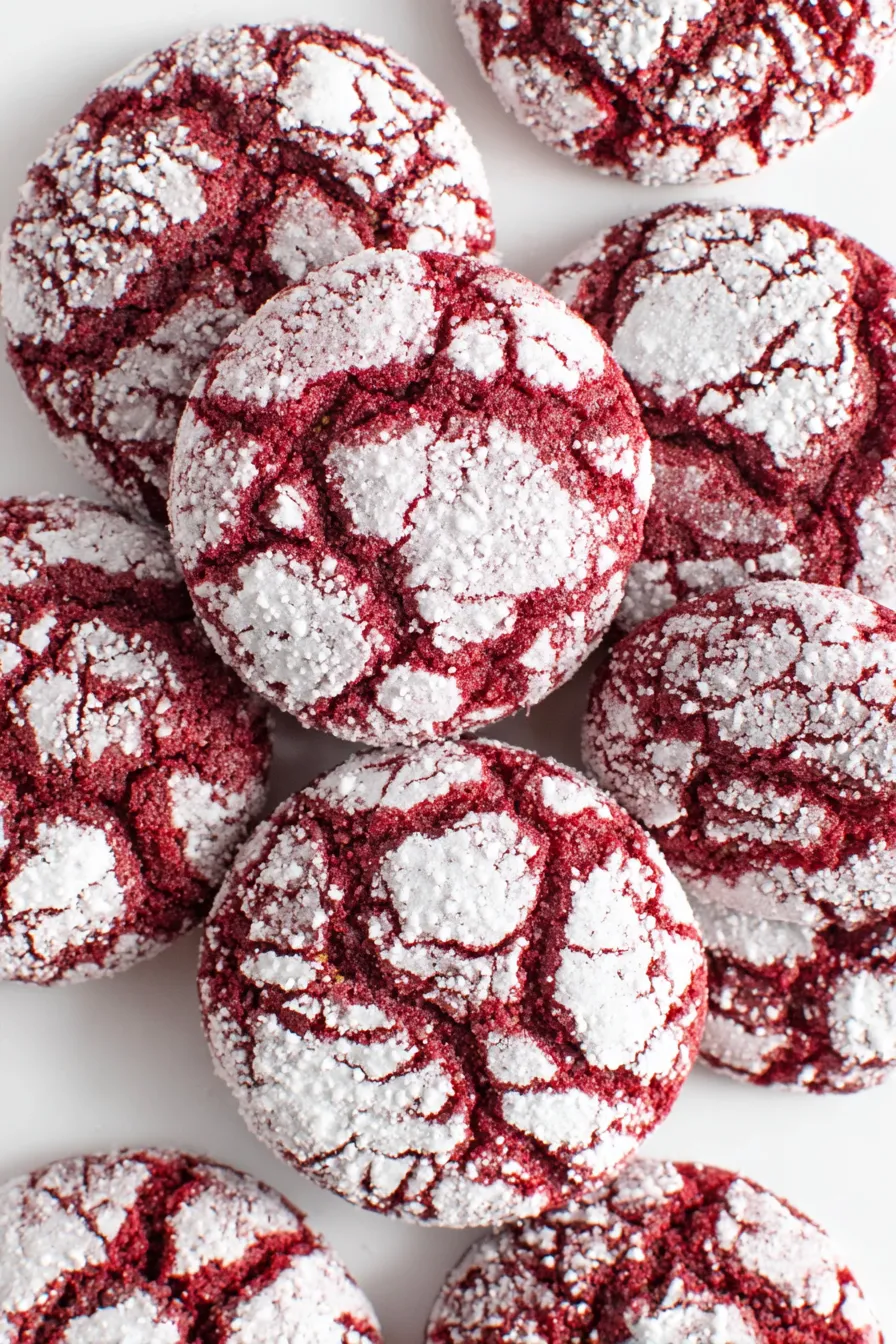
This One Bowl 20 Minute Red Velvet Crinkle Cookies recipe has become my favorite last-minute dessert when a celebration, school bake sale, or unexpected guest arrives. I first landed on this formula late one afternoon when I wanted a festive cookie that didn’t require chilling, elaborate equipment, or a long list of bowls to wash. The result is a tender, slightly fudgy cookie with a striking red interior and a delicate powdered-sugar crust that cracks attractively as it bakes. The texture sits somewhere between a cakey cookie and a brownie edge — soft in the center, lightly crisp at the edges, and deeply chocolatey thanks to unsweetened cocoa.
I remember the first time I pulled a tray from the oven: my little niece peered over the counter, eyes wide at the candy-apple red, and declared them “party cookies.” That moment cemented the recipe in our family rotation — quick, comforting, and reliably impressive. Because the dough is intentionally wetter than typical cookie dough, the finished cookie keeps a soft chew and the powdered sugar sticks in those signature crinkles. Make sure your egg is at room temperature and you use a gel food coloring for the deepest shade with the least liquid added.
In our home these cookies double as both an everyday treat and a holiday centerpiece. I’ve tested them at different altitudes and with several brands of oil; while results vary slightly, the one-bowl method delivers consistent success. Guests often ask if they’re store-bought — and I always smile and tell them they’re secretly very easy to make.

My favorite part is the contrast: when you bite into one, the snowy exterior gives way to a warm, cocoa-kissed center that’s unexpectedly tender for such a fast recipe. I’ve served these at birthday parties and holiday cookie swaps; people love the retro look and comforting chocolate flavor. Because they’re quick to mix and bake, they’ve saved more than one last-minute celebration in my home.
Store cooled cookies in a single layer or with parchment between layers inside an airtight container at room temperature for up to five days. For longer storage, freeze baked cookies on a tray in a single layer until firm (about 30 minutes), then transfer to a freezer-safe container or bag for up to three months. To refresh after freezing, thaw at room temperature and warm briefly in a 300°F oven for 3–4 minutes to revive the powdered-sugar crust and soften the center.
If you don’t have neutral oil, melted unsalted butter can be used but will change the texture — cookies become slightly richer and may spread a bit more, so reduce the amount to about 1/4 cup melted butter. For a vegan version, replace the egg with a flax egg (1 tbsp ground flax + 3 tbsp water) and use vegan powdered sugar; results will be slightly denser. If you only have liquid red dye, use half the recommended amount and accept a paler hue. Dutch-processed cocoa will deepen color but can reduce their tangy lift compared to natural cocoa.
These are delightful plated with a dusting of extra powdered sugar, alongside whipped cream or a scoop of vanilla ice cream for a dessert duo. They pair wonderfully with a cup of black coffee, hot chocolate, or a simple glass of milk. For a festive touch, garnish with a few chocolate shavings or crushed peppermint during the holidays. Arrange on a tiered platter for parties or wrap stacked cookies in cellophane tied with ribbon for edible gifts.
Red velvet has roots in early 20th-century American baking where cocoa, vinegar, and buttermilk created a distinctive texture and color. Over time it evolved into the vivid red desserts we know today, often associated with Southern baking traditions and celebratory desserts. These crinkle cookies borrow the color and cocoa notes from that tradition, but streamline the technique into a fast, one-bowl format that modern home cooks will appreciate.
For winter holidays, swap half the powdered sugar coating for a mix that includes finely crushed candy cane for a peppermint kick. In spring, fold in a handful of white chocolate chips or add a tiny orange zest to the batter for a bright note. During summer gatherings, serve slightly chilled with a dollop of mascarpone sweetened with a touch of honey and lemon zest for a lighter presentation.
Make the dough and portion it into scooped balls on a parchment-lined tray, then freeze the tray until firm and transfer the cookie balls to a sealed bag. Bake from frozen, adding 1–2 minutes to the baking time. This gives you freshly baked cookies anytime without extra mixing. Alternatively, bake a full batch and freeze baked cookies in a single layer; thaw as needed and warm briefly for the fresh-baked experience.
These cookies are a small, reliable joy — simple to prepare, easy to scale, and made with ingredients you likely already have. They’re proof that a few smart techniques and one bowl can create something deliciously memorable.
Use gel food coloring for a vivid red without adding excess liquid.
Room-temperature egg blends more smoothly into the oil-sugar mixture for better rise.
Sift cocoa with the flour to prevent lumps and ensure even color and texture.
Press powdered sugar into the dough ball so it adheres and creates dramatic crinkles.
This nourishing one bowl 20 minute red velvet crinkle cookies recipe is sure to be a staple in your kitchen. Enjoy every moist, high protein slice — it is perfect for breakfast or as a wholesome snack any time.
Yes — the dough is intentionally wet; it yields a soft interior. Scoop and roll as instructed, then bake without flattening.
You can freeze shaped, unbaked cookie balls on a tray until firm, then transfer to a bag. Bake from frozen, adding 1–2 minutes to time.
This One Bowl 20 Minute Red Velvet Crinkle Cookies recipe makes perfectly juicy, tender, and flavorful steak every time! Serve with potatoes and a side salad for an unforgettable dinner in under 30 minutes.
Preheat oven to 325°F (165°C) and line one or two sheet pans with parchment paper. Decide whether to bake all 12 at once or split across two pans for even spacing and airflow.
In a medium bowl whisk together the oil, brown sugar, granulated sugar, room-temperature egg, vanilla, and red gel coloring until slightly thickened and well combined. About one minute of vigorous whisking or a brief pulsed blend with a hand mixer.
Sift the flour, cocoa powder, salt, and baking soda into the wet mixture. Fold gently with a rubber spatula until just combined; expect a wet, glossy dough.
Scoop 40 g balls with a #40 scoop, roll in granulated sugar, then in powdered sugar, pressing lightly so the powdered sugar adheres. Place on parchment-lined pan, leaving room to expand.
Bake for 12–13 minutes until edges are set and cookies are puffed. Optionally, gently nudge with a slightly larger cookie cutter to perfect the round shape while still warm. Cool on pan 10–15 minutes before transferring to a rack.
Last Step: Please leave a rating and comment letting us know how you liked this recipe! This helps our business to thrive and continue providing free, high-quality recipes for you.
Leave a comment & rating below or tag
@paletina on social media!

Ultra-fudgy brownies packed with chocolate chunks, crowned with gooey marshmallows and glossed with warm chocolate frosting for a decadent crowd-pleaser.

Buttery shortbread crust topped with a gooey brown sugar-pecan filling. Ten minutes to prep, irresistibly crunchy edges, and perfect for make-ahead treats.

Silky, crack-free pumpkin cheesecake with warm spice, buttery graham crust, and make-ahead convenience for showstopping holiday dinners.
Leave a comment & rating below or tag @paletina on social media!
Enjoyed this recipe? Share it with friends and family, and don't forget to leave a review!
This recipe looks amazing! Can't wait to try it.
Comments are stored locally in your browser. Server comments are displayed alongside your local comments.

Join to receive our email series which contains a round-up of some of our quick and easy family favorite recipes.
