
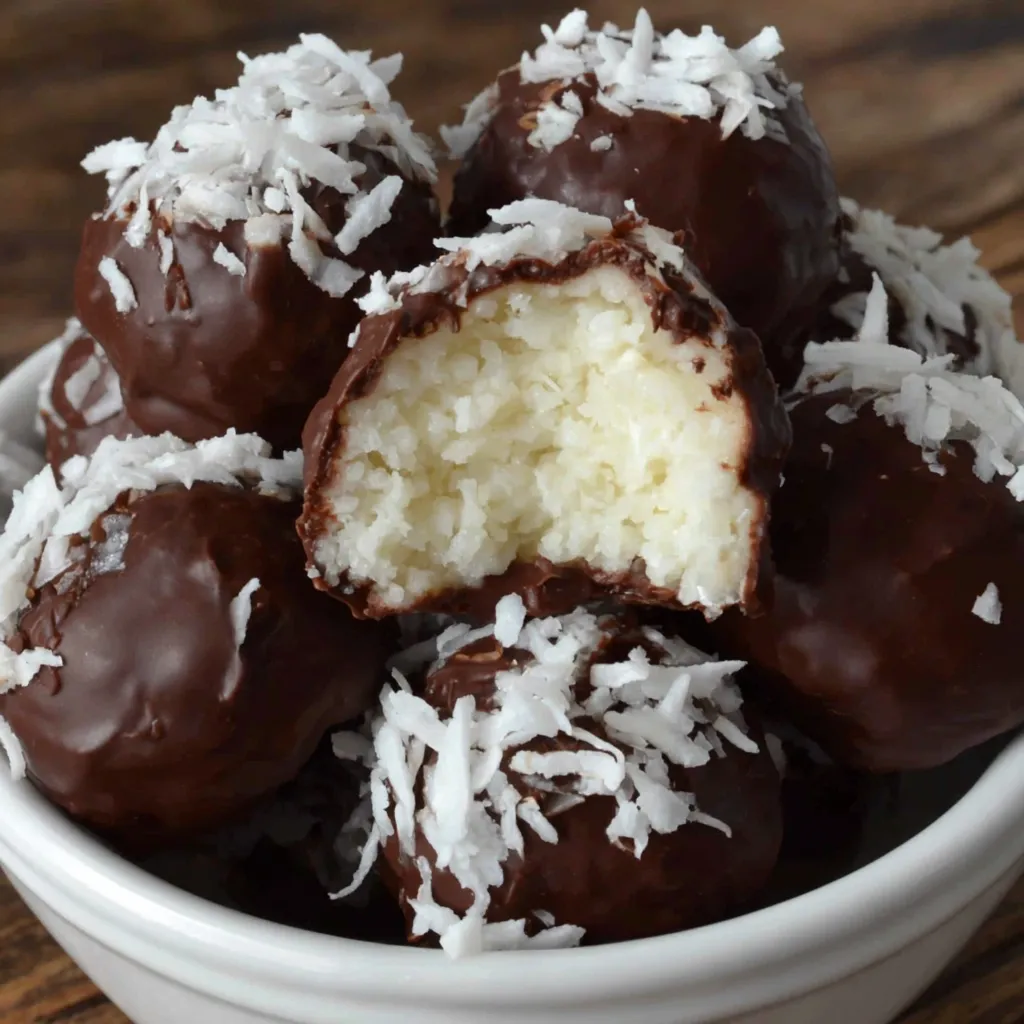
3-Ingredient Chocolate Coconut Balls

Easy, no-bake chocolate-covered coconut bites made with just shredded coconut, condensed milk, and dark chocolate — a perfect make-ahead treat.
Why You'll Love This Recipe
- Only three ingredients and no oven required — ready in about 25 minutes active time and quick chill time.
- Uses pantry staples: shredded coconut and condensed milk are easy to find, and dark chocolate can be any quality you prefer.
- Make-ahead friendly: formed balls freeze well for months and thaw in minutes for instant treats or party platters.
- Crowd-pleasing texture: chewy coconut center with a crisp chocolate shell creates a delightful contrast.
- Flexible for dietary swaps: use coconut condensed milk to make them dairy-free, or choose different chocolates for sweetness adjustments.
- Portable and perfect for gifting: package in small boxes or mason jars with parchment paper between layers.
I began leaving a small bowl of these out during holiday gatherings and people kept asking for the recipe. My sister taught me a trick to chill them briefly in the freezer for faster dipping, which saves time when making large batches. They’re also the first thing little cousins reach for at birthday parties — a sign that simple flavors done well always win.
Ingredients
- Shredded coconut (unsweetened) — 2 cups: Use freshly shredded coconut if you can, otherwise choose a reputable brand like Bob's Red Mill or Let's Do Organic. Unsweetened keeps the sweetness balanced; finely shredded coconut binds more evenly with the milk.
- Condensed milk — 1 cup: Standard sweetened condensed milk (Eagle Brand or Carnation) provides sweetness and acts as the binder. For a dairy-free version, substitute 1 cup sweetened coconut condensed milk — the texture will be nearly identical.
- Dark chocolate — 3.5 ounces (about 100 grams): Use a good-quality dark chocolate bar or chips for melting. I like 60–70% cocoa for balanced sweetness; Ghirardelli or Valrhona work well if you want a more gourmet finish.
Instructions
Combine coconut and condensed milk: Pour the shredded coconut into a large mixing bowl and add the condensed milk. Use clean hands to fold and press the mixture together until it forms a thick, moldable mass. This tactile method helps you gauge moisture — the mixture should stick together without being overly wet. If too dry, add a teaspoon of condensed milk at a time. Portion and shape: Using a tablespoon or small cookie scoop, portion 1 to 2 tablespoons per ball. Roll between your palms to form smooth rounds. Aim for consistent sizes so they set and chill uniformly. Place each on a parchment-lined baking sheet with a little space between them. Chill to firm up: Transfer the baking sheet to the refrigerator for 15 to 30 minutes to firm the centers. If you’re short on time, freeze for 5 to 10 minutes until just solid enough to handle without losing shape. Melt the chocolate: Chop the chocolate if using a bar, then melt gently. Microwave in 20 to 30 second bursts, stirring between intervals until smooth. Alternatively, heat a small saucepan of simmering water and set a heatproof bowl over it for a bain-marie; stir the chocolate until fully melted and glossy. Avoid overheating, which can seize the chocolate. Coat the balls: Using a fork or dipping tool, submerge each chilled ball in the melted chocolate, tapping the fork on the edge to remove excess. Transfer to a wire rack set over parchment to catch drips. Ensure a complete, even coating; if you prefer a thinner shell, swirl the ball through the chocolate rather than fully submerging. Set and store: Allow the chocolate to harden at room temperature for a few minutes, then transfer to the refrigerator to cool completely for at least 15 minutes. Store in an airtight container in the fridge for up to two weeks or freeze for longer storage.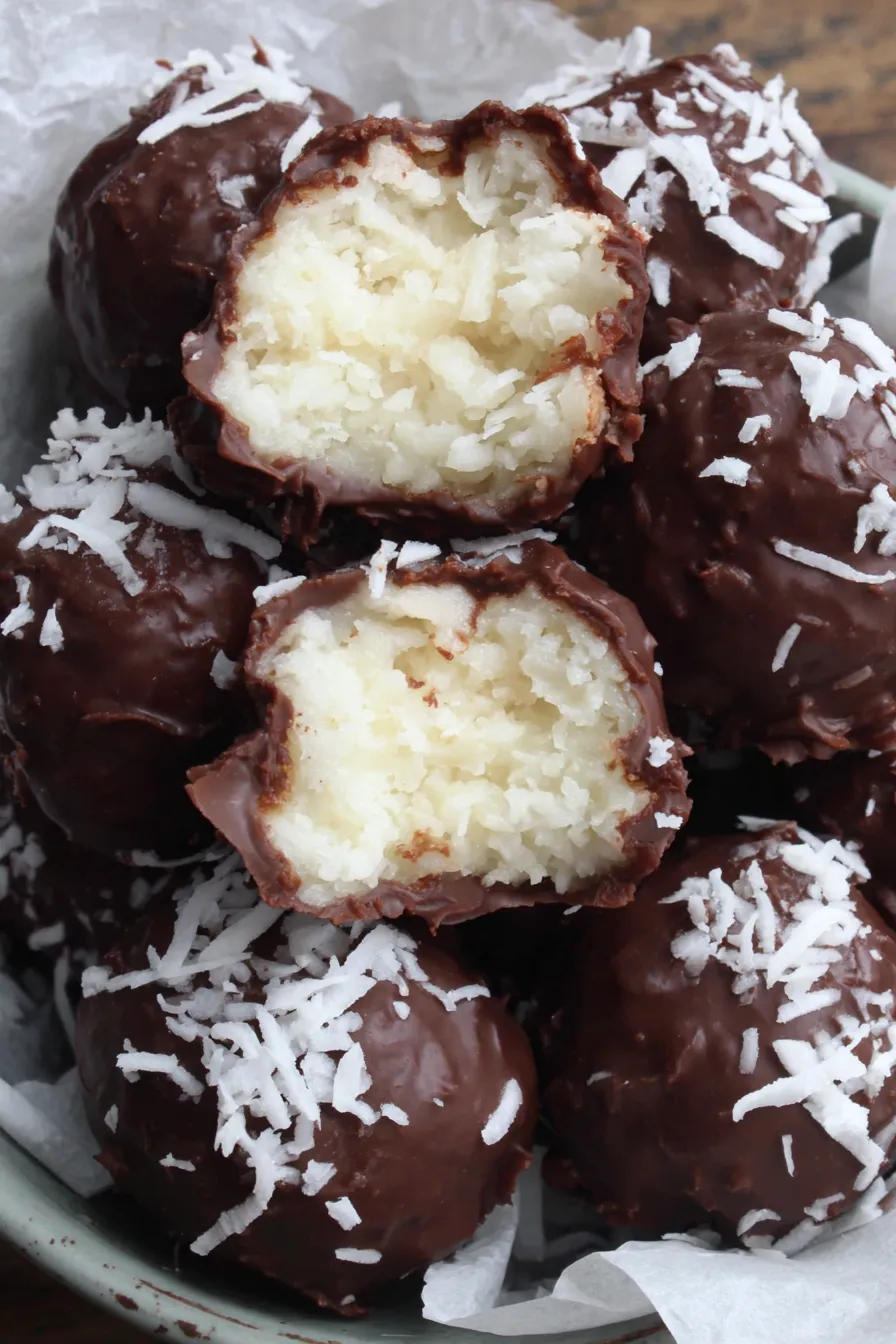
You Must Know
- High in energy: these bites are calorie-dense because of coconut and condensed milk; keep portions small for snacking.
- Freezer friendly: freeze arranged on a tray until solid, then transfer to a sealed container; they keep well for 2 to 3 months.
- Allergen note: contains coconut and may contain dairy unless coconut condensed milk is used.
- Chocolate sets best when fully cool; avoid humid conditions which can cause blooming on the chocolate surface.
My favorite part is how customizable these are. I often roll half of the formed centers in toasted coconut before chilling for extra crunch, and family members argue over whether the plain dark chocolate or the toasted coating is best. Watching the chocolate set into a glossy shell never gets old.

Storage Tips
Keep the finished bites in an airtight container layered with parchment paper to prevent sticking. Refrigerated, they remain fresh for up to two weeks; for longer storage, freeze on a tray until solid then pack into a freezer-safe container for up to three months. Thaw in the refrigerator or at room temperature for 10 to 20 minutes before serving. If you notice the chocolate surface showing white bloom after long storage, it’s still safe to eat; simply let them come to room temperature to improve appearance.
Ingredient Substitutions
To make them dairy-free, swap regular condensed milk for sweetened coconut condensed milk cup-for-cup. If you prefer a sweeter center, use sweetened shredded coconut instead of unsweetened but reduce any additional sugar in toppings. For a richer chocolate layer, use milk chocolate or a mix of dark and milk — be aware that milk chocolate will yield a softer shell at room temperature. You can also add a teaspoon of vanilla or a pinch of salt to the coconut mixture to round flavors.
Serving Suggestions
Serve chilled on a small platter with a sprinkle of flaky sea salt on top of each ball for a salted chocolate variation. Pair with espresso or a cup of tea for an afternoon treat. For occasions, package in cellophane bags with a ribbon or arrange in a decorative tin lined with parchment. They make lovely homemade gifts around the holidays or a quick addition to a dessert board.
Cultural Background
Simple coconut confections appear in many culinary traditions because coconut is a versatile base that binds well with sweeteners. These particular bites echo the idea of truffles and small confections coated in chocolate, a technique adapted worldwide. Using condensed milk as a binder is common in home confectionery since it provides both sweetness and the right texture without cooking, making this approach instantly accessible.
Seasonal Adaptations
In summer, dress them up with citrus zest — a teaspoon of lime or orange zest mixed into the coconut adds brightness. For winter, fold in a pinch of ground cinnamon or cardamom for warmth. Around holidays, dip half in white chocolate and drizzle with colored chocolate for festive presentations. You can also roll some in finely chopped nuts or cocoa powder for different textures.
Meal Prep Tips
Make them in batches on a weekend and freeze for quick snacks during the week. Portion into single-serve containers for easy grab-and-go breakfasts or desserts. Use a small scoop for uniform balls to speed up production, and set up an assembly line: one person shapes, another chills, and a third coats. This saves time and keeps hands from warming the centers too much during shaping.
These three-ingredient bites are a joyful example of how minimal ingredients and a few careful techniques create something special. They’re forgiving, travel well, and invite experimentation. I hope you make a batch and discover your favorite chocolate coating or garnish — then tell me which version won over your crowd.
Pro Tips
Chill the shaped centers for at least 15 minutes before dipping to prevent them from falling apart in the chocolate.
If melted chocolate starts to thicken, warm it gently in 10-second microwave bursts or over a bain-marie; avoid water contact to prevent seizing.
For a glossy finish, let chocolate cool slightly before dipping, then tap off excess and set on a wire rack to harden evenly.
Toast the shredded coconut in a dry skillet over medium heat until lightly golden for extra aroma before mixing, but cool it completely first.
This nourishing 3-ingredient chocolate coconut balls recipe is sure to be a staple in your kitchen. Enjoy every moist, high protein slice — it is perfect for breakfast or as a wholesome snack any time.
Tags
3-Ingredient Chocolate Coconut Balls
This 3-Ingredient Chocolate Coconut Balls recipe makes perfectly juicy, tender, and flavorful steak every time! Serve with potatoes and a side salad for an unforgettable dinner in under 30 minutes.
Instructions
Combine ingredients
Place shredded coconut into a bowl and add condensed milk. Using clean hands or a spoon, mix until a thick, moldable mass forms. Adjust moisture with small additional amounts of condensed milk if necessary.
Portion and shape
Scoop 1 to 2 tablespoons of the mixture and roll between palms to form smooth balls. Place on a parchment-lined baking sheet with spacing between each.
Chill to firm
Refrigerate the formed balls for 15 to 30 minutes, or freeze for 5 to 10 minutes if short on time, until firm enough for dipping.
Melt chocolate
Chop chocolate if needed and melt in 20–30 second microwave bursts stirring between intervals, or use a double boiler until glossy and smooth. Avoid overheating.
Dip and set
Dip each chilled ball into the melted chocolate using a fork or dipping tool, tap off excess, and place on a wire rack over parchment. Let the chocolate set at room temperature then refrigerate until completely firm.
Last Step: Please leave a rating and comment letting us know how you liked this recipe! This helps our business to thrive and continue providing free, high-quality recipes for you.
Nutrition
Did You Make This?
Leave a comment & rating below or tag
@paletina on social media!
Categories:
You might also like...

Chocolate Chunk Marshmallow Brownies
Ultra-fudgy brownies packed with chocolate chunks, crowned with gooey marshmallows and glossed with warm chocolate frosting for a decadent crowd-pleaser.

Buttery Pecan Pie Bars
Buttery shortbread crust topped with a gooey brown sugar-pecan filling. Ten minutes to prep, irresistibly crunchy edges, and perfect for make-ahead treats.

Creamy Pumpkin Cheesecake
Silky, crack-free pumpkin cheesecake with warm spice, buttery graham crust, and make-ahead convenience for showstopping holiday dinners.
Did You Make This?
Leave a comment & rating below or tag @paletina on social media!
Rate This Recipe
Share This Recipe
Enjoyed this recipe? Share it with friends and family, and don't forget to leave a review!
Comments (1)
This recipe looks amazing! Can't wait to try it.
Comments are stored locally in your browser. Server comments are displayed alongside your local comments.

Hi, I'm Isabella!
What's Popular

30-Minute Meals!
Join to receive our email series which contains a round-up of some of our quick and easy family favorite recipes.