
>>

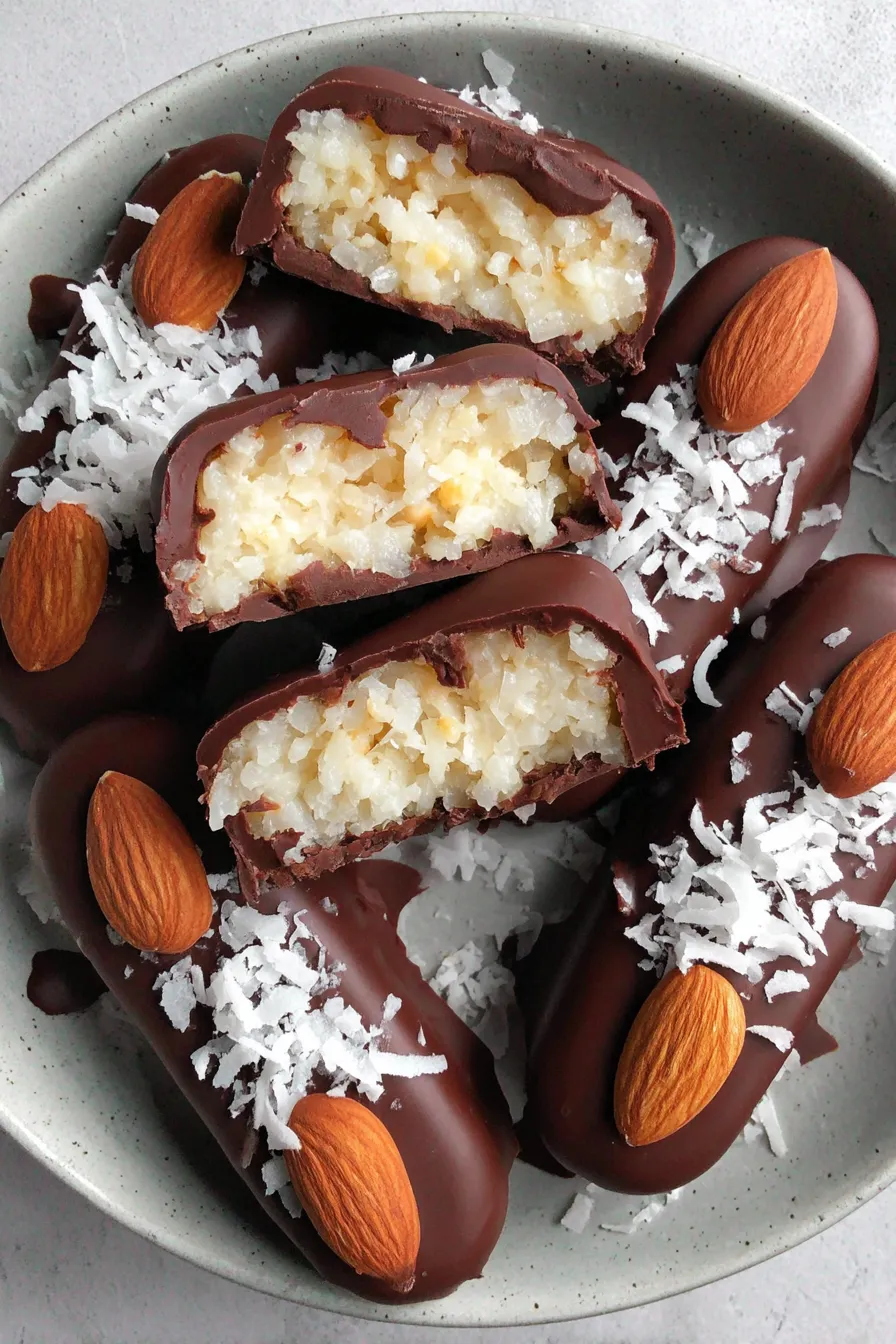
A simple no bake treat that recreates the classic Almond Joy with just five ingredients. Creamy coconut centers, toasted almonds, and glossy dark chocolate in bite sized bars.
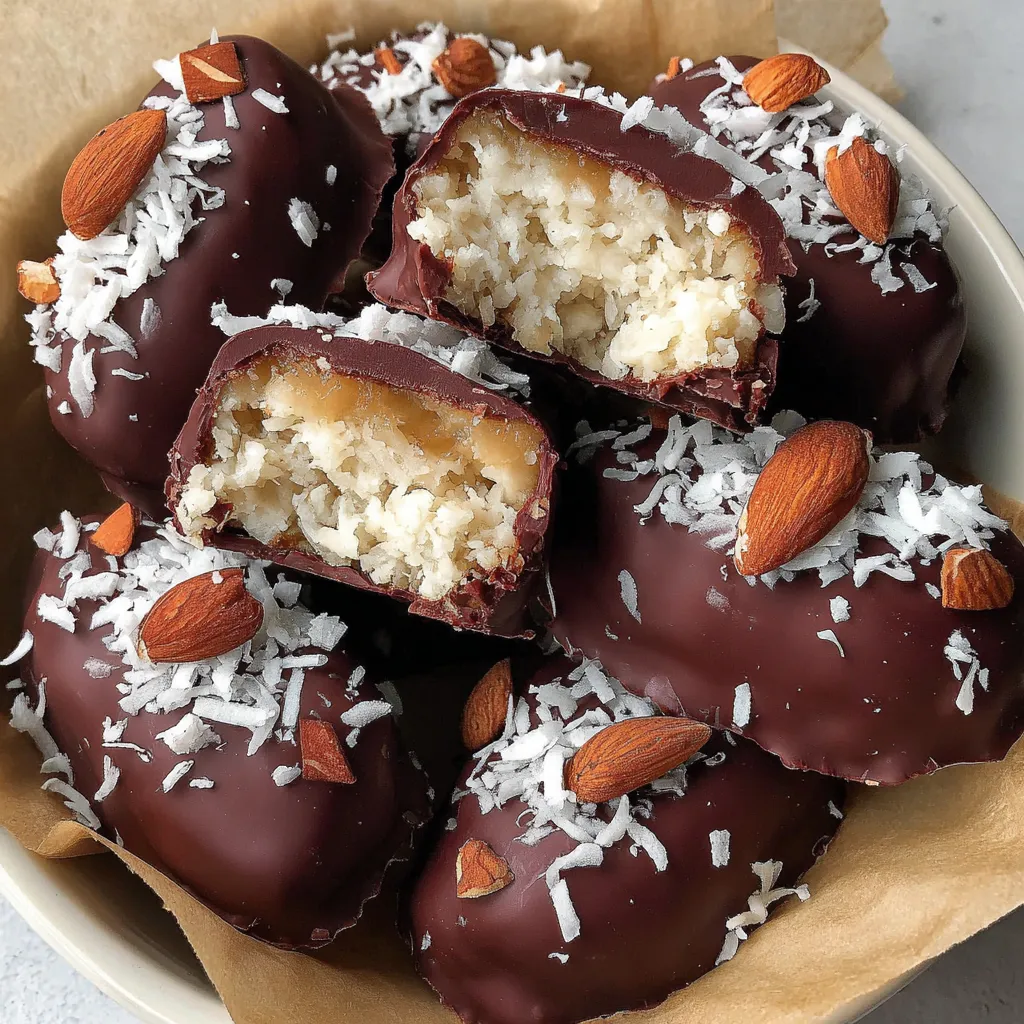
This homemade take on a nostalgic candy bar was born out of an afternoon of sweet cravings and a sparse pantry. I wanted the familiar trio of coconut, almond, and chocolate without the fuss or specialized equipment. After a few small adjustments I landed on a version that is clean, stable, and utterly addictive. The texture balances creamy coconut centers that hold together when pressed, a pleasant almond crunch, and a dark chocolate shell that sets with a satisfying snap. I first made these on a rainy Sunday and carried a tray to a neighborhood potluck where they disappeared faster than I could count.
What makes this approach special is its simplicity. Five pantry friendly ingredients, no baking, and straightforward shaping produce candy bars that look like store bought confections but taste fresher. You can choose regular sweetened condensed milk for a rich classic flavor or swap in condensed coconut milk to keep them dairy free. I often make a double batch to freeze and keep on hand for last minute guests or a quiet dessert night served with black coffee.
In my experience these bars consistently get compliments for how much they taste like the original candy without the preservatives. Friends have compared them to candy shop treats and my family rates them as a top pantry creation. Making them has led me to experiment with chocolate varieties and almond finishes, each variation yielding delightful results.
My favorite aspect of this recipe is how reliably it produces candy shop quality bars with minimal effort. Friends have told me they prefer these to store bought versions because the coconut is fresher and the chocolate is not overly sweet. I often double the batch for holidays and wrap individual bars in parchment for gifting.
To store keep the bars in a single layer in an airtight container lined with parchment paper. Refrigerate for everyday use and use within two weeks for best texture. For long term storage freeze in a sealed container for up to three months. Thaw in the refrigerator overnight before serving to avoid condensation on the chocolate. When transporting place them in a chilled cooler or wrapped around ice packs to keep the chocolate from melting. If you need to recondition the chocolate briefly let the bars sit at room temperature for fifteen minutes before serving so the chocolate regains its snap.

You can replace sweetened condensed milk with condensed coconut milk to make the centers dairy free while preserving sweetness. Swap manuka honey for agave or maple syrup for a slightly different floral or caramel note. For the chocolate coating use milk chocolate for a sweeter finish or use a high cacao chocolate for a more intense contrast. If you want a creamier center fold in a tablespoon of coconut cream, though you may need to add more shredded coconut to maintain structure. Toasted shredded coconut will deepen the flavor and add a hint of caramelization.
Serve these bars chilled or at cool room temperature alongside strong coffee or a glass of cold milk for a classic pairing. For a party platter arrange them on a decorative tray with fruit and nut clusters. Garnish individual bars with flaky sea salt for a modern sweet salty contrast or finish with a sprinkling of toasted coconut. These are also excellent when wrapped individually in wax paper for gift boxes or holiday stockings.
The flavor combination of coconut, almond, and chocolate evokes classic candy traditions that originated in early twentieth century confectionery. Commercial brands popularized the combination and it became a staple confection across many regions. Homemade versions have long been popular because they preserve control over ingredients and sweetness while delivering a comforting nostalgic taste. This simplified five ingredient approach highlights the essence of the candy without relying on stabilizers or preservatives.
In summer consider chilling the centers longer and working in a cool kitchen or use a chilled chocolate dipping station. For winter try infusing the condensed milk with a vanilla bean or a pinch of cinnamon to create a seasonal nuance. For holiday variations fold in a small amount of finely chopped candied orange peel or swap almonds for toasted pecans to create festive flavor spins that still maintain the original texture profile.
These bars are ideal for meal prep style sweet snacks. Double the batch and portion into small containers with parchment between layers for grab and go desserts. Freeze individual bars on a sheet pan then transfer to a labeled freezer bag for quick assembly. When packing for lunches place in an insulated lunchbox with a frozen pack to keep them firm. Because the bars are compact they store efficiently and portion control is easy to manage.
These five ingredient bars have become a go to for me whenever I want something indulgent but straightforward. They reward little effort with high impact flavor and presentation so I hope you make them often and adapt them to your own pantry and preferences.
Chill the centers in the freezer until firm to ensure clean dipping and minimal chocolate spreading.
Use a teaspoon of coconut oil to thin melted chocolate for a glossy finish and easier coating.
If the filling feels too wet add shredded coconut one tablespoon at a time until it binds.
Prepare on parchment lined trays for easy release and fast cleanup.
Store in single layers separated by parchment to prevent sticking and preserve the chocolate shell.
This nourishing 5-ingredient homemade almond joy candy bars recipe is sure to be a staple in your kitchen. Enjoy every moist, high protein slice — it is perfect for breakfast or as a wholesome snack any time.
This 5-Ingredient Homemade Almond Joy Candy Bars recipe makes perfectly juicy, tender, and flavorful steak every time! Serve with potatoes and a side salad for an unforgettable dinner in under 30 minutes.
Combine two cups shredded coconut, one cup condensed milk or condensed coconut milk, and one to two tablespoons honey in a medium bowl. Stir until the mixture is sticky and holds when pressed. Adjust texture with extra coconut or a splash of condensed milk.
Line a baking sheet with parchment. Shape the mixture into oblong mounds about two inches long and one inch wide. Press firmly so they hold their shape and smooth the tops for even coating.
Press one almond into the top of each mound. Freeze the tray for forty five to sixty minutes until centers are firm. This step prevents the chocolate from causing the centers to swell.
Melt one cup dark chocolate chips in thirty second bursts in a microwave safe bowl, stirring between intervals. Add one teaspoon coconut oil if the chocolate needs thinning for a glossy finish.
Dip each frozen center into the melted chocolate using a fork or dipping tool. Tap off excess chocolate and return to parchment. Drizzle extra chocolate for decoration if desired. Chill until the chocolate sets, about ten to fifteen minutes.
Transfer set bars to an airtight container. Refrigerate for up to two weeks or freeze for up to three months. Thaw overnight in the refrigerator before serving.
Last Step: Please leave a rating and comment letting us know how you liked this recipe! This helps our business to thrive and continue providing free, high-quality recipes for you.
Leave a comment & rating below or tag
@paletina on social media!

Ultra-fudgy brownies packed with chocolate chunks, crowned with gooey marshmallows and glossed with warm chocolate frosting for a decadent crowd-pleaser.

Buttery shortbread crust topped with a gooey brown sugar-pecan filling. Ten minutes to prep, irresistibly crunchy edges, and perfect for make-ahead treats.

Silky, crack-free pumpkin cheesecake with warm spice, buttery graham crust, and make-ahead convenience for showstopping holiday dinners.
Leave a comment & rating below or tag @paletina on social media!
Enjoyed this recipe? Share it with friends and family, and don't forget to leave a review!
This recipe looks amazing! Can't wait to try it.
Comments are stored locally in your browser. Server comments are displayed alongside your local comments.

Join to receive our email series which contains a round-up of some of our quick and easy family favorite recipes.
