
>>

Creamy, peanut butter–swirled cheesecakes nestled on a chocolate graham crust and topped with a silky chocolate-peanut glaze. Portable, indulgent, and perfect for parties.
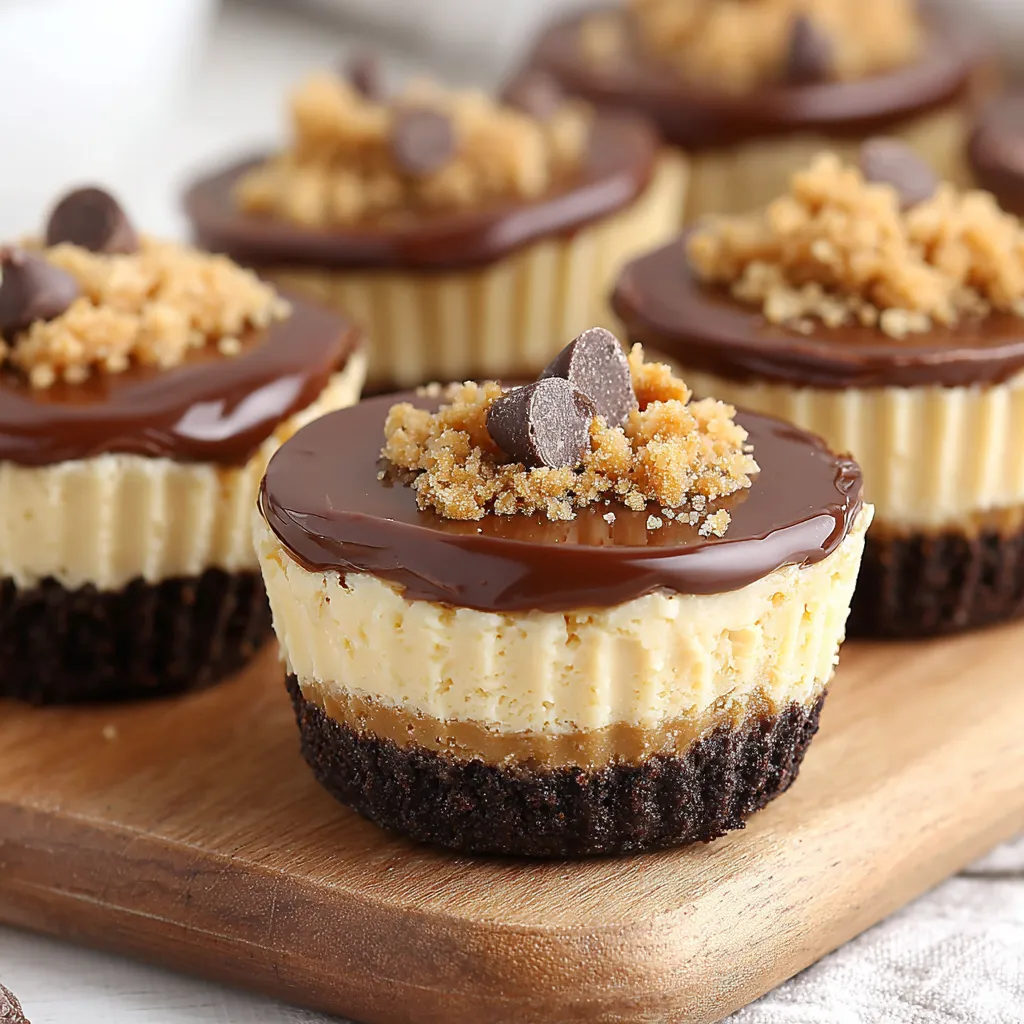
This recipe started as a weekend experiment when I wanted all the nostalgia of a peanut butter cup without fighting over the last candy in the bowl. I first made these on a rainy afternoon, determined to turn two pantry staples into something elegant and shareable. The result was so good that my neighbor knocked on the door asking if I was selling them. Since then they have become my go-to for potlucks, birthdays, and the occasional Tuesday when the house needs cheering up. Each bite offers a buttery graham base, a dense and velvety filling with true peanut butter flavor, and a glossy chocolate-peanut topping that snaps gently when you bite into it.
What I love most is how approachable the technique is: no water baths, no fussy tempering, and no special equipment beyond a mixer and a standard cupcake tin. The texture is a little denser than a full-size cheesecake yet lighter than a truffle, which makes them perfectly snackable. I discovered that keeping the cream cheese and eggs at room temperature and adding ingredients one at a time prevents lumps and yields a consistently smooth filling. These small cheesecakes bring the same satisfaction as a candy bar but elevated in balance and presentation.
I learned early on that my in-laws prefer a touch more chocolate, so now I always make the topping slightly thicker for their visits. My kids love to help press the crust into the liners, which turns a simple bake into a memory. At a recent book club, these disappeared first, and a friend asked for the recipe on the spot; that’s the kind of validation I’m always happy to receive.


My favorite part of making these is how the topping sets with a gentle sheen that makes each piece look professionally finished. I often double the topping when entertaining so there’s an extra puddle for anyone who wants a more decadent bite. Friends have called these an elevated candy bar and a grown-up dessert rolled into one; I like that they’re both comforting and a little fancy.
Store in an airtight container in the refrigerator for up to 24 hours; the crust remains pleasantly firm but not rock-hard. For longer storage, freeze on a tray until solid, then transfer to a freezer-safe container for up to 3 months. Thaw overnight in the refrigerator before serving. When transporting, place cheesecakes in a shallow box with non-slip shelf liner to keep them from sliding. To reheat slightly for a softer mouthfeel, sit on the counter for 10 minutes before serving.
Swap the chocolate graham crumbs for Oreo crumbs if you prefer a richer crust; reduce added sugar slightly. Use natural peanut butter if you like a more pronounced roasted flavor, though texture may be grainier. Replace coconut oil with a neutral oil such as vegetable oil if allergy-conscious guests are present. For dairy-free versions, use a cream cheese alternative and a vegan butter substitute, though the texture will be slightly less dense and more delicate.
Serve chilled on a dessert platter with fresh berries, a sprinkle of flaky sea salt, or a drizzle of extra melted chocolate. These are perfect alongside coffee or after a heavy meal as a compact sweet finish. For a festive presentation, top with mini peanut butter cups or chopped roasted peanuts. They pair beautifully with a cold glass of milk or a robust espresso.
The peanut butter cup is an American confection classic, invented in the early 20th century as a simple combination of chocolate and ground peanuts. This bite-sized version follows the same inspiration, translating a familiar candy into a creamy, custard-like format popular in North American baking. The mash-up of graham cracker crusts and rich dairy fillings nods to traditional American desserts like tarts and cheesecake while embracing the comfort-food appeal of peanut butter and chocolate.
In summer, lighten the topping by using dark chocolate and garnish with sliced strawberries for color. In winter, stir a pinch of cinnamon or a splash of maple into the filling for warmth. For holidays, press a few festive sprinkles into the topping before it sets or swirl in raspberry jam for a peanut butter and jelly twist. These small swaps let you adapt the basic method to almost any season or celebration.
Make the bases and filling a day ahead and refrigerate until ready to bake to distribute workload. You can also bake, chill, and freeze the unglazed minis; add the topping after thawing for the freshest finish. Use a cookie scoop to portion batter quickly and uniformly, and label containers with dates to keep track. When prepping for an event, glaze at the last minute to avoid condensation forming on the chocolate.
These mini peanut butter cup cheesecakes are small, bold, and reliably satisfying. Whether you’re feeding a crowd or looking for a treat to lift a weekday afternoon, they’re easy to scale and forgiving in method. Have fun with the topping and share them with folks you love—they’re the kind of dessert that invites conversation and second helpings.
Bring cream cheese and eggs to room temperature to ensure a smooth, lump-free filling.
Add ingredients one at a time and mix on low to avoid whipping air into the batter.
Press the crust firmly with the back of a measuring cup to form compact bases that hold together when served.
Chill the cheesecakes for at least 2 hours after baking; overnight chilling gives the cleanest cuts and best texture.
This nourishing mini peanut butter cup cheesecakes recipe is sure to be a staple in your kitchen. Enjoy every moist, high protein slice — it is perfect for breakfast or as a wholesome snack any time.
Yes, you can freeze the finished minis for up to 3 months. Freeze on a tray until solid, then transfer to a freezer-safe container. Thaw overnight in the refrigerator before serving and add the topping if you prefer it fresh.
Use room-temperature cream cheese and eggs and add ingredients one at a time. Mix only until combined to avoid incorporating extra air which leads to sinking.
This Mini Peanut Butter Cup Cheesecakes recipe makes perfectly juicy, tender, and flavorful steak every time! Serve with potatoes and a side salad for an unforgettable dinner in under 30 minutes.
Preheat oven to 350°F and line a standard cupcake pan with 18 liners. Combine graham crumbs, 2 tablespoons sugar, and melted butter. Press firmly into the bottom of each lined cup and chill briefly.
Beat 16 ounces room-temperature cream cheese until smooth. Add 1/2 cup sugar, then eggs one at a time, mixing gently. Add 1/2 cup peanut butter and 1 teaspoon vanilla, mixing until just combined; avoid overbeating.
Divide batter among the 18 crusts, tap the pan to remove air bubbles, and bake 17 to 19 minutes until centers slightly jiggle. Cool 30 minutes at room temperature, then refrigerate to firm for at least 2 hours.
Melt 1/2 cup chocolate chips with 3 tablespoons peanut butter and 2 tablespoons coconut oil in 30-second microwave intervals or over a double boiler until smooth. Spoon over chilled cheesecakes and chill until set.
Last Step: Please leave a rating and comment letting us know how you liked this recipe! This helps our business to thrive and continue providing free, high-quality recipes for you.
Leave a comment & rating below or tag
@paletina on social media!

Ultra-fudgy brownies packed with chocolate chunks, crowned with gooey marshmallows and glossed with warm chocolate frosting for a decadent crowd-pleaser.

Buttery shortbread crust topped with a gooey brown sugar-pecan filling. Ten minutes to prep, irresistibly crunchy edges, and perfect for make-ahead treats.

Silky, crack-free pumpkin cheesecake with warm spice, buttery graham crust, and make-ahead convenience for showstopping holiday dinners.
Leave a comment & rating below or tag @paletina on social media!
Enjoyed this recipe? Share it with friends and family, and don't forget to leave a review!
This recipe looks amazing! Can't wait to try it.
Comments are stored locally in your browser. Server comments are displayed alongside your local comments.

Join to receive our email series which contains a round-up of some of our quick and easy family favorite recipes.
