
>>

Tender, tangy pulled pork made in the Instant Pot: seared, pressure-cooked, shredded, and finished with your favorite barbecue sauce for a fast crowd-pleaser.
This Instant Pot pulled pork has been my go-to for busy weekends and last-minute gatherings. I discovered this method during a hectic fall weekend when I needed something comforting, hands-off, and reliably delicious. The pressure cooker turns a meaty, fatty Boston butt into fork-tender shreds in a fraction of the time braising requires, while the searing step builds a caramelized crust that keeps the finished meat from tasting flat. The result is a perfect balance of rich pork, smoky spices, and bright vinegar tang that sings with a simple barbecue sauce.
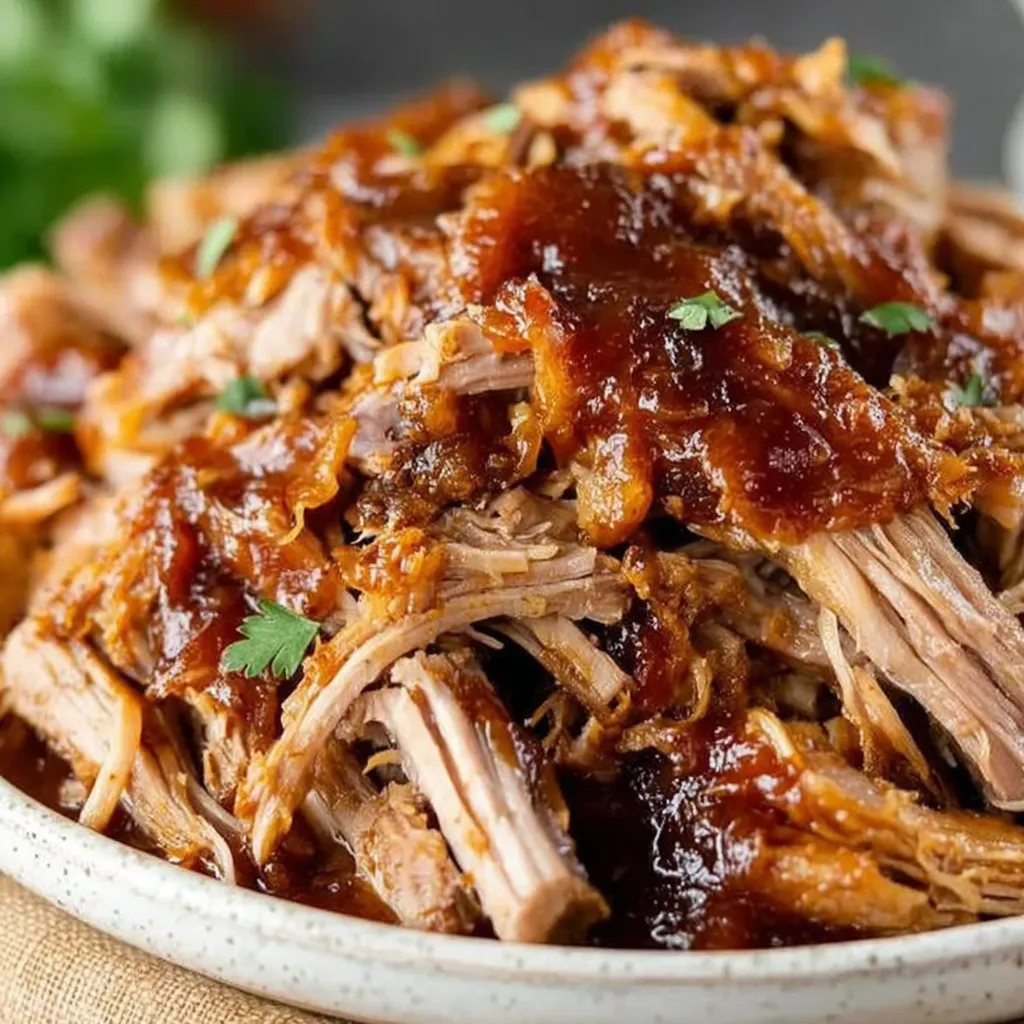
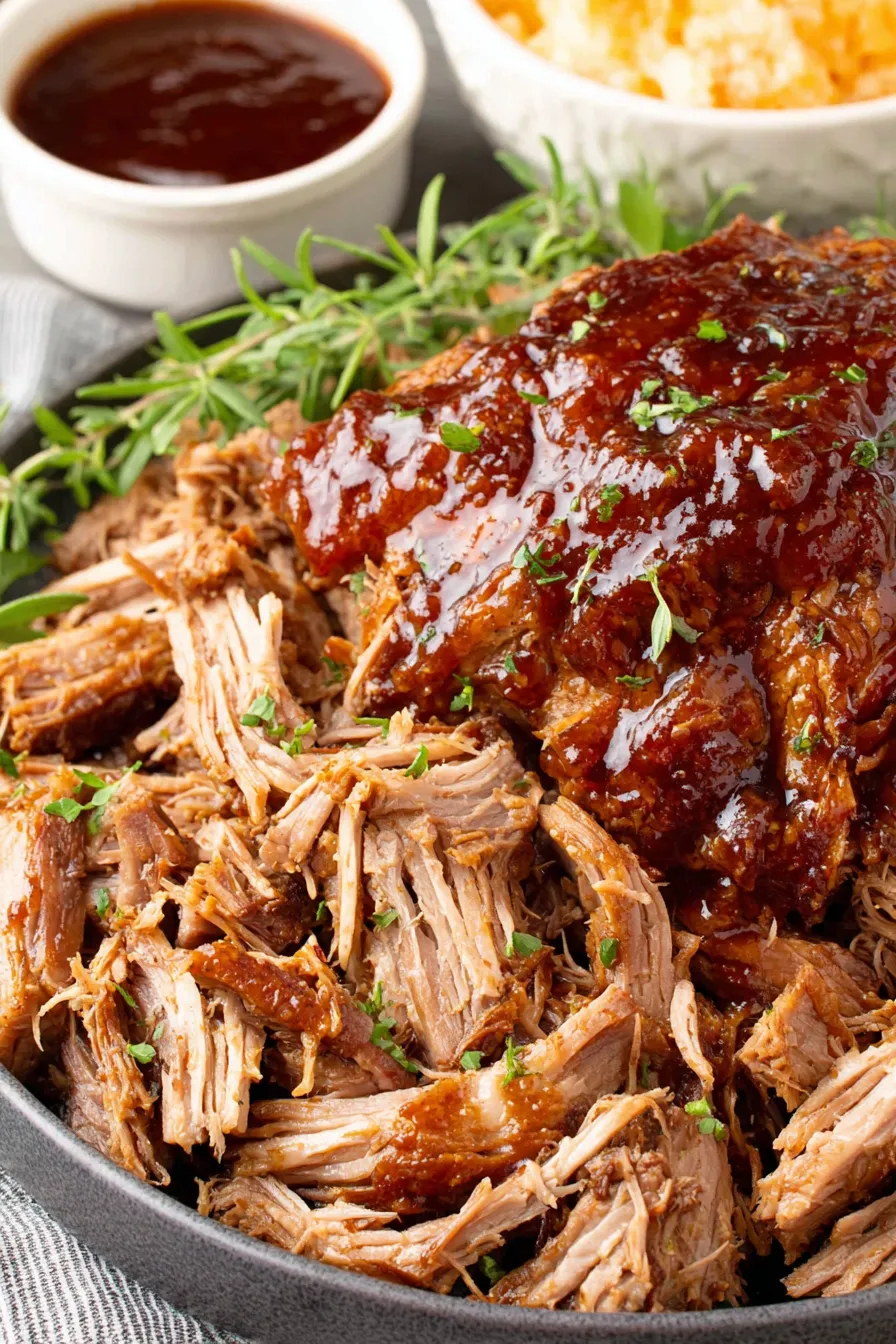
I first made this for a small family reunion, and watching the table empty as folks piled their sandwiches high became one of those small, gratifying memories. The texture is what sells it: moist strands that pull apart cleanly, studded with pockets of rendered fat that keep every bite glossy. The seasoning blend is straightforward but bold, anchoring the meat so the barbecue sauce becomes a finishing accent rather than the whole personality. This version is forgiving, fast, and built for real life—family dinners, game-day platters, and make-ahead meals that reheat beautifully.
My family’s reaction the first time I served this was immediate: everyone went back for seconds and someone asked if I would bring it to the next potluck. I love that it feels indulgent but is actually simple to pull together using tools and ingredients most home cooks already have. It travels well and can be scaled up or down by adjusting the cut size and pressure time slightly.
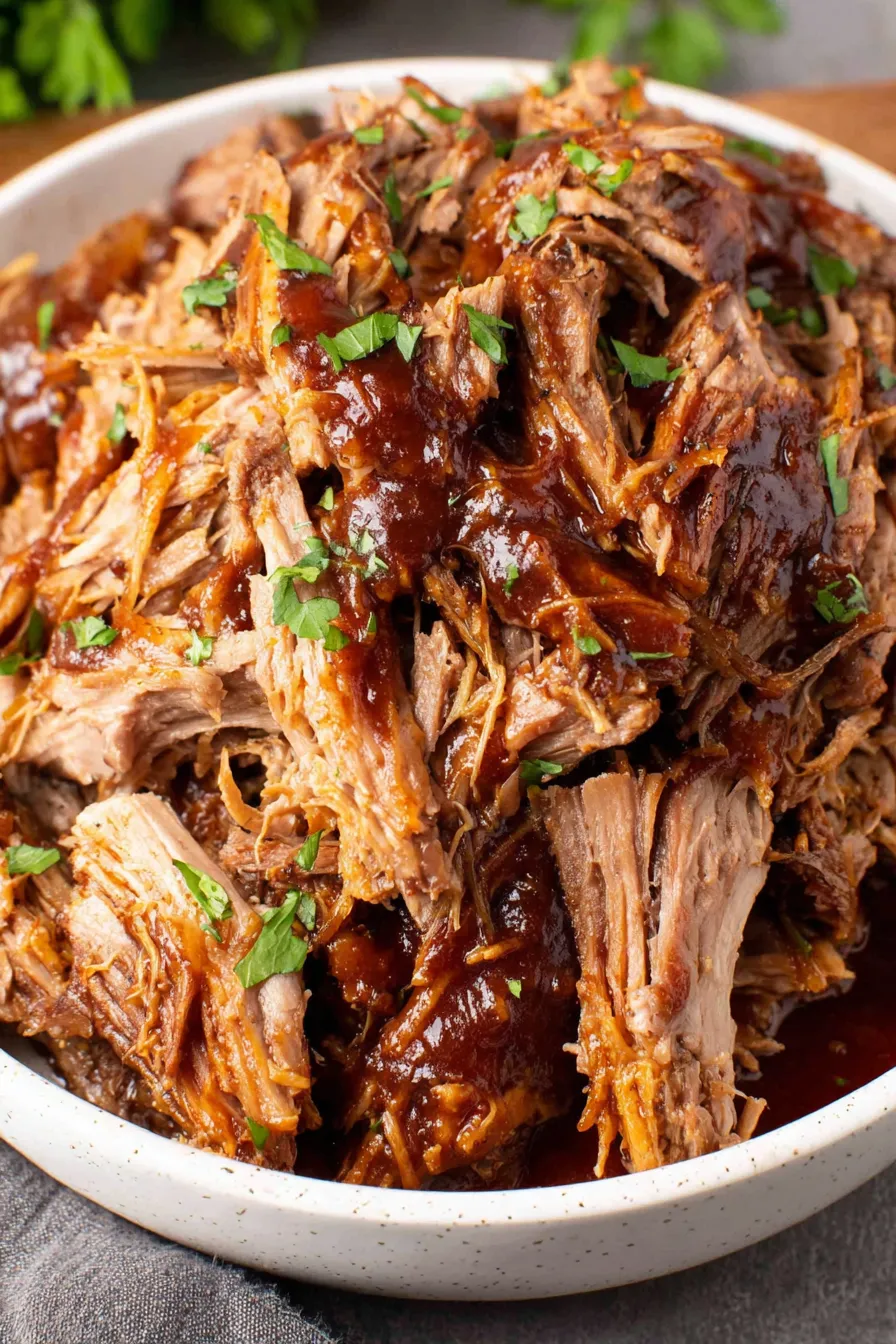
My favorite aspect of this method is the texture: pressure-cooked pork keeps moisture in but the initial sear adds a caramelized note that stands up when mixed with sauce. Over the years I learned to reserve a little cooking liquid to rescue dried-out portions and to adjust vinegar sweetness after shredding for perfect balance. The recipe reliably converts picky eaters into fans because it delivers rich, comforting mouthfeel with straightforward seasoning cues.
For short-term storage, cool pork to room temperature no more than two hours after cooking, then refrigerate in an airtight container for up to four days. For longer storage, portion into freezer-safe bags or containers and remove excess air; frozen pork keeps well for three months. Reheat gently in a skillet with a splash of reserved cooking liquid or in a covered baking dish at 325 degrees Fahrenheit until warmed through. Avoid microwave overheating which can tighten the meat fibres and dry the pork.
If you do not have apple cider vinegar, use white wine vinegar or a mild rice vinegar at a 1:1 ratio; the flavor will be slightly different but still bright. Substitute chicken broth with beef broth or water plus a beef bouillon cube for a deeper savor. For lower sugar, reduce brown sugar to 2 tablespoons and choose a sugar-reduced barbecue sauce, keeping in mind sweetness helps with caramelization and balance.
Serve on toasted brioche buns with crisp coleslaw and dill pickles for classic sandwiches, or pile over baked sweet potatoes for a hearty weeknight meal. Try serving in warm corn tortillas with quick-pickled red onions and cilantro for a Tex-Mex variation. Garnish with chopped green onions and a drizzle of extra barbecue sauce. For lighter fare, pair with steamed green beans and a lemony cabbage slaw to cut richness.
Pulled pork has deep roots in American barbecue traditions, particularly in the Carolinas and the South where slow-cooking and vinegar-based sauces are staples. While regional variations range from mustard-forward styles in South Carolina to tomato-and-vinegar blends elsewhere, the core technique—slowly breaking down a tough cut of pork until it pulls apart—remains constant. This Instant Pot approach compresses time while preserving the DNA of slow barbecue, combining classic flavor profiles with modern convenience.
In summer swap apple cider vinegar for a lighter picnic-friendly coleslaw topping and use a fruity barbecue sauce for bright notes. In colder months, add a tablespoon of molasses to the braising liquid for depth and richness and serve with braised cabbage and roasted root vegetables. Holiday gatherings benefit from adding whole cloves of garlic and a bay leaf to the cooking liquid for aromatic warmth.
Portion shredded pork into single-serving containers with a little cooking liquid to keep meat moist when reheating. Store sauce separately if you prefer fresher-tasting sandwiches the next day. Use labeled freezer bags and lay them flat to freeze for compact storage. Thaw overnight in the refrigerator before reheating, or transfer frozen packets directly to a low oven covered with foil for gentle defrost and warm-up.
Making this pulled pork has turned many busy nights into simple, satisfying dinners for my household. The technique is adaptable, forgiving, and perfect for sharing—cook once and enjoy multiple meals across the week.
Pat the pork dry before seasoning to ensure a good sear and caramelization.
Reserve 1/2 cup of the cooking liquid to loosen the shredded pork if it seems dry when reheating.
Do not overcrowd the pot when searing; brown in batches for even crust development.
Let the pork rest 5 minutes after pressure cooking before shredding to redistribute juices.
This nourishing instant pot pulled pork — quick & flavorful recipe is sure to be a staple in your kitchen. Enjoy every moist, high protein slice — it is perfect for breakfast or as a wholesome snack any time.
Yes. After cooking, let the pressure release naturally for at least 10 to 15 minutes to retain moisture, then quick-release the remainder.
Yes. Refrigerate in an airtight container for up to 4 days. Freeze for up to 3 months in meal-sized portions.
This Instant Pot Pulled Pork — Quick & Flavorful recipe makes perfectly juicy, tender, and flavorful steak every time! Serve with potatoes and a side salad for an unforgettable dinner in under 30 minutes.
Trim excessive fat and cut the pork into 3 to 4 even chunks. Pat dry and season all sides evenly with salt, pepper, smoked paprika, garlic powder, onion powder, and a light dusting of brown sugar.
Set the Instant Pot to sauté, add olive oil, and sear pork in batches until deeply browned on all sides, 3 to 4 minutes per side. Transfer browned pieces to a plate and deglaze the pot if fond sticks.
Add chicken broth, apple cider vinegar, remaining brown sugar, and optional cayenne to the pot. Stir to dissolve sugar and scrape any browned bits from the bottom with a wooden spoon.
Return pork to the pot. Seal and cook on high pressure for 60 minutes. Allow natural release for 15 minutes, then quick-release the remaining pressure carefully.
Transfer pork to a tray, shred with forks, then return to the pot with barbecue sauce. Toss to coat and warm gently. Adjust seasoning and add reserved cooking liquid if needed.
Last Step: Please leave a rating and comment letting us know how you liked this recipe! This helps our business to thrive and continue providing free, high-quality recipes for you.
Leave a comment & rating below or tag
@paletina on social media!

Ultra-fudgy brownies packed with chocolate chunks, crowned with gooey marshmallows and glossed with warm chocolate frosting for a decadent crowd-pleaser.

Buttery shortbread crust topped with a gooey brown sugar-pecan filling. Ten minutes to prep, irresistibly crunchy edges, and perfect for make-ahead treats.

Silky, crack-free pumpkin cheesecake with warm spice, buttery graham crust, and make-ahead convenience for showstopping holiday dinners.
Leave a comment & rating below or tag @paletina on social media!
Enjoyed this recipe? Share it with friends and family, and don't forget to leave a review!
This recipe looks amazing! Can't wait to try it.
Comments are stored locally in your browser. Server comments are displayed alongside your local comments.

Join to receive our email series which contains a round-up of some of our quick and easy family favorite recipes.
