
>>

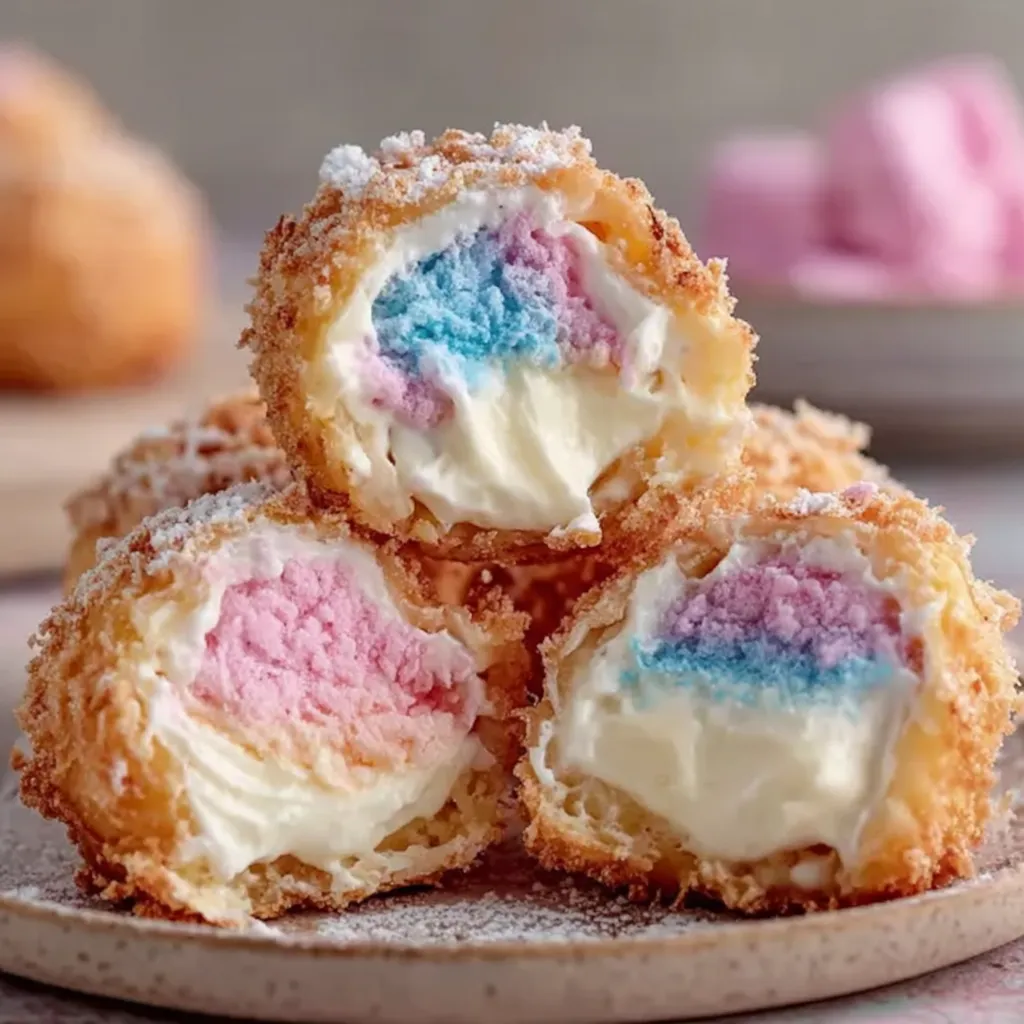
Light, creamy cheesecake bites wrapped in golden biscuit dough, fried until crisp and finished with whimsical cotton candy sweetness — a carnival-style treat for special occasions.
This playful cotton candy cheesecake creation is the kind of treat that turns ordinary afternoons into small celebrations. I first stumbled on the idea during a weekend fair when a deep-fried booth was selling novelty sweets. I adapted the flavors into a handheld version that keeps the fluffy, nostalgic cotton candy taste centered on a smooth cheesecake core. The contrast between the lush, creamy filling and the crisp, golden exterior makes each bite sing; the center stays cool and soft while the outside provides a satisfying crunch.
I started perfecting these at home because my kids demanded something pink and fun for a birthday sleepover. After a few rounds of tweaks — finding the right creaminess for the filling so it doesn’t leak and the right dough thickness so it fries evenly — these bombs became our celebration staple. The cotton candy extract is the secret: a little goes a long way, giving a light, nostalgic aroma without overwhelming the tang of the cream cheese. Serve them warm with a cloud of spun sugar and a drizzle of white chocolate to make them irresistible.
I remember bringing a tray to my daughter’s school bake sale and watching neighbors line up. The first batch was a hit because the look alone sparked curiosity. Over the years I've learned which biscuit brands seal best and how to chill the filling long enough to reduce leakage. Each family taste test nudged the recipe into a perfect balance of childhood whimsy and grown-up technique.
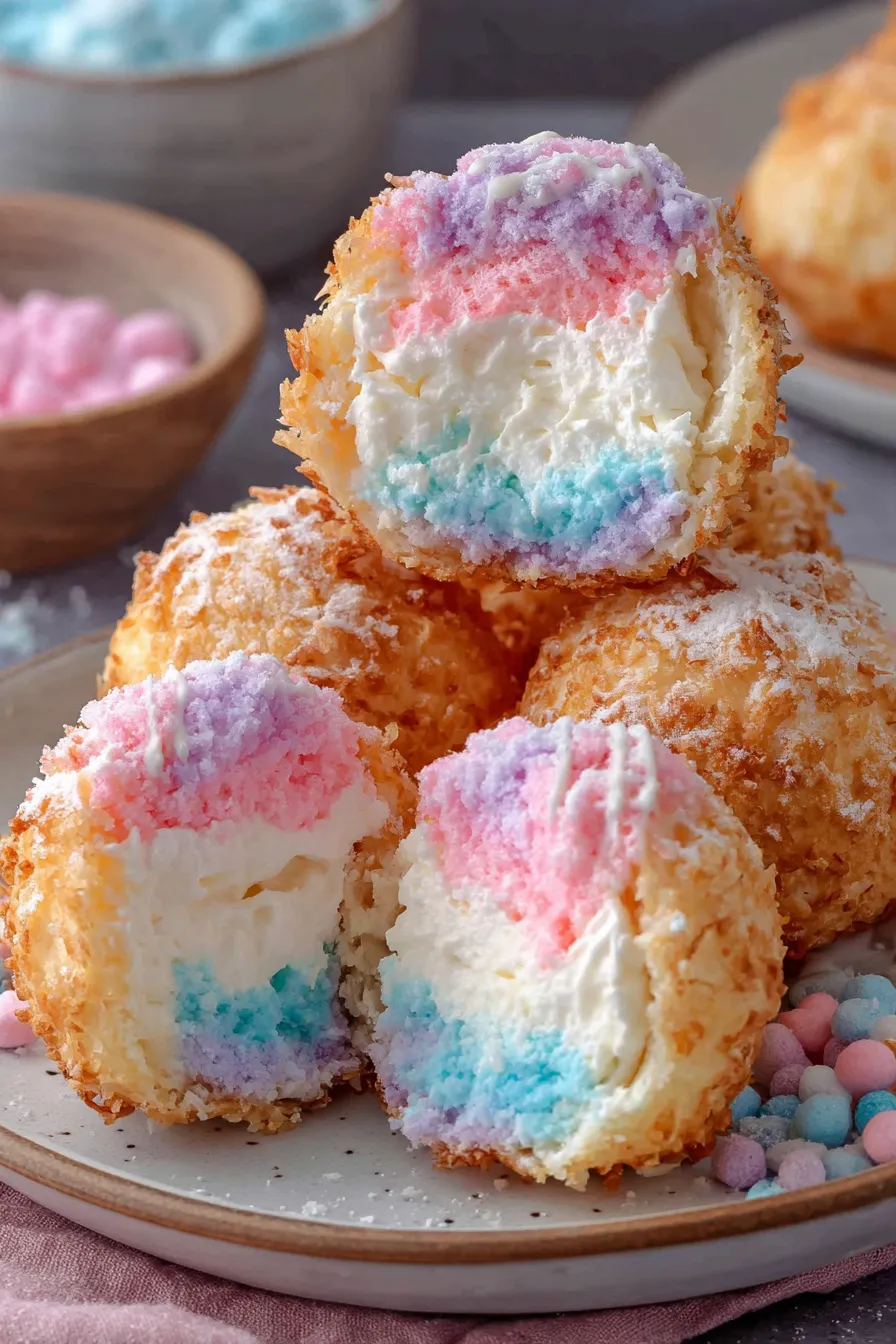
My favorite aspect is the moment you split one open and the warm crisp shell gives way to cool, cloud-like filling. Watching guests’ surprised faces when the cotton candy scent hits is a rewarding reminder that small, whimsical details can make a dessert memorable. I often bring these to neighborhood gatherings where they disappear within minutes.
Store uncoated bombs in an airtight container in the refrigerator for up to 24 hours. If you plan to keep them longer, freeze unbaked assembled balls on a tray until solid, then transfer to a freezer bag for up to 3 months. When reheating refrigerated pieces, warm briefly in a 325 degrees Fahrenheit oven for 6 to 8 minutes to recrisp the shell. Avoid microwaving as it makes the dough soggy and can melt the filling unevenly. For presentation, add cotton candy garnish right before serving since it dissolves quickly in humid or warm environments.
If you prefer a lighter filling, substitute half the cream cheese with mascarpone for a silkier texture, or use full-fat ricotta blended smooth for a grain-free mouthfeel. For a gluten-free option, use gluten-free biscuit dough and a gluten-free flour for dusting. Replace the whipped topping with stabilized whipped cream made from 2 tablespoons sugar and 1/4 cup heavy cream whipped to soft peaks if you want an all-natural alternative. For a dairy-free version, try a vegan cream cheese and a plant-based whipped topping, but be aware the frying behavior may change slightly and chilling time may vary.
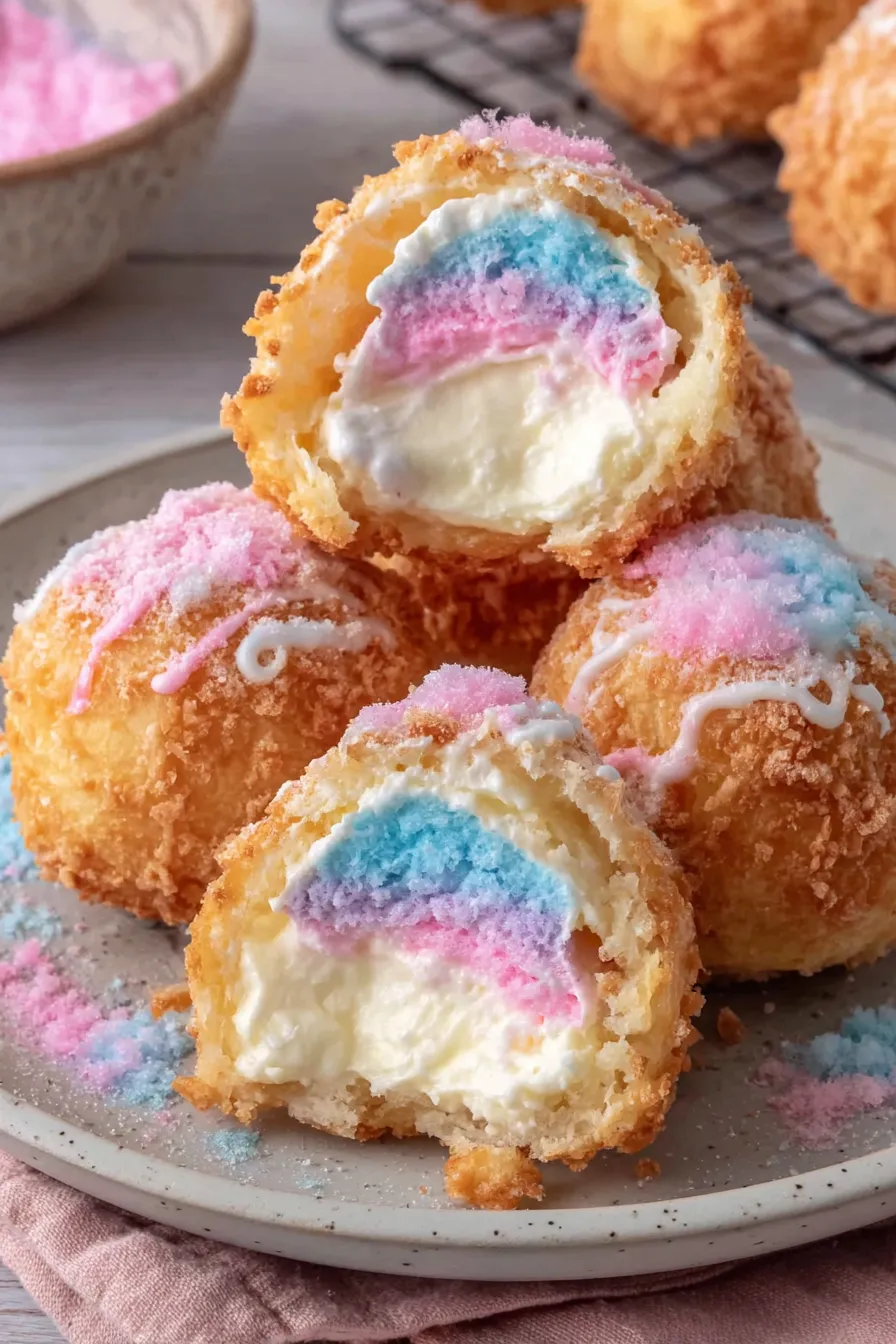
Present these on a decorative platter with small cones of spun cotton candy on the side. Pair with chilled sparkling lemonade or a light rosé for a delightful contrast. Garnish with pastel sugar crystals, a dusting of powdered sugar, or a zigzag of melted white chocolate for an elegant touch. They work well as a whimsical dessert at birthday parties, baby showers, or as an indulgent carnival-themed finale to a casual dinner.
Deep-fried sweets have a long history at fairs and street vendors across many cuisines — think of funnel cakes in the United States or beignets in France. These cotton candy cheesecake bites borrow that tradition and pair the carnival spirit of spun sugar with the creamy comfort of cheesecake. The result is a small, portable treat that nods to classic fair foods while incorporating creamy dessert techniques most associated with Western patisserie.
In spring and summer, finish the sugar coating with bright pastel hues and add edible flowers for outdoor parties. For fall, stir a pinch of ground cinnamon or pumpkin spice into the sugar and use a warm caramel drizzle instead of white chocolate. During winter holidays, replace the cotton candy extract with peppermint extract and roll the fried pieces in crushed candy canes mixed with powdered sugar for a festive twist.
Prepare the filling one day ahead and keep it chilled. Assemble and refrigerate the filled dough balls on a parchment-lined tray covered with plastic wrap; they can sit overnight, which helps them hold shape during frying. When ready to serve, fry directly from the fridge to minimize filling leakage. Pack cooled, sugared bombs in single layers with parchment between them for short-term transport to parties. For large gatherings, plan to fry in multiple batches and keep finished pieces on a warm rack in a low oven so they remain crisp while you finish frying the rest.
These Crispy Cotton Candy Cheesecake Bombs are a joyful mix of technique and whimsy. They reward careful attention to temperature and chilling, but the payoff is a dessert that feels celebratory and indulgent. Make them for special moments, and don’t be surprised if they become everyone’s new favorite showstopper.
Chill the filling at least 30 minutes to firm up, preventing leakage during frying.
Maintain oil temperature at 350 degrees Fahrenheit by frying in small batches to avoid greasy results.
Seal seams tightly and use a little water to help dough edges adhere for a smooth, leak-free ball.
Use a candy or deep-fry thermometer for accurate oil temperature control.
Roll in granulated sugar while still warm for best adhesion and a crunchy exterior.
This nourishing crispy cotton candy cheesecake bombs recipe is sure to be a staple in your kitchen. Enjoy every moist, high protein slice — it is perfect for breakfast or as a wholesome snack any time.
Yes. The filling can be made a day ahead and kept refrigerated in an airtight container for up to 24 hours. Assemble just prior to frying for best results.
Freeze unbaked, assembled balls on a tray until solid, then transfer to a freezer-safe bag for up to 3 months. Fry straight from frozen, adding 1 to 2 minutes to the frying time.
This Crispy Cotton Candy Cheesecake Bombs recipe makes perfectly juicy, tender, and flavorful steak every time! Serve with potatoes and a side salad for an unforgettable dinner in under 30 minutes.
Beat softened cream cheese until smooth, then add powdered sugar and vanilla and mix until homogenous. Stir in cotton candy extract, fold in whipped topping and heavy cream, then chill 30 minutes to firm.
Flour the work surface lightly and flatten each refrigerated biscuit to about 1/8 inch thickness. Keep dough cool to prevent sticking and tearing.
Portion the chilled filling with a small scoop, place in center of each flattened biscuit, and seal tightly, rolling into smooth balls. Chill assembled pieces 10 minutes before frying.
Heat vegetable oil to 350 degrees Fahrenheit in a deep pot. Fry in small batches, 1 to 2 minutes per side, until golden brown. Drain briefly on a rack.
While warm, roll bombs in granulated sugar (optionally flavored and colored). Dust with powdered sugar, add cotton candy garnish, or drizzle with melted white chocolate before serving.
Last Step: Please leave a rating and comment letting us know how you liked this recipe! This helps our business to thrive and continue providing free, high-quality recipes for you.
Leave a comment & rating below or tag
@paletina on social media!

Ultra-fudgy brownies packed with chocolate chunks, crowned with gooey marshmallows and glossed with warm chocolate frosting for a decadent crowd-pleaser.

Buttery shortbread crust topped with a gooey brown sugar-pecan filling. Ten minutes to prep, irresistibly crunchy edges, and perfect for make-ahead treats.

Silky, crack-free pumpkin cheesecake with warm spice, buttery graham crust, and make-ahead convenience for showstopping holiday dinners.
Leave a comment & rating below or tag @paletina on social media!
Enjoyed this recipe? Share it with friends and family, and don't forget to leave a review!
This recipe looks amazing! Can't wait to try it.
Comments are stored locally in your browser. Server comments are displayed alongside your local comments.

Join to receive our email series which contains a round-up of some of our quick and easy family favorite recipes.
