
>>

A simple, traditional Italian loaf with a crisp crust and tender crumb — easy to make on a weeknight and perfect for sandwiches, soups, and dipping.
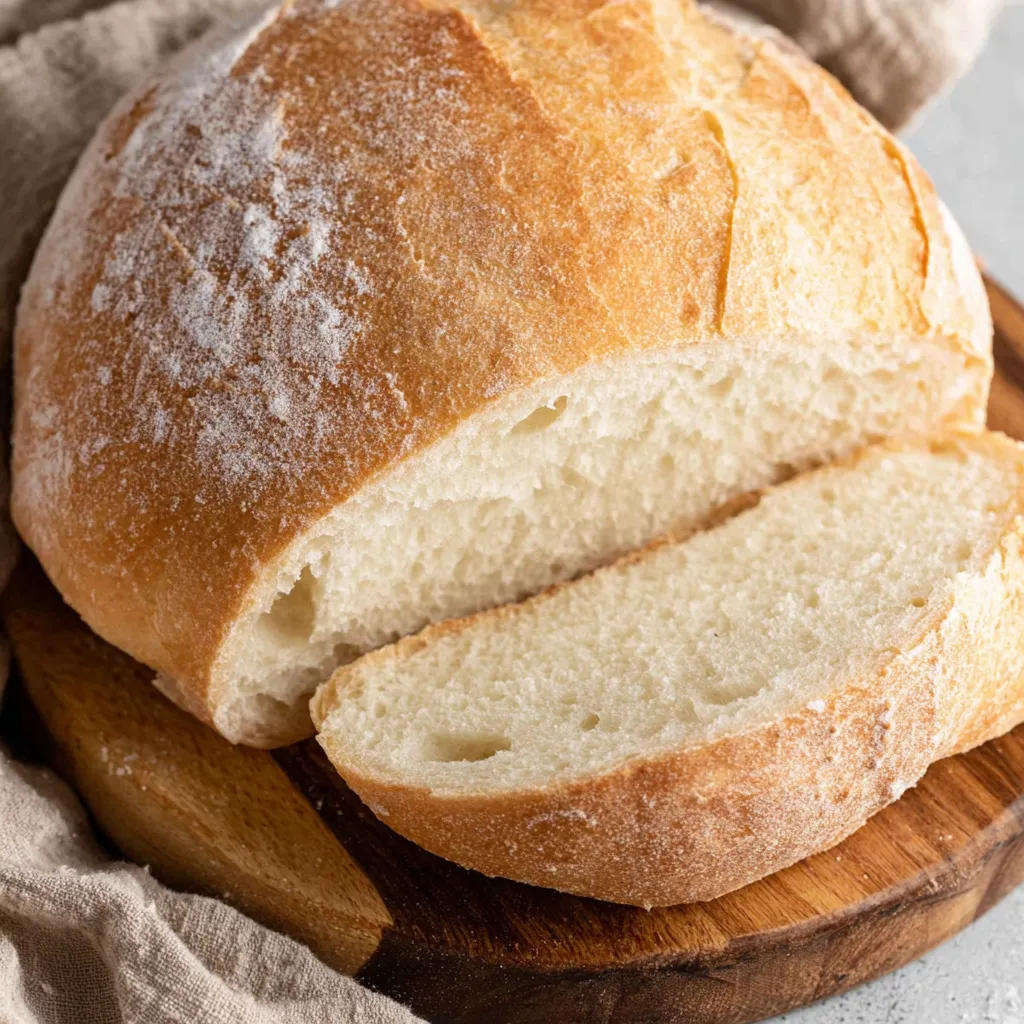
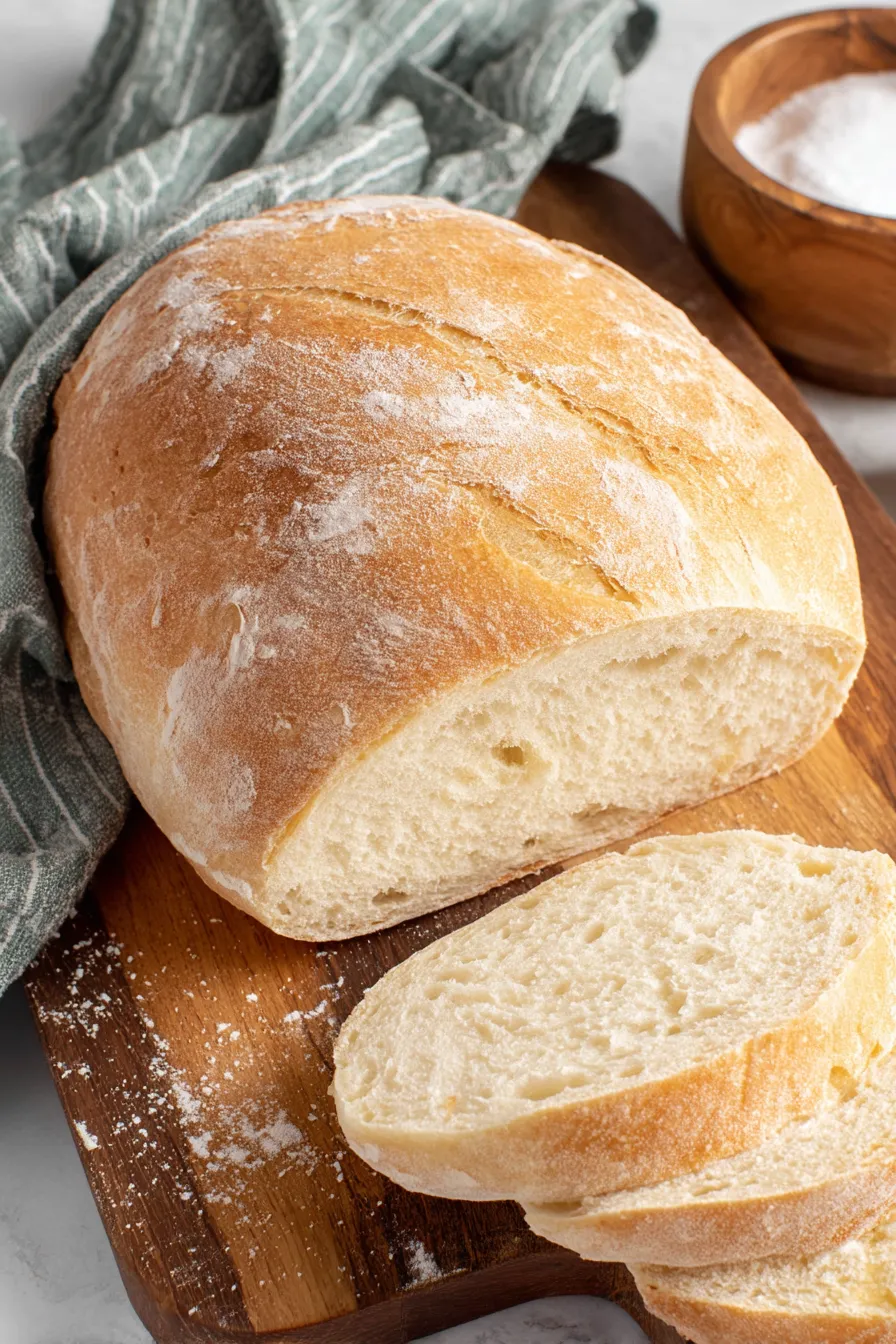
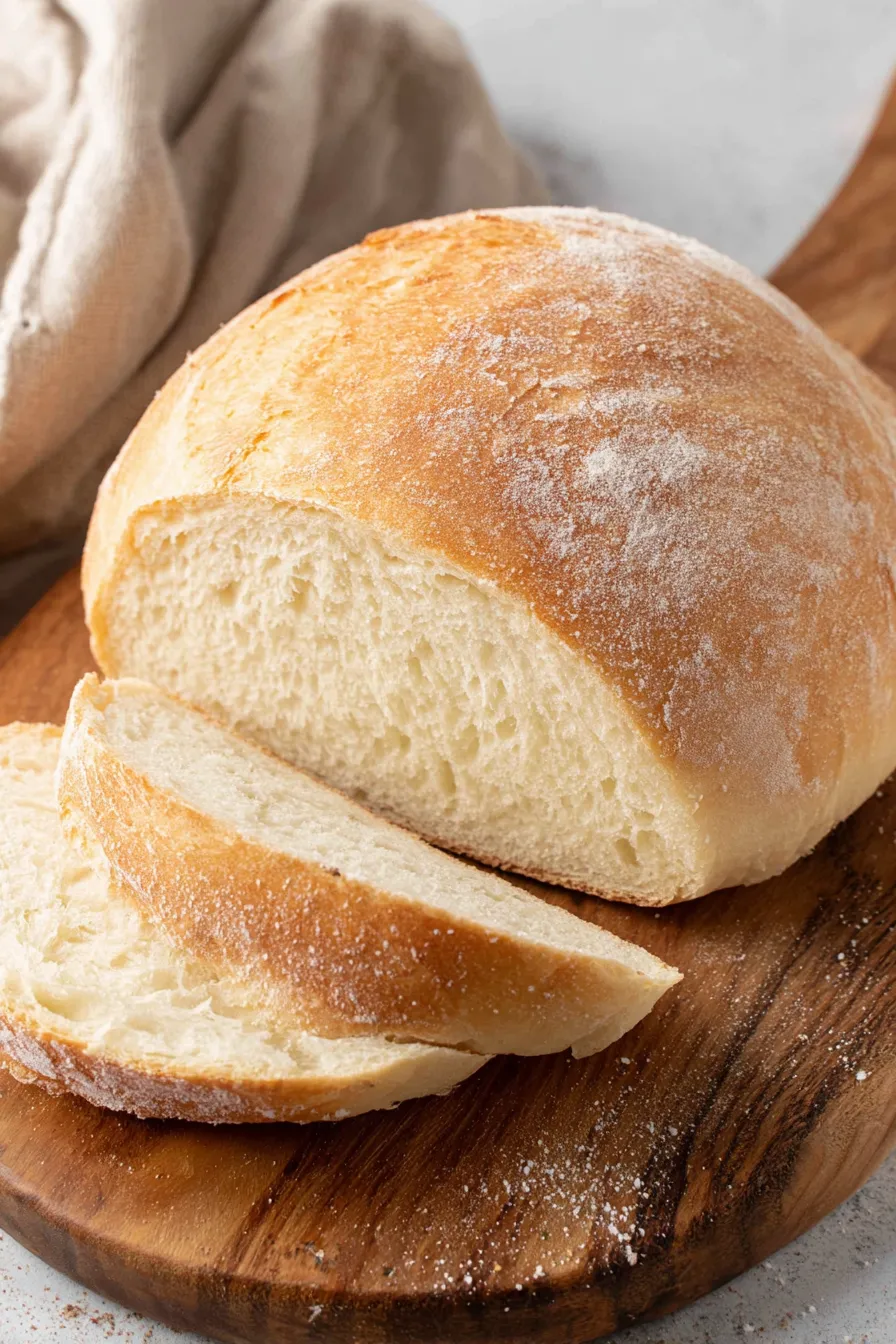
This Italian loaf has been a quietly triumphant addition to my weeknight baking for years. I first learned this straightforward method during a rainy weekend when my pantry was limited to flour, yeast, olive oil and a stubborn craving for fresh bread. The result surprised me: a golden batard with a crisp crust, an airy yet tender crumb, and that warm, toasty aroma that fills the kitchen and pulls everyone close. It is the kind of bread you slice thick for a simple sandwich, tear into at the table with olive oil, or use to sop up a robust tomato sauce.
What makes this version special is the combination of a short, manageable rise schedule and forgiving handling: you do not need professional equipment, and the dough responds well whether you knead by hand or in a mixer. The crust develops a beautiful caramelized color in a hot 400°F oven, and the loaf keeps its freshness for several days when stored properly. I often double the recipe and freeze one loaf for busy nights; defrosted and briefly reheated, it tastes almost as fresh as the day it was baked.
In my house this loaf has become the backbone of casual dinners. My partner loves thick slices for grilled cheese and our daughter eats toasted slivers with jam. Baking it taught me small techniques that changed my bread: keeping water at about 110°F to wake the yeast without killing it, and looking for a glossy, elastic dough during kneading rather than relying strictly on time.
My favorite part about this loaf is the ritual—mixing, feeling the dough transform under my hands, and the reward of that first warm slice with olive oil. Friends have brought this to potlucks and called it an instant hit; one neighbor told me it tasted like the bakery from his childhood. Those responses are why I keep this method simple and dependable: it encourages home bakers to try bread without intimidation.
To retain crust and crumb quality, cool completely before storing. For short-term storage keep the loaf in a paper bag at room temperature; this allows the crust to remain crisp while the interior stays slightly moist. For multi-day storage, slice and place in an airtight container in the refrigerator for up to five days, or freeze slices in a freezer bag for up to three months. When reheating frozen slices, toast straight from the freezer or warm the whole loaf at 350°F for 10 to 12 minutes wrapped loosely in foil, then unwrap for a few minutes to re-crisp the crust.
If you only have instant yeast, omit the proofing step and mix the yeast directly with the dry ingredients; expect slightly faster rise times. Swap bread flour for all-purpose if necessary—your crumb will be softer but still delicious. For a whole-wheat version substitute up to half the white flour with whole-wheat flour and add a tablespoon of extra water to compensate for bran absorption. Olive oil may be replaced with neutral vegetable oil or melted butter for richer flavor, though butter will add dairy.
Serve warm with extra-virgin olive oil and flaky sea salt for dipping, or use thick slices for grilled sandwiches and panini. Pair with hearty soups like minestrone or with a simple platter of cured meats and cheeses for an easy Italian-style meal. Toasted slices topped with garlic, chopped tomatoes and basil make a quick bruschetta for appetizers. Garnish with fresh herbs or a drizzle of balsamic reduction for an elevated presentation at gatherings.
The batard is a classic European shape—longer than a boule but shorter and wider than a baguette—commonly found in Italian and French home baking. Traditional Italian loaves emphasize high-quality grains and olive oil, favoring simplicity and texture over heavy enrichment. This loaf echoes rural Italian baking where ovens were used for multiple purposes and loaves were shaped to maximize even baking and portability for daily meals.
In cooler months, add a tablespoon of finely chopped rosemary or a teaspoon of roasted garlic for warming flavors. During summer, serve the loaf alongside light salads and marinated vegetables. For holidays, fold in a couple tablespoons of roasted nuts and dried fruit for a slightly sweet, festive variant—reduce sugar slightly if using sweet additions. Adjust rising time in cold kitchens by using a proofing box or a slightly warmed oven to ensure consistent results.
For meal prep, bake two loaves: use one immediately and freeze the other. Slice the second loaf and flash-freeze slices on a tray before transferring to a freezer bag—this prevents sticking and makes it easy to grab single portions. Pre-slice the active loaf after cooling and store slices in a breathable bag for easy sandwiches over the week. Reheat slices in a toaster or oven for crisp edges and refreshed aroma.
Fresh bread is one of the simplest joys of home cooking. With minimal ingredients, a little patience and these techniques you will have a dependable loaf that becomes a staple. Try different flours and flavor add-ins over time to make the loaf your own and enjoy sharing it around the table.
Always check water temperature; 105°F to 115°F is ideal to activate active dry yeast without damaging it.
Use a sharp blade to score the dough cleanly; dragging a dull knife will tear the surface and inhibit proper oven spring.
Allow the loaf to cool fully before slicing to prevent a gummy crumb and ensure clean slices.
This nourishing classic italian bread (homemade batard) recipe is sure to be a staple in your kitchen. Enjoy every moist, high protein slice — it is perfect for breakfast or as a wholesome snack any time.
If the yeast does not become foamy after 10 minutes, it may be inactive. Discard and start with fresh yeast and warm water around 110°F.
Yes. Slice before freezing and reheat in a 350°F oven for 10 minutes or toast slices directly from frozen for best texture.
This Classic Italian Bread (Homemade Batard) recipe makes perfectly juicy, tender, and flavorful steak every time! Serve with potatoes and a side salad for an unforgettable dinner in under 30 minutes.
Combine 2 1/4 teaspoons active dry yeast and 1 teaspoon sugar with 1 cup warm water (about 110°F). Let sit 5 to 10 minutes until foamy.
Add 2 cups flour, 2 tablespoons olive oil, and 1 teaspoon salt to the foamy mixture and stir until shaggy. Reserve remaining flour.
Knead by hand 10 minutes or in stand mixer 5 minutes, adding the remaining flour sparingly until the dough is soft, smooth, and elastic.
Place dough in an oiled bowl, turn to coat, cover and let rise 1 hour until doubled.
Punch down, shape into a 12-inch batard, place on prepared baking sheet, cover and let rise 20 to 30 minutes until puffy.
Preheat oven to 400°F, score the loaf with 1/4-inch slashes, and bake 20 to 25 minutes until golden and hollow-sounding.
Cool completely on a rack before slicing, at least 45 minutes.
Last Step: Please leave a rating and comment letting us know how you liked this recipe! This helps our business to thrive and continue providing free, high-quality recipes for you.
Leave a comment & rating below or tag
@paletina on social media!

Ultra-fudgy brownies packed with chocolate chunks, crowned with gooey marshmallows and glossed with warm chocolate frosting for a decadent crowd-pleaser.

Buttery shortbread crust topped with a gooey brown sugar-pecan filling. Ten minutes to prep, irresistibly crunchy edges, and perfect for make-ahead treats.

Silky, crack-free pumpkin cheesecake with warm spice, buttery graham crust, and make-ahead convenience for showstopping holiday dinners.
Leave a comment & rating below or tag @paletina on social media!
Enjoyed this recipe? Share it with friends and family, and don't forget to leave a review!
This recipe looks amazing! Can't wait to try it.
Comments are stored locally in your browser. Server comments are displayed alongside your local comments.

Join to receive our email series which contains a round-up of some of our quick and easy family favorite recipes.
