
>>

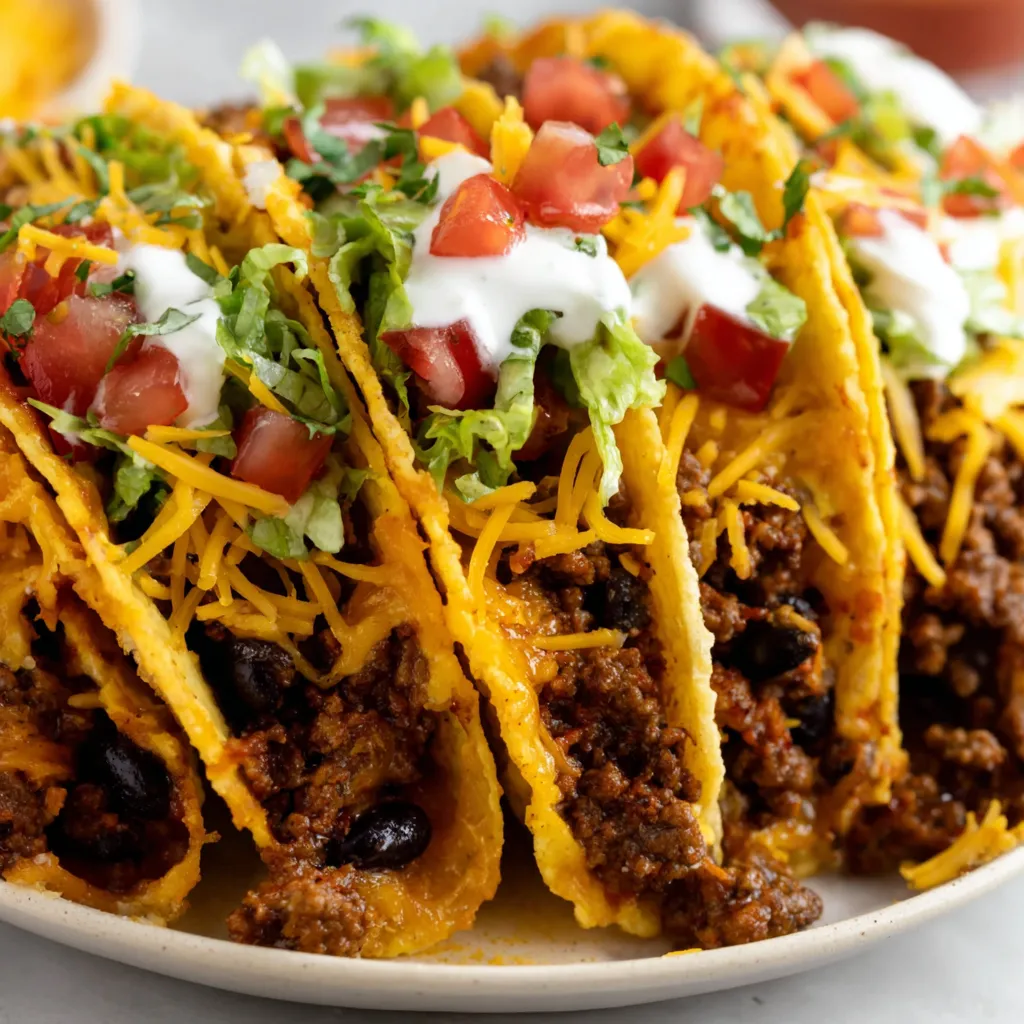
A simple oven-baked taco method that yields crispy, fully loaded tacos with black beans and seasoned beef — perfect for weeknights or casual entertaining.
This recipe for baked tacos quickly became my go-to on busy weeknights. I first discovered the idea of arranging hard shells in a 9 x 13-inch pan while trying to speed up taco night: I wanted the crunch of a hard shell and the ease of a casserole. After a few experiments I landed on a combination that keeps the shells upright, the filling comfortably warm, and the cheese perfectly melted without soggy bottoms. The result is a tray of neat, handheld tacos that look impressive but cook in under 30 minutes.
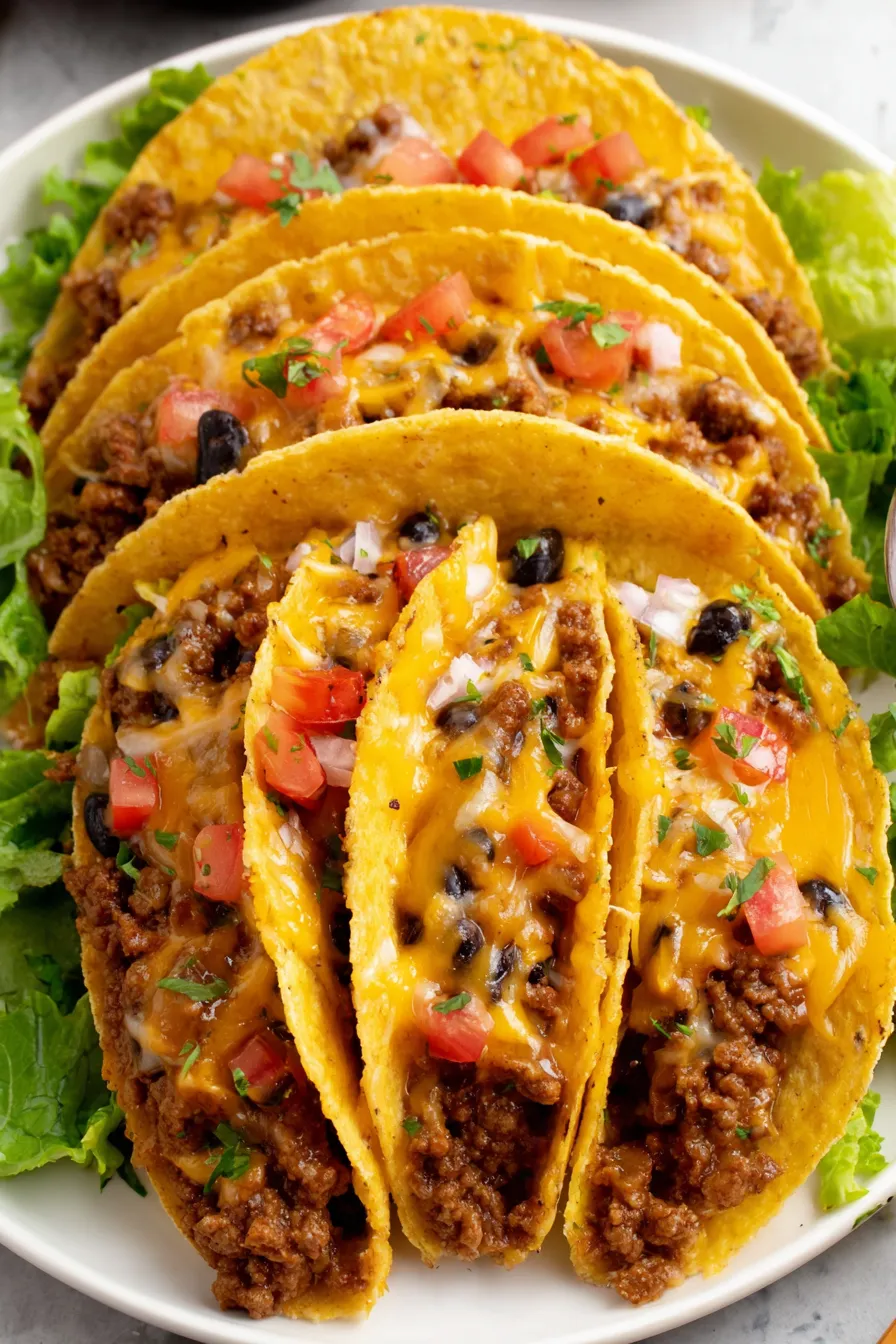
What makes these especially satisfying is the balance of textures and flavors — the slight char from browned beef, the soft creaminess of black beans, and the tangy pop from diced tomatoes with green chilies. I typically use Stand 'N Stuff shells because they fit the pan and hold filling reliably. This recipe is flexible: swap ground beef for shredded chicken, add extra veg, or make it vegetarian with textured soy crumbles. It’s a family favorite whenever we want something both comforting and shareable.
I remember the first time I brought a tray of these to a potluck — everyone asked for the recipe, and a friend declared them the best portable tacos she’d ever had. At home, my kids appreciate the tidy shape that makes toppings less messy. Over time I’ve fine-tuned the simmering step so the filling is moist but not watery; that small moment of reducing the juices makes all the difference.
My favorite part of this dish is how reliably it travels: I’ve taken trays to potlucks and family dinners where guests appreciate the no-fuss serving. Once, at a backyard game night, a friend praised the way the shells stayed crisp despite heavy toppings — that little pre-bake makes all the difference. I also love that picky eaters can customize toppings, making it a flexible option for mixed groups.
Store leftover filling in an airtight container in the refrigerator for up to 3 days. If you’ve already baked assembled tacos, they keep best for 24 hours because the shells will gradually soften. To reheat the filling, warm gently on the stove with a splash of broth to loosen; to re-crisp shells, bake empty shells 3–5 minutes at 350°F then fill. For freezing, cool the filling completely and freeze up to 3 months in labeled freezer-safe containers. Thaw overnight in the fridge before reheating.
Swap ground beef for 1 lb. cooked shredded chicken or 1 lb. ground turkey for a lighter version. For a vegetarian option, use 16 oz. cooked lentils or 12–14 oz. textured vegetable protein, and skip the cream cheese. Use pepper jack instead of cheddar for extra heat, or monterey jack for a milder melt. If you need gluten-free shells, select certified gluten-free hard shells and note cooking time may vary slightly.
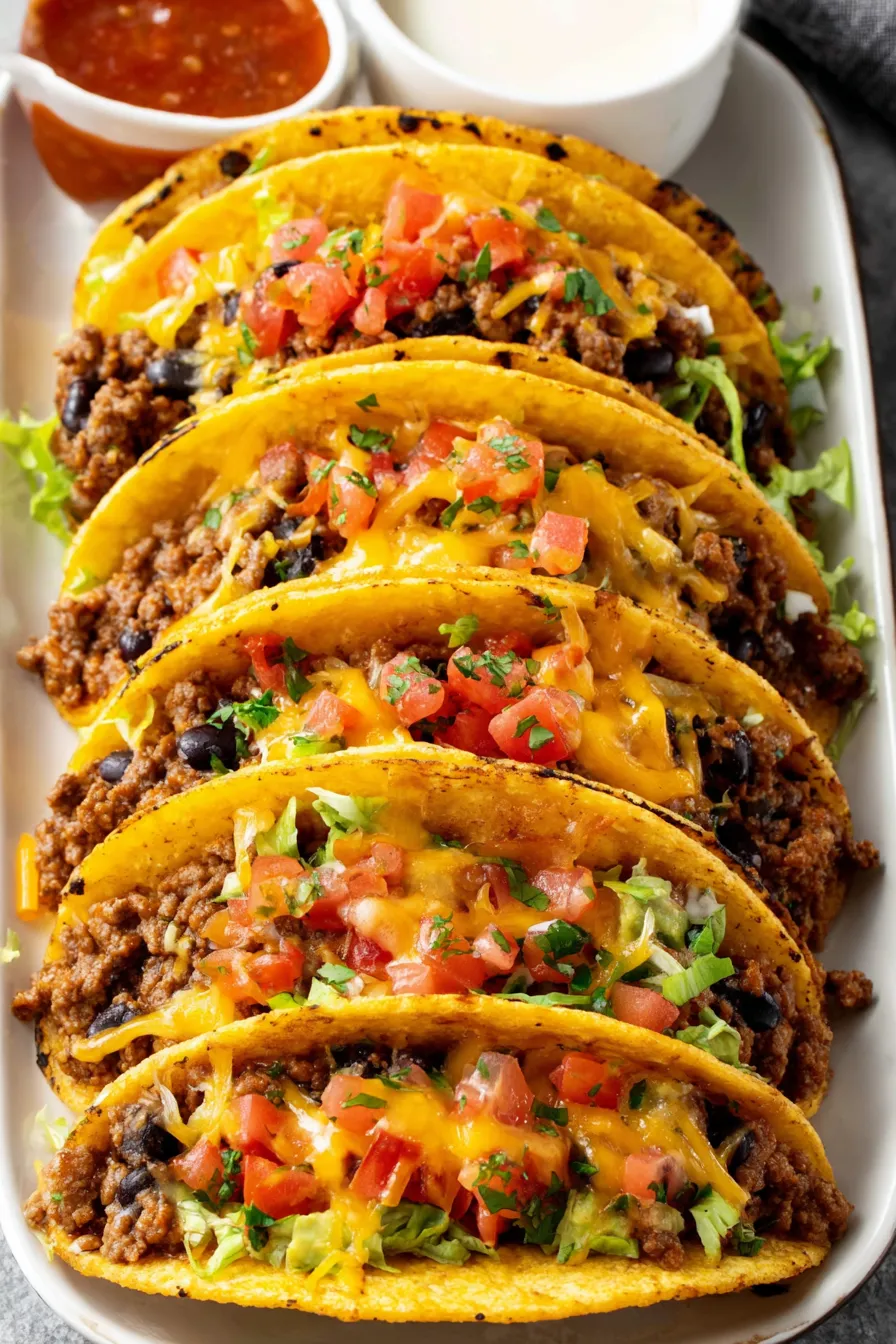
Serve with a bright, acidic side to cut richness: lime wedges, a chopped cilantro and radish salad, or a quick pico de gallo. For a full plate, add Mexican-style rice and charred corn. Garnish with finely shredded lettuce for crunch and sliced avocado for creaminess. For casual entertaining, set toppings in bowls and let guests build their own tacos at the table.
These baked tacos are a Tex-Mex inspired shortcut that merges traditional hard-shell tacos with the convenience of oven cooking. Hard-shell tacos themselves are an American adaptation of Mexican flavors, popularized in U.S. home kitchens and fast-food culture. This format — filling shells upright in a pan — owes more to American casserole traditions than to traditional Mexican methods, but it delivers the flavors many people associate with classic taco fillings: seasoned meat, cheese, beans, and salsa.
In summer, swap canned tomatoes for fresh roasted tomatoes and charred summer corn for a lighter, fresher filling. In colder months, add sautéed poblano or bell peppers and a pinch of smoked paprika for depth. During holidays, make a festive batch by adding chipotle in adobo for warmth or finishing with pickled red onions to brighten richer flavors.
Make the meat and bean filling up to 3 days ahead; cool completely before refrigerating. On the day you plan to serve, heat the filling slowly in a skillet or microwave, pre-bake shells while reheating, then assemble and finish under the oven. Portion filling into individual containers for quick lunches or assemble tacos cold for grab-and-go convenience — add avocado right before eating to avoid browning.
These baked tacos are a reliable, versatile recipe that lifts simple pantry ingredients into something shareable and satisfying. Whether for a weeknight meal or a casual gathering, they deliver the crunch, melty cheese, and warm filling that everyone enjoys. Make them your own with different proteins and toppings — and don’t skip the brief pre-bake.
Pat canned beans dry with paper towels to prevent excess liquid from making shells soggy.
Pre-bake shells briefly in a light or dark dish as directed to keep them crisp during the final bake.
If filling seems dry after simmering, add 1–2 tablespoons of broth to retain moisture before baking.
Use freshly shredded cheese rather than pre-shredded for better melt and texture.
This nourishing crispy baked tacos (stand 'n stuff method) recipe is sure to be a staple in your kitchen. Enjoy every moist, high protein slice — it is perfect for breakfast or as a wholesome snack any time.
This Crispy Baked Tacos (Stand 'N Stuff Method) recipe makes perfectly juicy, tender, and flavorful steak every time! Serve with potatoes and a side salad for an unforgettable dinner in under 30 minutes.
Preheat oven to 400°F. Arrange 8–10 shells in a 9 x 13-inch casserole dish and bake 3–5 minutes depending on dish color to set shells.
Drain and rinse black beans and lay on paper towels to remove excess moisture before adding to shells.
Cook ground beef and diced onion over medium-high heat for 8–10 minutes until browned and onion is softened, then drain grease.
Add taco seasoning, undrained diced tomatoes, and broth; bring to a boil 1–2 minutes then simmer until most liquid evaporates; stir in cream cheese until combined.
Place a spoonful of black beans in each shell bottom, top with the beef mixture, and sprinkle with shredded cheddar.
Bake uncovered 7–10 minutes until cheese is melted and bubbly. Remove and garnish with desired toppings before serving.
Last Step: Please leave a rating and comment letting us know how you liked this recipe! This helps our business to thrive and continue providing free, high-quality recipes for you.
Leave a comment & rating below or tag
@paletina on social media!

Ultra-fudgy brownies packed with chocolate chunks, crowned with gooey marshmallows and glossed with warm chocolate frosting for a decadent crowd-pleaser.

Buttery shortbread crust topped with a gooey brown sugar-pecan filling. Ten minutes to prep, irresistibly crunchy edges, and perfect for make-ahead treats.

Silky, crack-free pumpkin cheesecake with warm spice, buttery graham crust, and make-ahead convenience for showstopping holiday dinners.
Leave a comment & rating below or tag @paletina on social media!
Enjoyed this recipe? Share it with friends and family, and don't forget to leave a review!
This recipe looks amazing! Can't wait to try it.
Comments are stored locally in your browser. Server comments are displayed alongside your local comments.

Join to receive our email series which contains a round-up of some of our quick and easy family favorite recipes.
