
>>

A lighter, oven-baked take on the classic chile relleno: blistered poblano peppers filled with roasted chiles, sweet corn and gooey Chihuahua cheese, topped with cotija, tomatoes and cilantro.
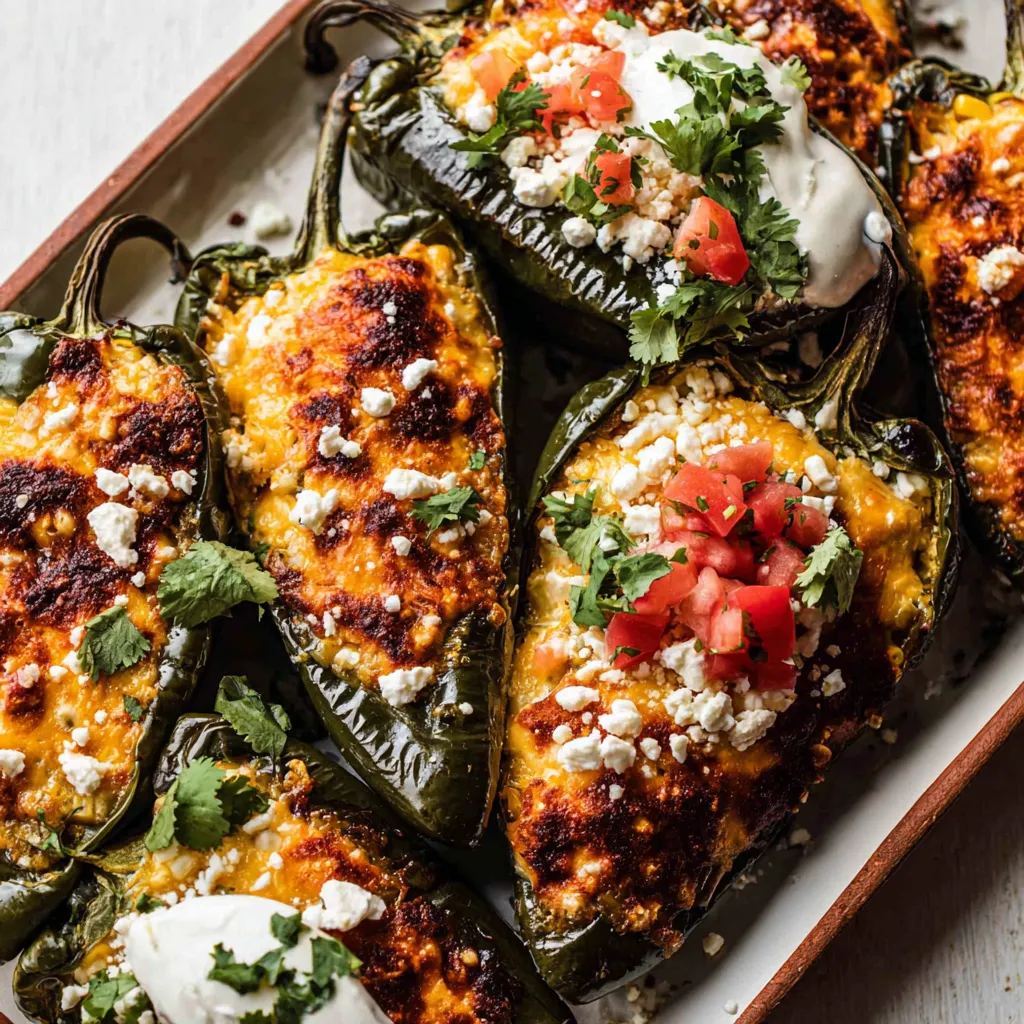
This baked chile relleno has been a weeknight lifesaver and a weekend showstopper in my kitchen. I stumbled on this oven method during a busy autumn when I wanted all the comfort of a traditional chile relleno but without standing over a pan of hot oil. The result is a pepper with smoky, blistered skin that steams to a tender flesh, packed with a seasoned corn and green chile filling and crowned with melting Chihuahua cheese. It brings the familiar contrast of smoky pepper, sweet corn, and rich cheese in every bite.
I first made this for a small family dinner and everyone asked for the recipe. The peppers hold their shape beautifully in the oven, making them easy to prepare ahead and reheat for guests. The texture is what I love most: the tender pepper, a creamy, melty interior, and a sprinkle of crumbly cotija and fresh tomato for brightness. It’s a comforting, colorful dish that reads festive on the plate yet is forgiving in the kitchen — perfect for cooks who want big flavor with minimal fuss.
When I serve these, my family gravitates toward the crumbly cotija and the splash of sour cream — those finishing touches turn each pepper from everyday to celebratory. Guests often comment on how light yet satisfying they are, and I find the leftovers are nearly as good after a gentle reheat.
My favorite part is the contrast between the smoky roasted pepper and the fresh tomato topping — it’s a small thing that makes each bite sing. At holidays I make a double batch; the peppers arrive at the table looking vibrant and everyone dives in. A curious niece once proclaimed it "the prettiest dinner ever," which is the kind of feedback that keeps me making this again and again.

To store, cool peppers to room temperature and place in an airtight container; stack them seam-side up to keep the filling intact. Refrigerate for up to 3 days. For longer storage, wrap each pepper tightly in plastic wrap and put them in a freezer-safe bag; they keep up to 3 months. Reheat from thawed in a 350°F oven for 10–15 minutes covered, then 5 minutes uncovered to refresh the top. Avoid microwave reheating when possible — it softens the pepper and can make the filling watery.
If you don’t have Chihuahua cheese, use shredded mozzarella, Monterey Jack, or a mild white cheddar for similar meltability. Swap canned diced green chiles with 1 cup roasted green chiles you peel and dice for fresher flavor. Use frozen corn kernels if fresh aren’t available; thaw and pat dry so filling doesn’t get soggy. For dairy-free diets, use a plant-based melting cheese and omit the cotija — add a sprinkle of toasted pepitas for crunch instead.
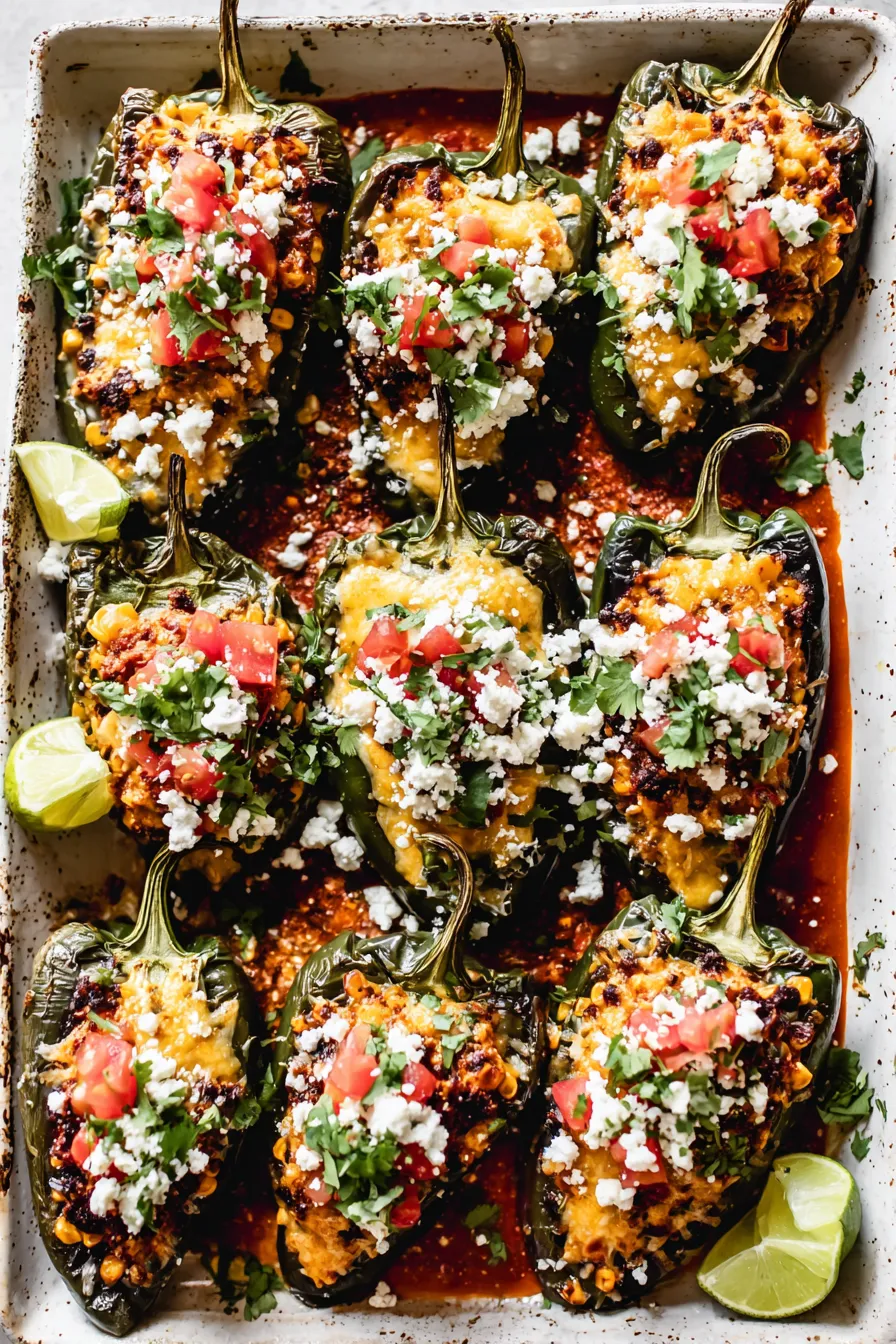
Serve with warm flour or corn tortillas, Mexican rice, or a bright cabbage slaw for crunch. A simple side salad dressed with lime, olive oil and a pinch of salt cuts the richness. Garnish each pepper with extra cotija and chopped cilantro, and offer lime wedges for squeezing at the table — the acid lifts the entire dish. For a heartier meal, accompany with black beans seasoned with cumin and garlic.
The stuffed pepper is a beloved form across Mexico and the American Southwest. The classic chile relleno traditionally involves poblano peppers dipped in an egg batter and fried until golden, often stuffed with cheese or picadillo. Baking is a modern adaptation that reduces oil while keeping the rustic, smoky character of the pepper. Using ranchero sauce and cotija borrows regional flavors — tangy tomato-based sauces and crumbly cheeses are staples in many Mexican kitchens.
Summer: use fresh roasted poblano and charred fresh corn for peak sweetness. Fall: add roasted sweet potato cubes to the filling for earthiness and color. Winter: use canned chiles and corn; add a spoonful of pumpkin purée and smoked paprika for a seasonal twist. For holiday menus, prepare early and reheat in the oven before serving — they plate beautifully and feel festive.
I brought these to a potluck once and a guest asked for the recipe on the spot — she loved how they looked plated and how the flavors felt both traditional and fresh. At home, my partner insisted I add extra corn every time because it adds a pop of sweetness that balances the smoky pepper. A reader mentioned they serve them with pickled red onions to cut richness — a brilliant tip I now use regularly.
For efficient meal prep, broil and peel all peppers in one session, then store them wrapped in paper towels and plastic in the fridge for up to 48 hours. Mix and refrigerate the filling separately; when ready to bake, assemble and top with cheese, then bake until bubbly. Portion into meal-prep containers with a side of salsa or slaw for ready lunches that heat well in an oven or toaster oven.
There’s something joyful about serving these peppers: they look like a special effort but are simple to prepare. Share them with friends, customize the toppings, and make this dish your own.
After broiling, tent the peppers for 5 minutes to steam — this loosens the skin and makes peeling easier.
If using frozen corn, thaw and pat dry to avoid watering down the filling.
To reduce salt, skip cotija or use a low-sodium cheese and taste the filling before adding more salt.
When baking from frozen, cover peppers and bake at 350°F until heated through, then uncover to brown the top.
This nourishing baked chile relleno recipe is sure to be a staple in your kitchen. Enjoy every moist, high protein slice — it is perfect for breakfast or as a wholesome snack any time.
This Baked Chile Relleno recipe makes perfectly juicy, tender, and flavorful steak every time! Serve with potatoes and a side salad for an unforgettable dinner in under 30 minutes.
Preheat the broiler and place peppers on a foil-lined baking sheet. Broil about 5 minutes per side until skin is mostly blackened and blistered. Rotate with tongs and watch closely to avoid burning.
Remove baking sheet and tent or cover peppers for 5 minutes so steam softens the skin and makes peeling easier.
Preheat oven to 350°F. Rub off as much loose skin as possible. Cut a small slit down one side of each pepper and remove seeds if desired to reduce heat.
Pour 1 1/2–2 cups ranchero sauce into a 9x13-inch dish if using, and arrange peppers seam-side up in a single layer.
Combine drained diced chiles, corn, kosher salt and ground cumin. Spoon into peppers and top each with about 1/4 cup shredded cheese.
Bake at 350°F for 15 minutes or until cheese is bubbly and filling is hot. Remove and top with cotija, diced tomatoes, sour cream and cilantro before serving.
Last Step: Please leave a rating and comment letting us know how you liked this recipe! This helps our business to thrive and continue providing free, high-quality recipes for you.
Leave a comment & rating below or tag
@paletina on social media!

Ultra-fudgy brownies packed with chocolate chunks, crowned with gooey marshmallows and glossed with warm chocolate frosting for a decadent crowd-pleaser.

Buttery shortbread crust topped with a gooey brown sugar-pecan filling. Ten minutes to prep, irresistibly crunchy edges, and perfect for make-ahead treats.

Silky, crack-free pumpkin cheesecake with warm spice, buttery graham crust, and make-ahead convenience for showstopping holiday dinners.
Leave a comment & rating below or tag @paletina on social media!
Enjoyed this recipe? Share it with friends and family, and don't forget to leave a review!
This recipe looks amazing! Can't wait to try it.
Comments are stored locally in your browser. Server comments are displayed alongside your local comments.

Join to receive our email series which contains a round-up of some of our quick and easy family favorite recipes.
