
>>

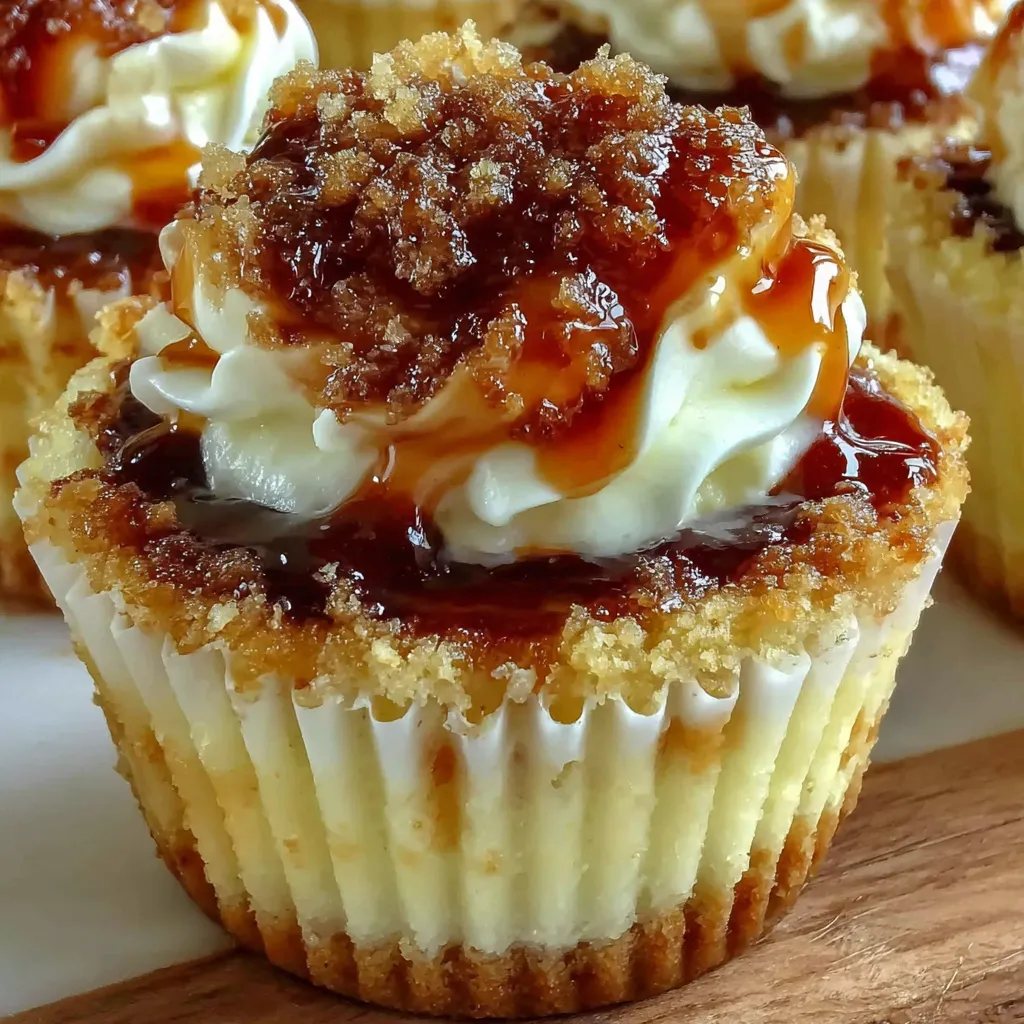
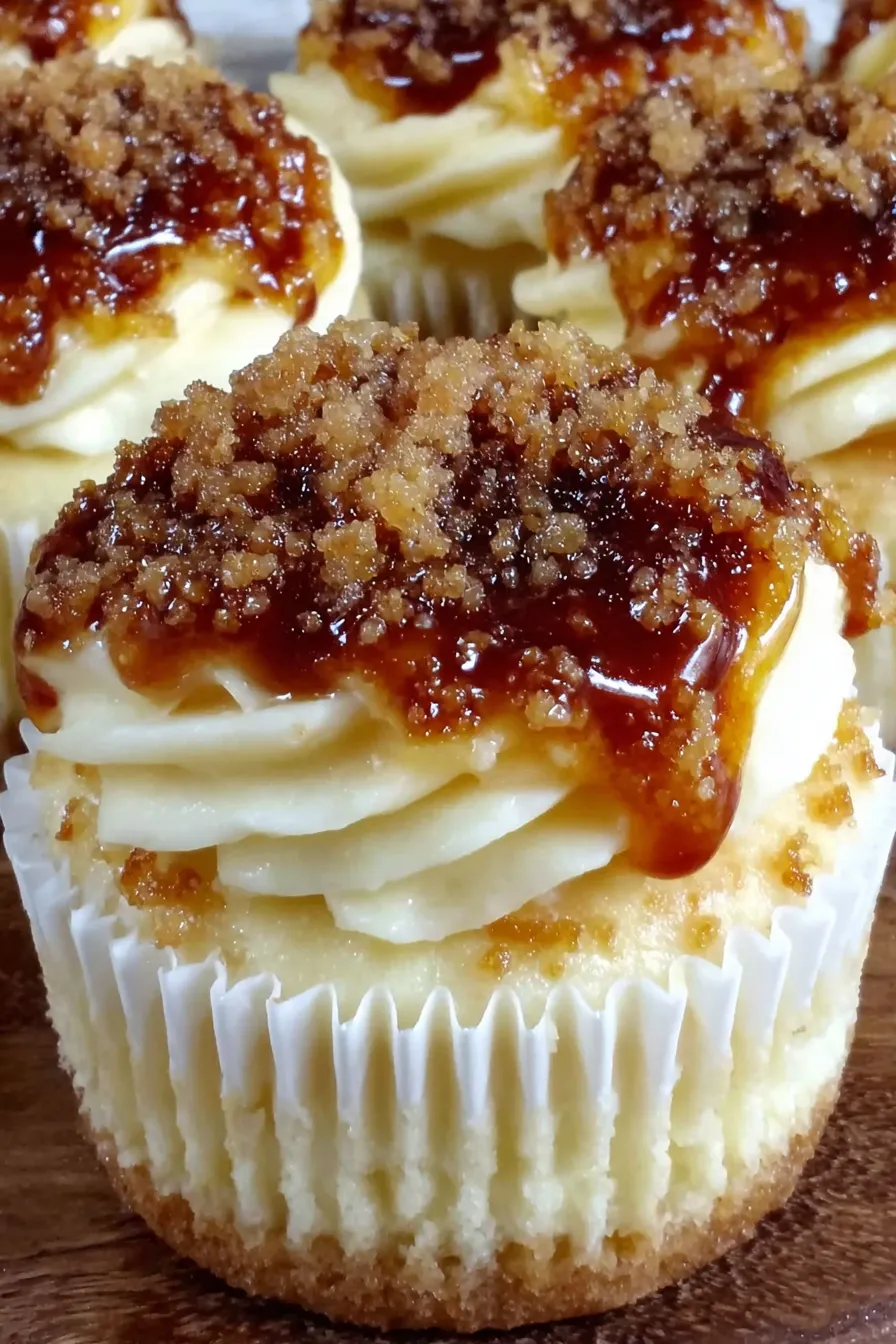
Decadent single-serve cupcakes with a tender vanilla crumb, creamy vanilla bean cheesecake center, and a caramelized brûlée top—an elegant but easy dessert for any occasion.
This recipe began as a small experiment the first holiday I wanted something showy but portable: a miniature combination of two of my favorite desserts. I wanted the rich creaminess of a classic cheesecake and the satisfying crackle and caramel aroma of crème brûlée, all nestled inside a tender vanilla cupcake. The result—Vanilla Bean Crème Brûlée Cheesecake Cupcakes—has become my go-to dessert when I need something both impressive and manageable. They stay neat on a dessert table, travel well to potlucks, and magic happens every time someone cracks the caramel top.
I discovered the balance between the cupcake crumb and the cheesecake center after a few iterations. The key is a cupcake that's not overly sweet so the filling can shine, and a cheesecake with bright vanilla bean flavor and a silkier texture than typical cheesecake. The caramelized sugar on top adds a warm toasted note and a ritualistic moment when you torch or broil each cupcake before serving. These are the kinds of sweets guests remember—and ask for the recipe for.
Every time I bring these to family dinners, someone always asks for the story behind them. My mother loved the idea of a caramel top and the kids adored cracking it with a spoon. Over the years I refined the crumb, switched to vanilla bean paste for consistent flavor, and learned the best caramelizing technique—torch first, broil only as a backup. These moments turned this treat into a little family tradition.
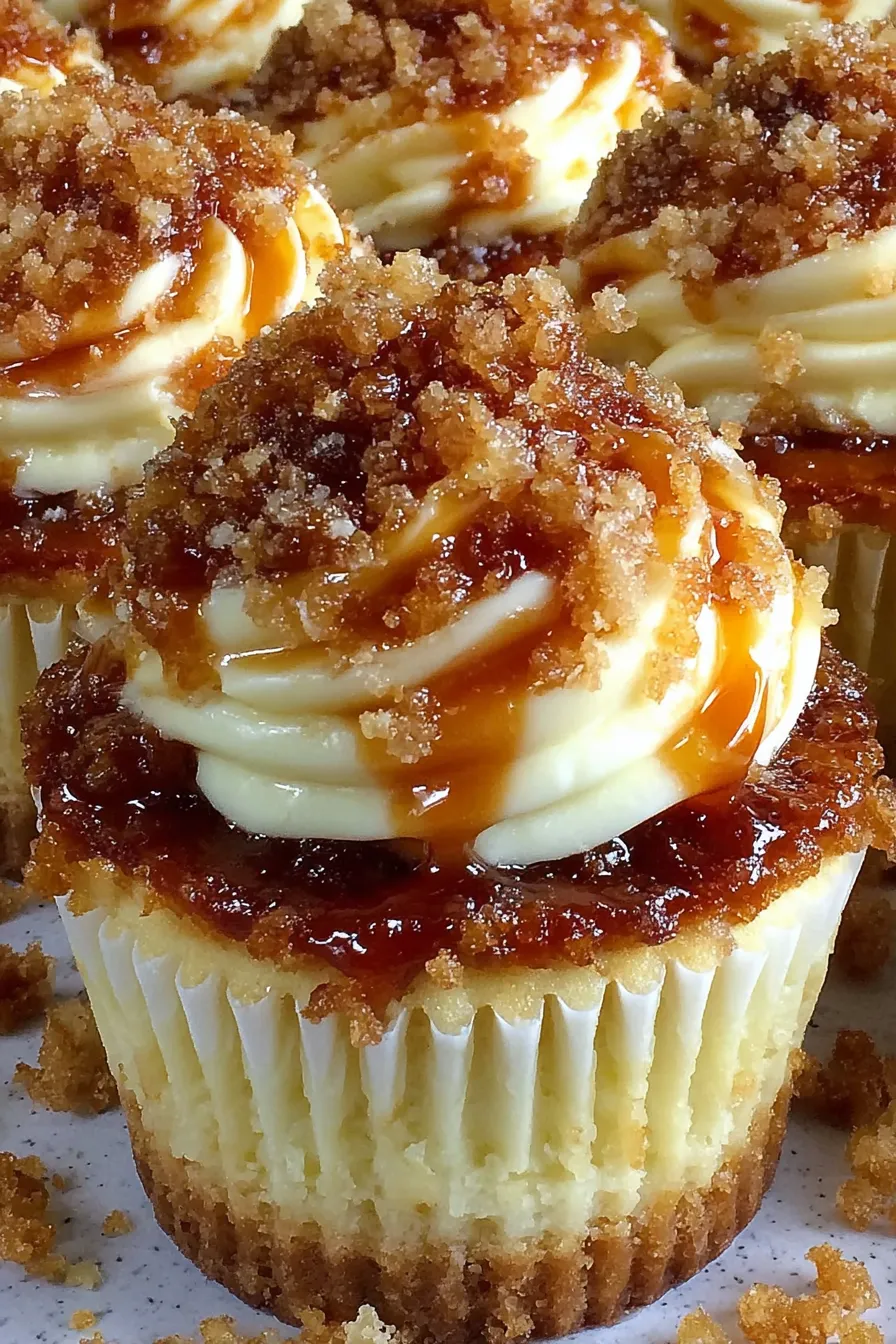
My favorite aspect is the theatrical moment of caramelizing the sugar: family members gather around, forks at the ready, and the crackle sound never fails to make people smile. Once, at a summer dinner, I torched these on the patio and the warm caramel aroma reminded everyone of fairground toffee and toasted sugar—memories that made the evening feel special. For extra indulgence, serve with a small spoonful of lightly sweetened whipped cream or a few berries.
To keep cupcakes at their best, cool completely before covering. Store in an airtight container in the refrigerator for up to 3 days; place a paper towel in the box to absorb excess moisture. For longer storage, freeze fully baked cupcakes without the caramel topping by wrapping each in plastic and placing them in an airtight container for up to 3 months. When you're ready to serve, thaw overnight in the fridge and caramelize with a torch or brief broiler blast to restore the crunchy top and fresh flavor.
If you need to adapt ingredients, use full-fat Greek yogurt in place of sour cream at a 1:1 ratio for similar moisture and tang. For a dairy-free variation, try a vegan cream cheese and a plant-based butter substitute; the texture will be slightly different and the filling may be softer, so chill longer before torching. If you prefer a less sweet topping, use raw cane sugar for torching to give a deeper toasted note. For gluten-free, substitute a 1-to-1 gluten-free flour blend and reduce mixing to avoid a gritty crumb.
Present these on a low cake stand with a dusting of powdered sugar around the base for contrast. Pair with a cup of rich espresso or a late-harvest dessert wine—both stand up to the creamy interior and caramel top. For extra color, garnish with a few raspberries or a tiny sprig of fresh mint. These are perfect for dinner parties, wedding showers, and holiday buffets where single-serve desserts are easiest to plate and serve.
The idea of combining a custard-like crème brûlée topping with a cheesecake base is a modern hybrid inspired by classic French and North American desserts. Crème brûlée itself traces back to France, prized for its creamy custard and caramelized sugar crust. Cheesecake has ancient roots, but the American-style cream cheese version became popular in the 20th century. Marrying the two creates a dessert that nods to both traditions: the elegance of French technique and the comforting richness of American baking.
In spring and summer, add lemon or orange zest to the filling for bright citrus notes; in autumn, fold in a tablespoon of pumpkin purée and 1/2 teaspoon pumpkin spice into the cheesecake for seasonal warmth. For winter holidays, stir 1/4 teaspoon ground cinnamon into the cupcake batter and sprinkle a pinch of flaky sea salt on the caramelized top for contrast. These small swaps keep the base technique intact while making the dessert feel tailored to the season.
Make the batter and filling separately and refrigerate them in airtight containers for up to 24 hours before assembling. Portion batter into liners and add filling when ready to bake; this makes same-day baking quick. Bake and chill cupcakes in the fridge; carry them chilled to events and torch on-site for best results. If you expect to serve many guests, bake multiple pans and use a small butane torch for efficient caramelizing.
These cupcakes combine showmanship and practicality—once you try the first one, you will understand why they disappear fast at every gathering. Make them your own by experimenting with citrus, spices, or finishing salts, and enjoy the applause when guests crack into the caramelized top.
Room-temperature ingredients combine more smoothly: remove butter, eggs, and cream cheese from the fridge 30 minutes before starting.
Chill cupcakes fully before torching to prevent the filling from overheating and becoming runny.
Use vanilla bean paste for consistent speckled vanilla and stronger flavor than extract alone.
If using the broiler to caramelize, move the rack close to the broiler and watch constantly to avoid burning.
This nourishing vanilla bean crème brûlée cheesecake cupcakes recipe is sure to be a staple in your kitchen. Enjoy every moist, high protein slice — it is perfect for breakfast or as a wholesome snack any time.
This Vanilla Bean Crème Brûlée Cheesecake Cupcakes recipe makes perfectly juicy, tender, and flavorful steak every time! Serve with potatoes and a side salad for an unforgettable dinner in under 30 minutes.
Preheat oven to 350 degrees F (175 degrees C). Place a rack in the center and line a 12-cup muffin tin with liners. This ensures even baking and easy release.
Whisk together flour, granulated sugar, baking powder, and salt in a medium bowl to distribute leavening and salt evenly through the batter.
Cream softened butter with sugar until light. Beat in eggs one at a time, then add vanilla extract and sour cream. Fold in dry ingredients just until combined to avoid developing gluten.
Beat cream cheese until smooth, then add powdered sugar and vanilla bean paste. Beat in the filling egg until fully incorporated and silky, scraping the bowl as needed.
Spoon batter into liners halfway, add about 1 tablespoon of cheesecake filling in the center, and top with a little more batter so the filling is enclosed but visible when cut.
Bake for 20 to 25 minutes until the cake portion yields a few moist crumbs on a toothpick. Cool completely then chill for at least 1 hour to set the filling before caramelizing sugar on top.
Sprinkle about 1 teaspoon granulated sugar on each cupcake and caramelize with a kitchen torch until amber and crisp, or under a very hot broiler for 1 to 2 minutes while watching closely.
Last Step: Please leave a rating and comment letting us know how you liked this recipe! This helps our business to thrive and continue providing free, high-quality recipes for you.
Leave a comment & rating below or tag
@paletina on social media!

Ultra-fudgy brownies packed with chocolate chunks, crowned with gooey marshmallows and glossed with warm chocolate frosting for a decadent crowd-pleaser.

Buttery shortbread crust topped with a gooey brown sugar-pecan filling. Ten minutes to prep, irresistibly crunchy edges, and perfect for make-ahead treats.

Silky, crack-free pumpkin cheesecake with warm spice, buttery graham crust, and make-ahead convenience for showstopping holiday dinners.
Leave a comment & rating below or tag @paletina on social media!
Enjoyed this recipe? Share it with friends and family, and don't forget to leave a review!
This recipe looks amazing! Can't wait to try it.
Comments are stored locally in your browser. Server comments are displayed alongside your local comments.

Join to receive our email series which contains a round-up of some of our quick and easy family favorite recipes.
