
>>

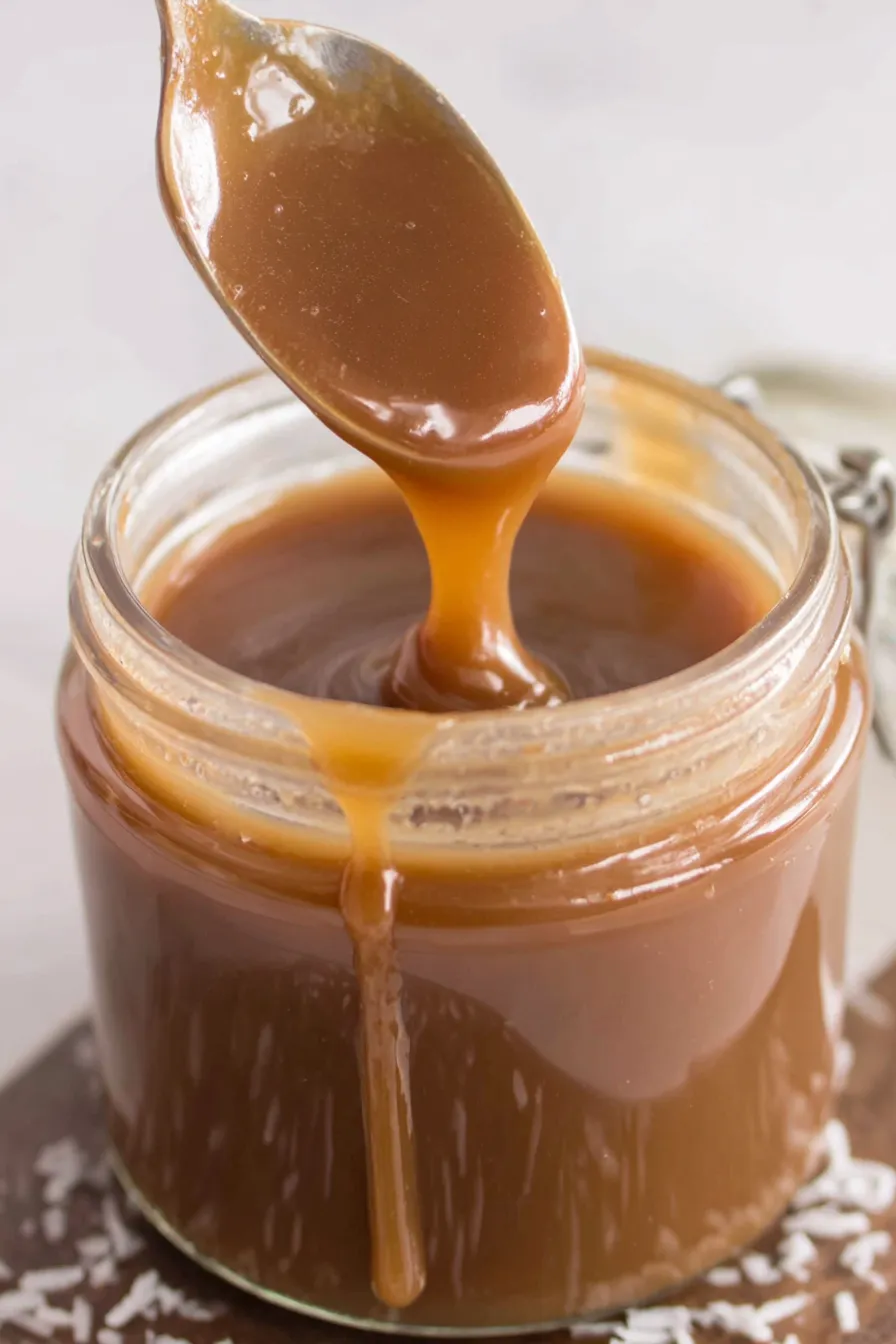
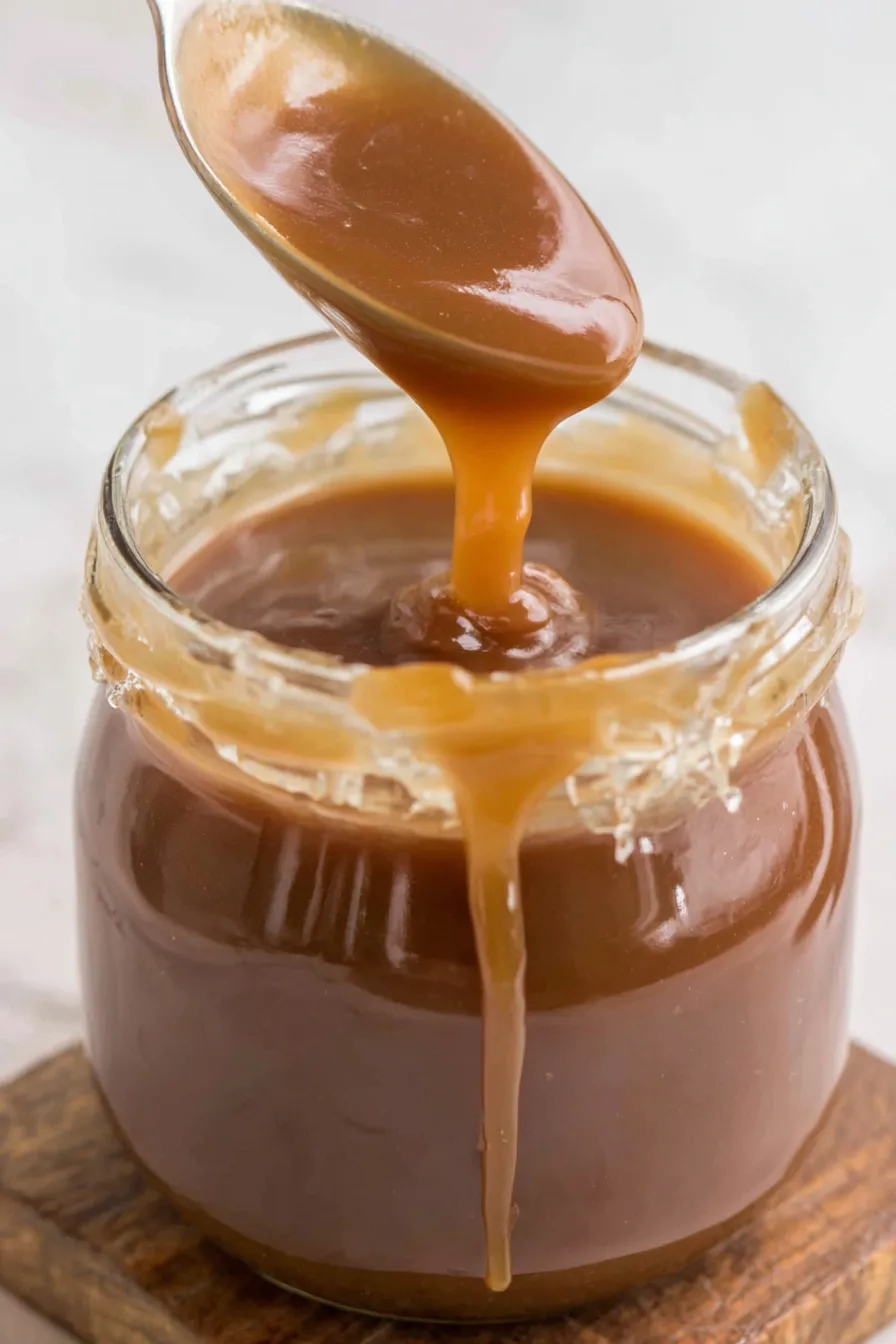
A rich, silky toffee sauce made with butter, brown sugar, and heavy cream—perfect for drizzling over ice cream, cakes, and warm fruit.
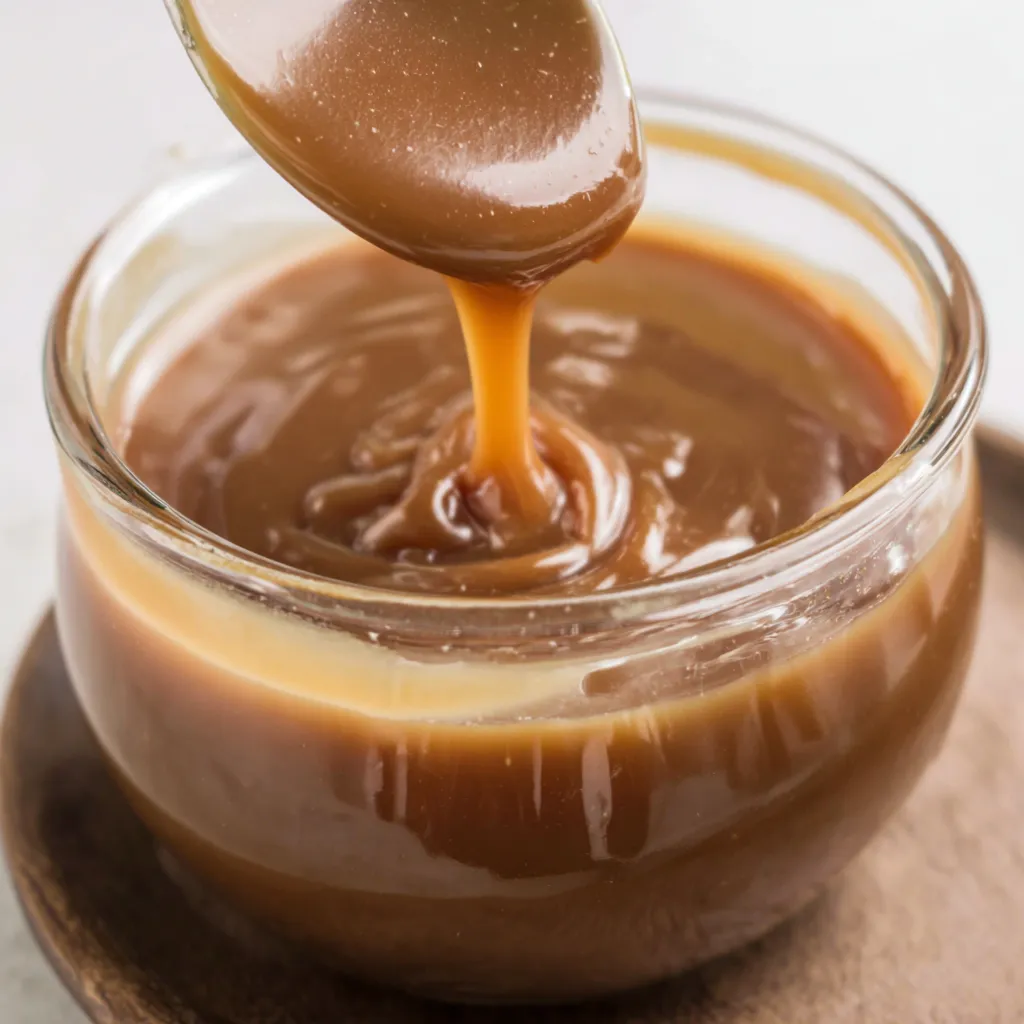
This toffee sauce has been my go-to finishing touch for desserts ever since I first made it on a rainy Sunday when the family needed something warm and indulgent. I discovered this simple combination of butter, packed brown sugar, and heavy cream when I wanted a real, old-fashioned sauce without complicated techniques. The result was a glossy, deep caramel-flavored sauce that tasted like a nostalgic candy shop but spooned warm over vanilla ice cream felt like a cozy hug.
What makes this version special is the balance of sweetness and buttery richness, plus the technique of constant stirring as the sugar and butter melt together—this prevents scorching and delivers a perfectly smooth texture. I often make a double batch to keep in the fridge for a week; it reheats beautifully and brightens everything from pancakes to roasted fruit. Family members have been known to argue over the last spoonful, and friends always ask for the recipe because it elevates even the most humble dessert into something memorable.
I remember serving this to guests one winter evening after a simple roast chicken dinner; the warm sauce over vanilla gelato felt effortless yet indulgent. My niece announced it the best dessert she’d ever had, and that kind of reaction is why I keep this recipe in heavy rotation. It’s the kind of thing I make when I want to impress without fuss.
What I love most about this sauce is how it transforms simple desserts into something celebratory—warm sauce on plain ice cream suddenly becomes a centerpiece. I’ve taken jars of this to potlucks, and people often ask for the recipe; it’s a small technique that makes a big difference in texture and flavor. The memory of serving it at a holiday gathering and watching everyone go back for seconds is why I keep this recipe handy year-round.
Store cooled sauce in a clean, airtight jar in the refrigerator for up to 10 days. For longer storage, portion into small freezer-safe containers or silicone muffin molds, leaving some headroom, and freeze for up to 3 months. To reheat, gently warm in the microwave in 10–15 second bursts, stirring between intervals, or warm over low heat in a small saucepan with a splash of cream to restore spoonable consistency. Never re-boil; gentle warming preserves the silky texture.
If you don’t have heavy cream, full-fat coconut milk can be used for a dairy-free version though the flavor will shift to a coconut profile. Replace unsalted butter with salted butter but reduce or skip the final sea salt. For a darker, more intense toffee flavor, substitute 1 cup of light brown sugar with 1 cup dark brown sugar, or add 1–2 tablespoons of molasses. Note: using alternative sweeteners will change set and mouthfeel.
This sauce is lovely over vanilla ice cream, sticky toffee pudding, warm apple pie, pancakes, or waffles. Spoon it over roasted fruit or use it as a filling between cake layers or in a trifle. Garnish with flaky sea salt or chopped toasted pecans for texture. For a cocktail twist, drizzle a little into Irish coffee or hot chocolate for a boozy dessert drink.
Toffee-style sauces and confections have long roots in British and American baking traditions where caramelized sugar and butter form the basis for candies and dessert sauces. This simple stovetop method mirrors classic candy-making techniques but stops short of reaching the hard-crack stage, producing a pourable toffee sauce that’s shared across many regional desserts. The addition of cream softens the texture, making it a dessert condiment rather than a firm candy.
In autumn, stir in warm spices like cinnamon or a pinch of ground ginger for a pumpkin-spice feel and pair with baked apples. In summer, add a squeeze of fresh citrus or a tablespoon of dark rum to brighten the flavor for grilled fruit desserts. During the holidays, fold in finely chopped toasted nuts or a splash of bourbon for depth and celebratory character.
Prepare a batch on a prep day and portion into small jars for quick dessert assembly. Label jars with the date and use within 10 days refrigerated or freeze in single-serving containers for grab-and-go toppings. When packing for picnics, store frozen jars in the cooler—they’ll thaw into a delicious sauce by dessert time. Use microwave-safe jars if you plan to reheat at the table.
Making this toffee sauce is a simple ritual that yields a deeply satisfying result—one spoonful can turn an everyday dessert into a small celebration. Try it once and you’ll find yourself reaching for it whenever you want a quick, indulgent finish.
Use a heavy-bottomed saucepan and moderate heat to prevent scorching the sugar.
Always whisk in heavy cream slowly to form a smooth emulsion and avoid lumps.
Add vanilla and salt off the heat to preserve aroma and prevent over-reduction.
For a silkier sauce, strain through a fine mesh if any granules remain.
This nourishing classic toffee sauce recipe is sure to be a staple in your kitchen. Enjoy every moist, high protein slice — it is perfect for breakfast or as a wholesome snack any time.
Store in the refrigerator for up to 10 days; freeze for up to 3 months in sealed containers.
Reheat gently in the microwave in short bursts or on the stovetop over low heat with a splash of cream.
This Classic Toffee Sauce recipe makes perfectly juicy, tender, and flavorful steak every time! Serve with potatoes and a side salad for an unforgettable dinner in under 30 minutes.
Measure butter and brown sugar in advance and have heavy cream and vanilla ready. Use a heavy saucepan to ensure even heating and a whisk for smooth incorporation.
Place butter and packed brown sugar in a heavy saucepan over medium heat. Stir constantly until the mixture is melted and glossy, about 2–3 minutes. Keep the heat moderate to avoid scorching.
Slowly whisk in the heavy cream until fully combined and smooth. The mixture will loosen and steam; whisking creates a stable emulsion between the dairy and sugar-butter syrup.
Bring to a gentle simmer for 2–3 minutes, stirring constantly. Look for small, steady bubbles at the edges—avoid a rolling boil to prevent over-reduction and graininess.
Remove from heat and carefully stir in vanilla extract and a pinch of sea salt if desired. Allow the sauce to cool slightly; it will thicken as it returns to room temperature.
Transfer to a heatproof jar, let cool to room temperature, then refrigerate for up to 10 days or freeze for up to 3 months. Reheat gently before serving.
Last Step: Please leave a rating and comment letting us know how you liked this recipe! This helps our business to thrive and continue providing free, high-quality recipes for you.
Leave a comment & rating below or tag
@paletina on social media!

Ultra-fudgy brownies packed with chocolate chunks, crowned with gooey marshmallows and glossed with warm chocolate frosting for a decadent crowd-pleaser.

Buttery shortbread crust topped with a gooey brown sugar-pecan filling. Ten minutes to prep, irresistibly crunchy edges, and perfect for make-ahead treats.

Silky, crack-free pumpkin cheesecake with warm spice, buttery graham crust, and make-ahead convenience for showstopping holiday dinners.
Leave a comment & rating below or tag @paletina on social media!
Enjoyed this recipe? Share it with friends and family, and don't forget to leave a review!
This recipe looks amazing! Can't wait to try it.
Comments are stored locally in your browser. Server comments are displayed alongside your local comments.

Join to receive our email series which contains a round-up of some of our quick and easy family favorite recipes.
