
>>

Sweet, salty, and festive — bite-sized caramel sandwiches dipped in red, green, and white candy coating and finished with holiday sprinkles. Perfect for parties and gift giving.
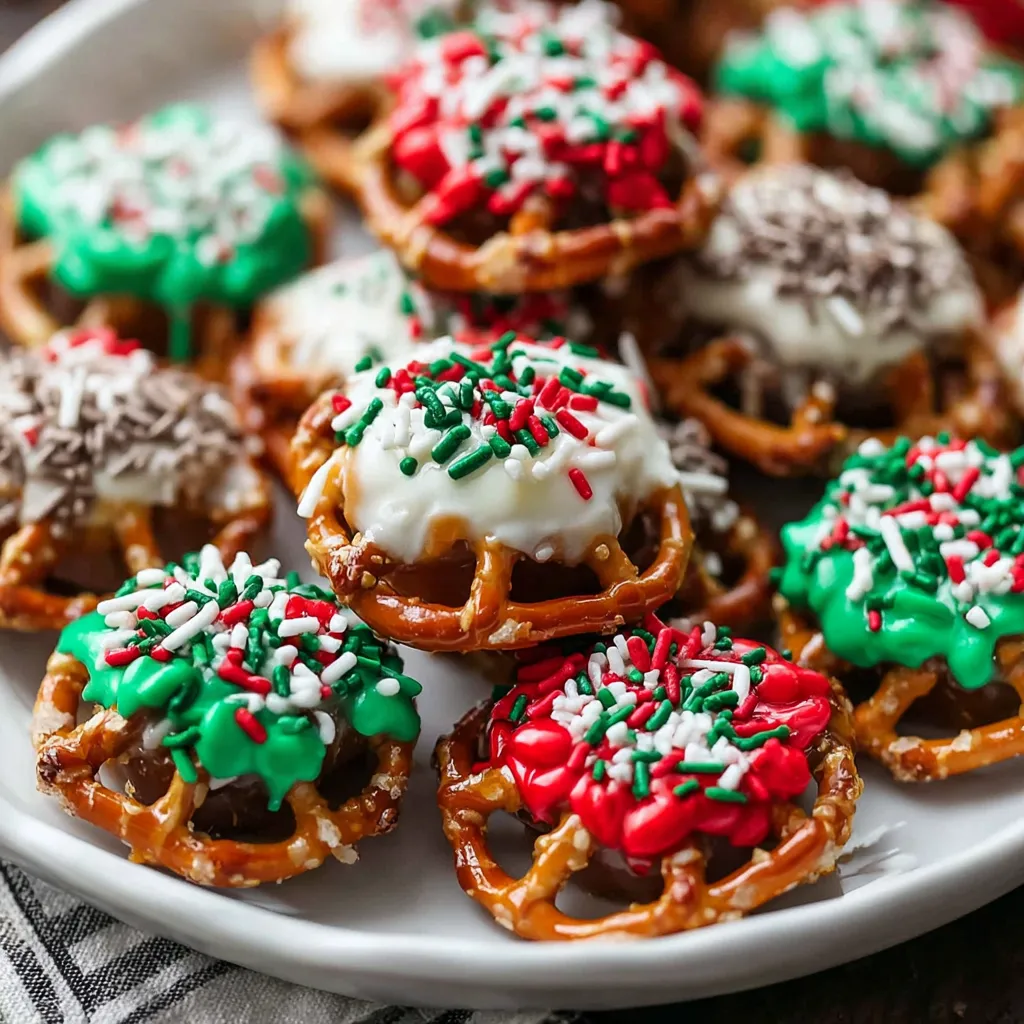
I’ve brought these to Christmas cookie exchanges and winter school parties; they always disappear first. Family members comment on the perfect contrast of textures, and the bright coatings make them look like they came from a bakery. Small investments — good-quality pretzels and decent Candy Melts such as Wilton — pay off visually and in flavor.
What I love most is how these transform simple store-bought items into something that feels homemade and festive. I’ve watched neighbors come by just to pick up a small box, and the bites always spark conversations about childhood holiday treats. They’re proof that attractive party food doesn’t need to be complicated.
Store the treats in a single layer or separated by parchment to avoid smudging the candy coating. At room temperature, they stay fresh for about one week in an airtight container; refrigeration extends freshness but may dull the shine slightly and make the coating firmer. To freeze, arrange in a single layer on a tray and freeze until solid, then stack with parchment between layers in a freezer-safe container for up to 3 months. Thaw in the refrigerator overnight and bring to room temperature before serving to restore optimal texture.
If you can’t find Candy Melts, use real chocolate (white, milk, or colored couverture) and temper it for a professional finish, though that requires a thermometer and slightly more time. For vegan variations, choose plant-based caramels and vegan candy coating (made from cocoa butter or specialized vegan melts). Swap pretzel twists for gluten-free pretzels if gluten is a concern — note the texture may be slightly different and sandwiches may be less sturdy. For less sweetness, use dark chocolate for coating and skip the white drizzle.
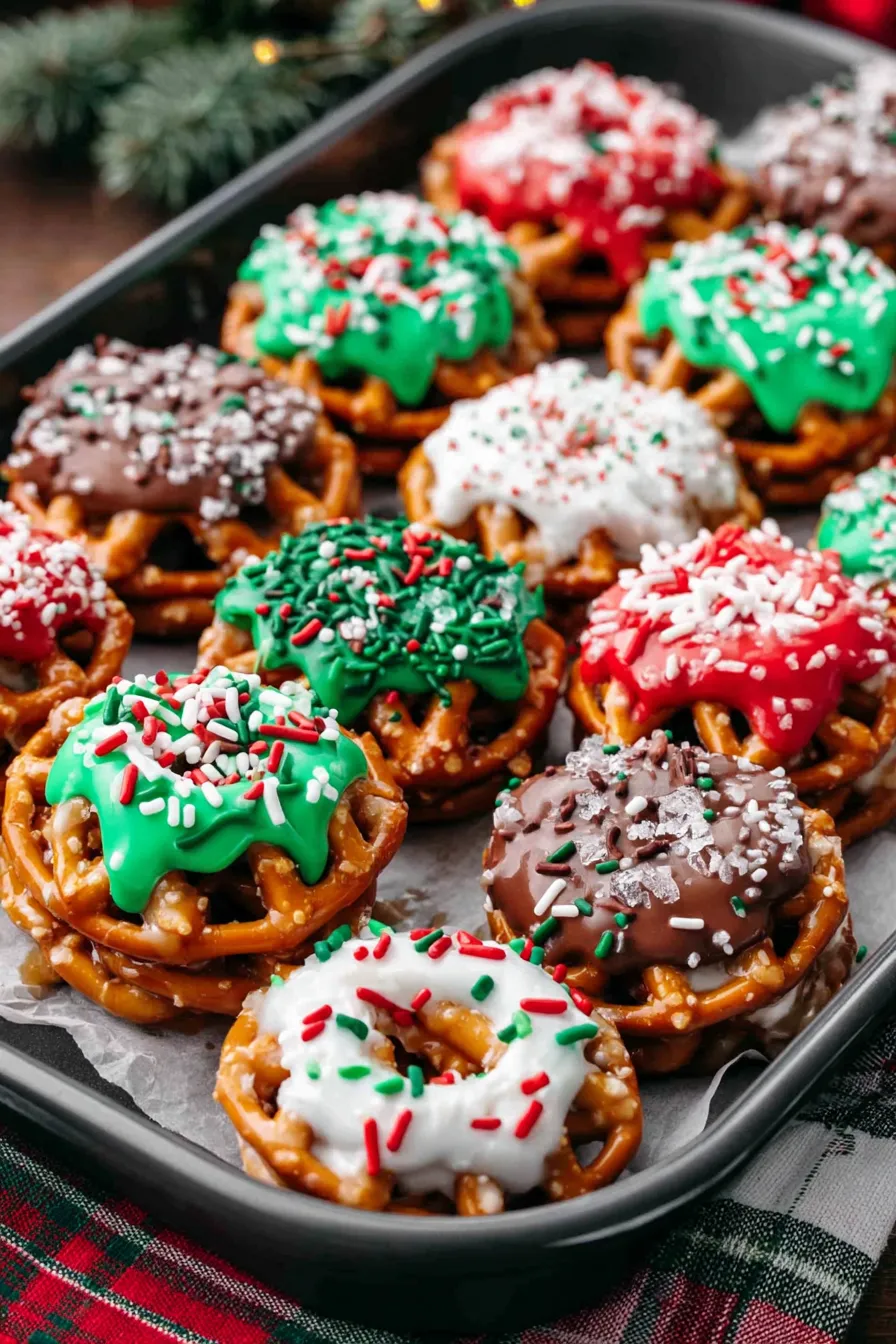
Serve these on a simple white platter garnished with fresh rosemary sprigs to mimic a festive wreath, or arrange them in mini cupcake liners for a tidy gift presentation. They pair beautifully with hot chocolate, mulled cider, or a dessert coffee. For parties, create a small DIY station with extras: additional sprinkles, chopped nuts, or crushed peppermint for a quick refresh during an event. They’re equally at home on a dessert board with cookies and candied nuts.
The idea of sweet-and-salty combinations is timeless in American holiday baking; pairing pretzels with caramel or chocolate has roots in mid-20th-century home baking when convenience confections became popular. Using Candy Melts emerged when home bakers sought colorful, easy-to-use coatings for themed events. These bites are a modern adaptation of classic candy sandwiches, blending convenience food with handmade charm — a favorite approach in contemporary festive baking traditions.
Change colors and toppings to match seasonal themes: orange and black Candy Melts with candy eyes for Halloween, pastel colors for Easter, or red, white, and blue for summer celebrations. Swap holiday sprinkles for crushed peppermint during winter or for toasted coconut in tropical summertime. For Thanksgiving, consider using caramel and a drizzle of dark chocolate with chopped toasted pecans on top.
Prep components ahead of time: unwrap and halve caramels and store them in a small container; line baking sheets with parchment and arrange pretzels the day before. On the day of assembly, bake for 5 minutes, sandwich, and then melt coatings in succession while the sandwiches cool. Use multiple microwave-safe bowls if preparing large batches to speed the process. Package in small bakery boxes with parchment separators for gifting.
One year I made three dozen of these for my office holiday swap; they were gone within 20 minutes and colleagues asked for the recipe. My niece used the green-coated versions as edible name tags at our family dinner — everyone loved the personalized touch. These bites have also been used to fill small jars with layered candy, creating festive hostess gifts that require minimal hands-on time but deliver maximum delight.
Bring a batch to your next holiday gathering — they’re simple to make, easy to transport, and perfect for sharing. I encourage you to personalize the colors and toppings to make them your own family favorite.
Unwrap and halve caramels ahead of time to speed assembly and reduce warm hands handling sticky sweets.
Heat Candy Melts in 30-second intervals and stir between bursts; add shortening one teaspoon at a time for drizzle consistency.
Work in small batches when drizzling to ensure coatings remain fluid and glossy before they set.
This nourishing christmas caramel pretzel bites recipe is sure to be a staple in your kitchen. Enjoy every moist, high protein slice — it is perfect for breakfast or as a wholesome snack any time.
Yes. To freeze, lay the set bites on a tray until solid, then transfer to a freezer-safe container with parchment between layers. Freeze up to 3 months. Thaw overnight in the refrigerator and bring to room temperature before serving.
Use vegan caramels and vegan candy coating; ensure pretzels are vegan as some contain honey. The texture and taste will be slightly different but still delicious.
If Candy Melts seize, gently stir in a small amount (1/4 teaspoon) of shortening and microwave in 10-second bursts until smooth. Avoid adding water.
This Christmas Caramel Pretzel Bites recipe makes perfectly juicy, tender, and flavorful steak every time! Serve with potatoes and a side salad for an unforgettable dinner in under 30 minutes.
Preheat oven to 375°F (190°C). Line a rimmed baking sheet with parchment paper to prevent sticking and make cleanup easier.
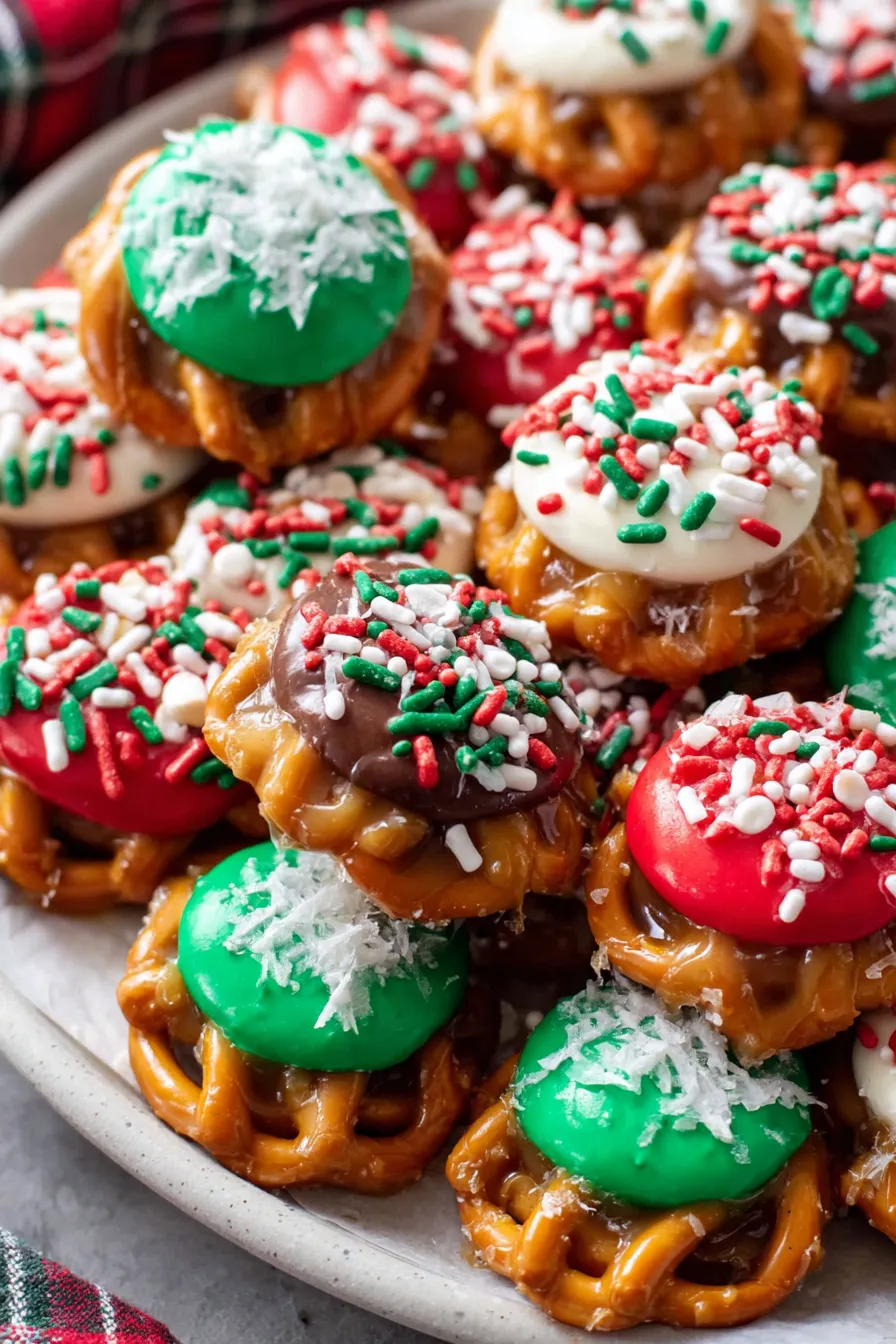
Place 24 mini pretzels on the lined sheet, spacing evenly. Place a halved caramel, cut side down, in the center of each pretzel.
Bake for approximately 5 minutes until caramels are softened and glossy but not runny. Check at 4 minutes to avoid over-melting.
Remove from oven and immediately press another pretzel on top of each softened caramel to form sandwiches. Cool on the sheet for 10–15 minutes.
Melt 1 cup red Candy Melts with 1 teaspoon shortening in a microwave-safe bowl, heating in 30-second intervals and stirring until smooth. Add more shortening by the teaspoon if needed.
Transfer melted red coating to a piping bag and drizzle over a third of the bites. Allow to firm slightly before the next color.
Repeat melting process with green Candy Melts and drizzle over another third of the bites once the red has set a bit.
Melt white Candy Melts with shortening and drizzle over remaining bites or as a finishing drizzle. While wet, immediately add sprinkles so they adhere.
Let all coatings harden at room temperature for at least 30 minutes, then store in an airtight container at room temperature for up to one week or refrigerate for longer storage.
Last Step: Please leave a rating and comment letting us know how you liked this recipe! This helps our business to thrive and continue providing free, high-quality recipes for you.
Leave a comment & rating below or tag
@paletina on social media!

Ultra-fudgy brownies packed with chocolate chunks, crowned with gooey marshmallows and glossed with warm chocolate frosting for a decadent crowd-pleaser.

Buttery shortbread crust topped with a gooey brown sugar-pecan filling. Ten minutes to prep, irresistibly crunchy edges, and perfect for make-ahead treats.

Silky, crack-free pumpkin cheesecake with warm spice, buttery graham crust, and make-ahead convenience for showstopping holiday dinners.
Leave a comment & rating below or tag @paletina on social media!
Enjoyed this recipe? Share it with friends and family, and don't forget to leave a review!
This recipe looks amazing! Can't wait to try it.
Comments are stored locally in your browser. Server comments are displayed alongside your local comments.

Join to receive our email series which contains a round-up of some of our quick and easy family favorite recipes.
