
Brownie Pie

A decadent brownie baked inside a 9-inch pie crust for an easy, crowd-pleasing dessert that slices like a pie and eats like a brownie.
This Brownie Pie is the sort of dessert I turn to when I want something that feels indulgent but is impossibly simple to make. I first discovered this combination late one winter when I had a frozen pie shell and a craving for chocolate; the contrast between a tender brownie interior and a crisp pie edge was instant magic. The texture sits somewhere between a fudgy brownie and a set custard, depending on how long you leave it in the oven, and it delivers glossy, crackly top notes when the sugar interacts with warm melted butter.
Over the years this version has become my entertaining secret because it travels well and slices neatly for a crowd. I rely on a frozen 9-inch unbaked pie crust to save time, and the batter comes together in one bowl with no electric mixer. Family and guests love it warm with ice cream or chilled with a dollop of softly whipped cream. If you prefer extra chew, scatter extra chocolate chips on top before baking; for a nuttier profile add toasted walnuts. Making this once will convince you that pie shells and brownie batter are an underrated match made in dessert heaven.
Why You'll Love This Recipe
- This recipe is quick and pantry-friendly: it uses a frozen 9-inch pie crust and simple baking staples so you can bake it any evening without a special trip to the store.
- Ready in under an hour from start to finish; active prep is about 15 minutes and baking is about 45 minutes depending on the desired set.
- Flexible texture: remove it near the shorter baking time for a fudgier center or bake longer for a more set, sliceable texture that behaves like a traditional pie.
- Make-ahead friendly and travels well; chill overnight to slice cleanly for parties and potlucks or serve slightly warm with ice cream for a cozy dessert.
- Accessible to beginner bakers: no tempering, no creaming with a mixer, and very forgiving timing if you prefer fudgy to cakey.
- Customizable toppings and mix-ins: swap chocolate chip varieties, omit nuts, or add a salted caramel drizzle to tailor sweetness and texture.
Personally, the first time I served this at a small family gathering everyone kept asking if it was from a bakery. We topped it with a scoop of vanilla ice cream and watched the edges shine and set as it cooled. That reaction convinced me this should be a staple for birthdays and casual dinners alike.
Ingredients
- Frozen 9-inch unbaked pie crust: Use a good-quality refrigerated or frozen crust such as Pillsbury or store brand. It provides a crisp, buttery shell that contrasts the chewy chocolate interior.
- 8 tablespoons unsalted butter, melted and warm: Unsalted gives control over seasoning and the warm butter helps dissolve sugar for a glossy top. Use European-style butter for a richer flavor if available.
- 3/4 cup granulated sugar: The sugar helps create a shiny, crackly top when combined with warm butter—don’t substitute all brown sugar here or the crackle will be reduced.
- 1 large egg and 1 large egg yolk: These bind the batter and add richness while helping achieve that tender, fudgy center.
- 1 tablespoon water and 1 1/2 teaspoons pure vanilla extract: Water slightly loosens the batter for even baking; vanilla adds aromatic depth.
- 1/2 cup unsweetened cocoa powder and 1/2 cup powdered sugar: Cocoa provides chocolate intensity; powdered sugar helps with texture and contributes to the glossy finish.
- 1/2 cup all-purpose flour and 1/4 teaspoon kosher salt: Flour gives structure while salt balances the sweetness and amplifies chocolate flavor.
- 1/2 cup semisweet chocolate chips (or milk chocolate chips): Semisweet works well for balanced chocolate flavor; choose milk chips for a sweeter profile.
- 1/4 cup finely chopped walnuts (optional): Adds pleasant crunch and a toasty note; lightly toast before chopping for best flavor.
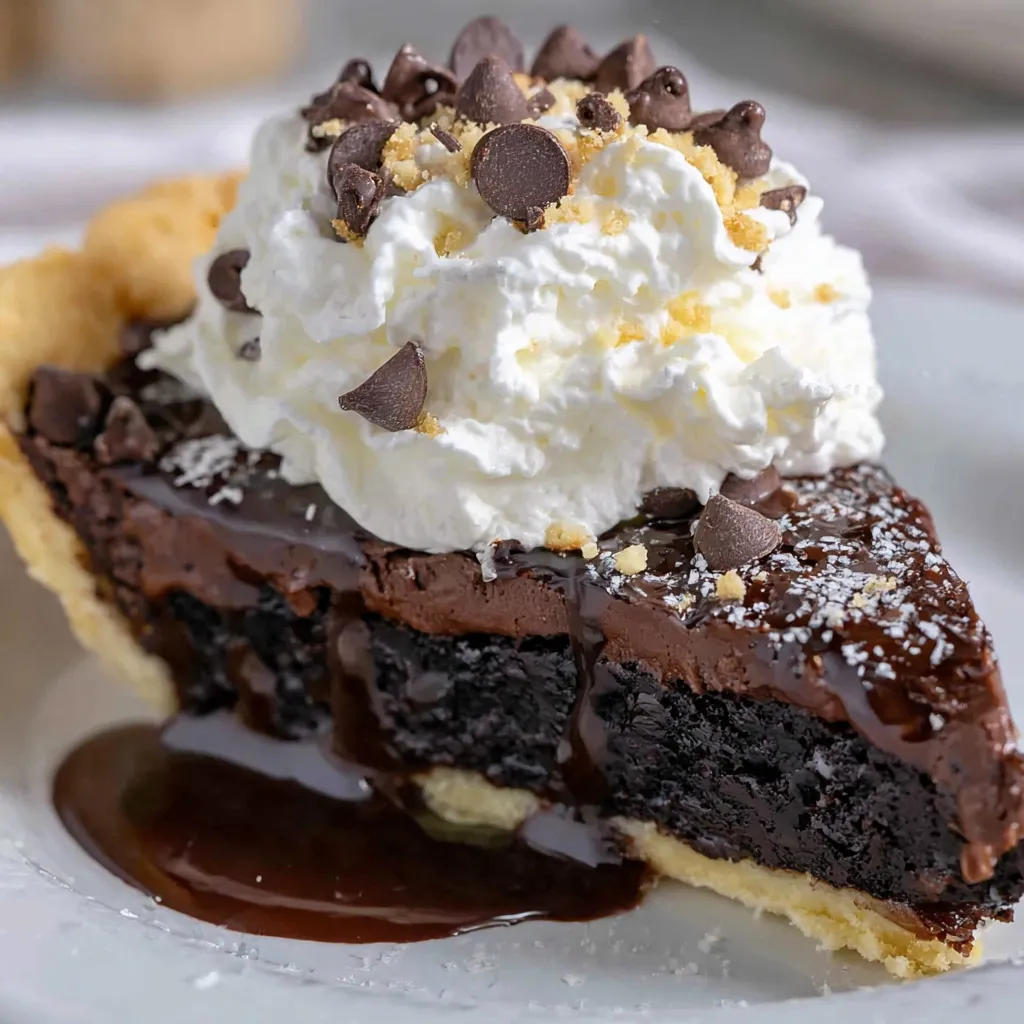
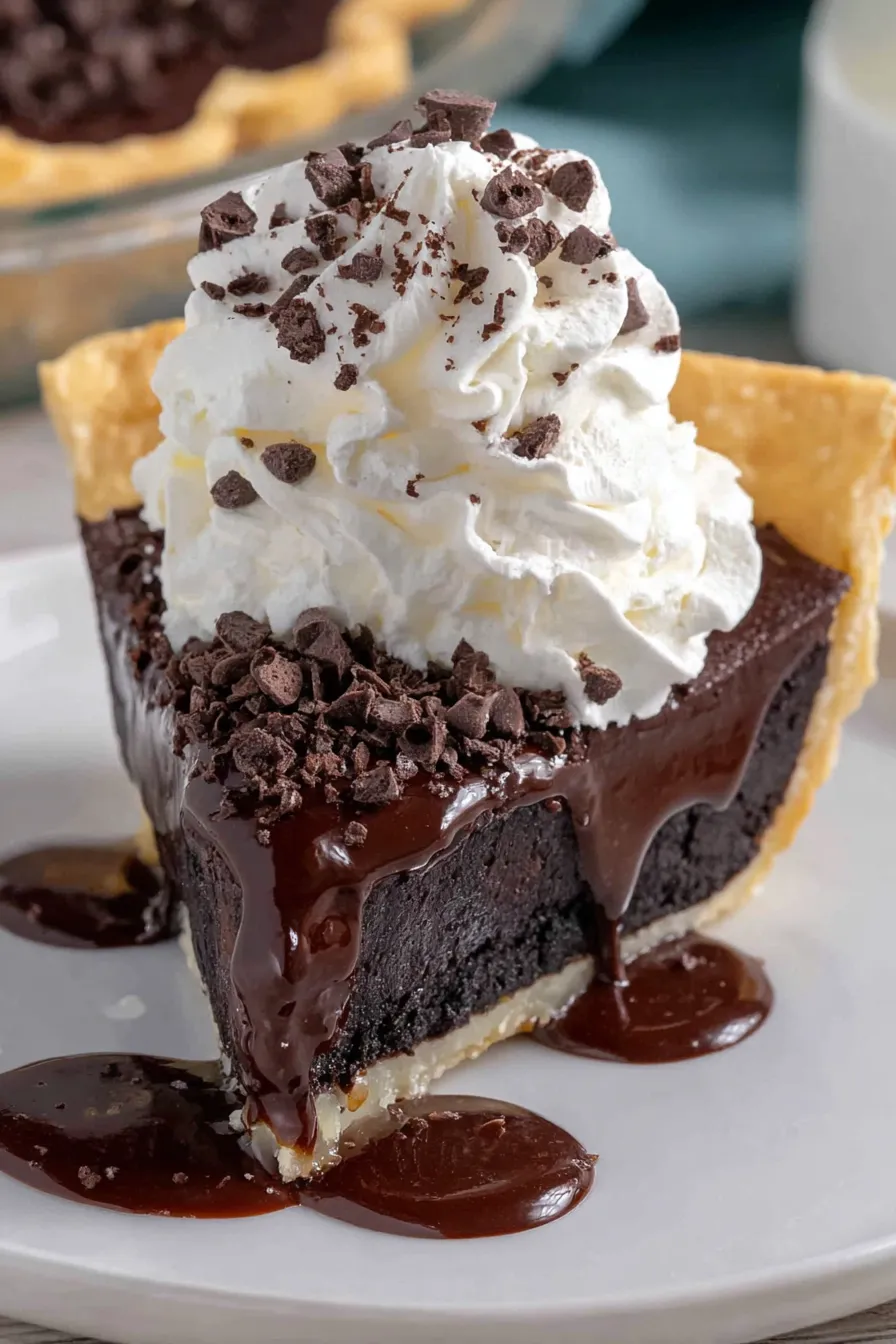
- Optional toppings: Chocolate sauce, whipped cream, or a scoop of vanilla ice cream elevate each slice for serving.
Instructions
Preheat the oven: Position a rack in the lower third of the oven and preheat to 350 degrees Fahrenheit. A lower position encourages a well-baked bottom crust so the pie shell finishes crisp without the top overbrowning. Combine sugar and warm melted butter: Place the granulated sugar in a large bowl and pour the warm melted butter over it. Stir briefly, then let the mixture sit undisturbed for five minutes so the heat begins to dissolve the sugar; this step promotes a glossy, crackly top once baked. Whisk in eggs and flavorings: After five minutes, whisk the butter and sugar vigorously for about 30 seconds. Add the whole egg, egg yolk, water, and vanilla extract and whisk for another 30 seconds until combined. Tap the whisk to collect excess batter and remove it to avoid overworking later steps. Add dry ingredients: Sprinkle the unsweetened cocoa powder, powdered sugar, all-purpose flour, and kosher salt directly over the butter mixture. Using a rubber spatula, fold and stir until the batter is glossy and uniform. Avoid overmixing to keep the interior tender and fudgy. Fold in chips and nuts: Gently fold in the semisweet chocolate chips and chopped walnuts, ensuring even distribution. If you want pockets of molten chocolate, reserve a few chips to scatter on top before baking. Fill the crust and cover: Pour the batter into the frozen 9-inch pie crust and smooth into an even layer. Lightly spray a piece of foil with nonstick spray and tent it over the pie, avoiding pressing the foil onto the batter so steam can escape while protecting the top from direct heat. Bake covered: Bake on the lower third of the oven, covered with the foil, for 25 minutes. This initial covered phase helps the center cook through without the edges overbaking. Finish baking uncovered: Carefully remove the foil and continue baking uncovered for 20 to 30 minutes. For a fudgier center remove the pie closer to 20 minutes after foil removal; for a more set pie bake toward the 30-minute mark. Visual cues: the center should look slightly glossy but not liquid, and a thin crust will form on top. Cool and serve: Transfer the pie to a wire rack to cool. Serve slightly warm for spoonable slices, at room temperature for cleaner slices, or chilled for a firmer, denser texture. Top with whipped cream, chocolate sauce, or ice cream as desired.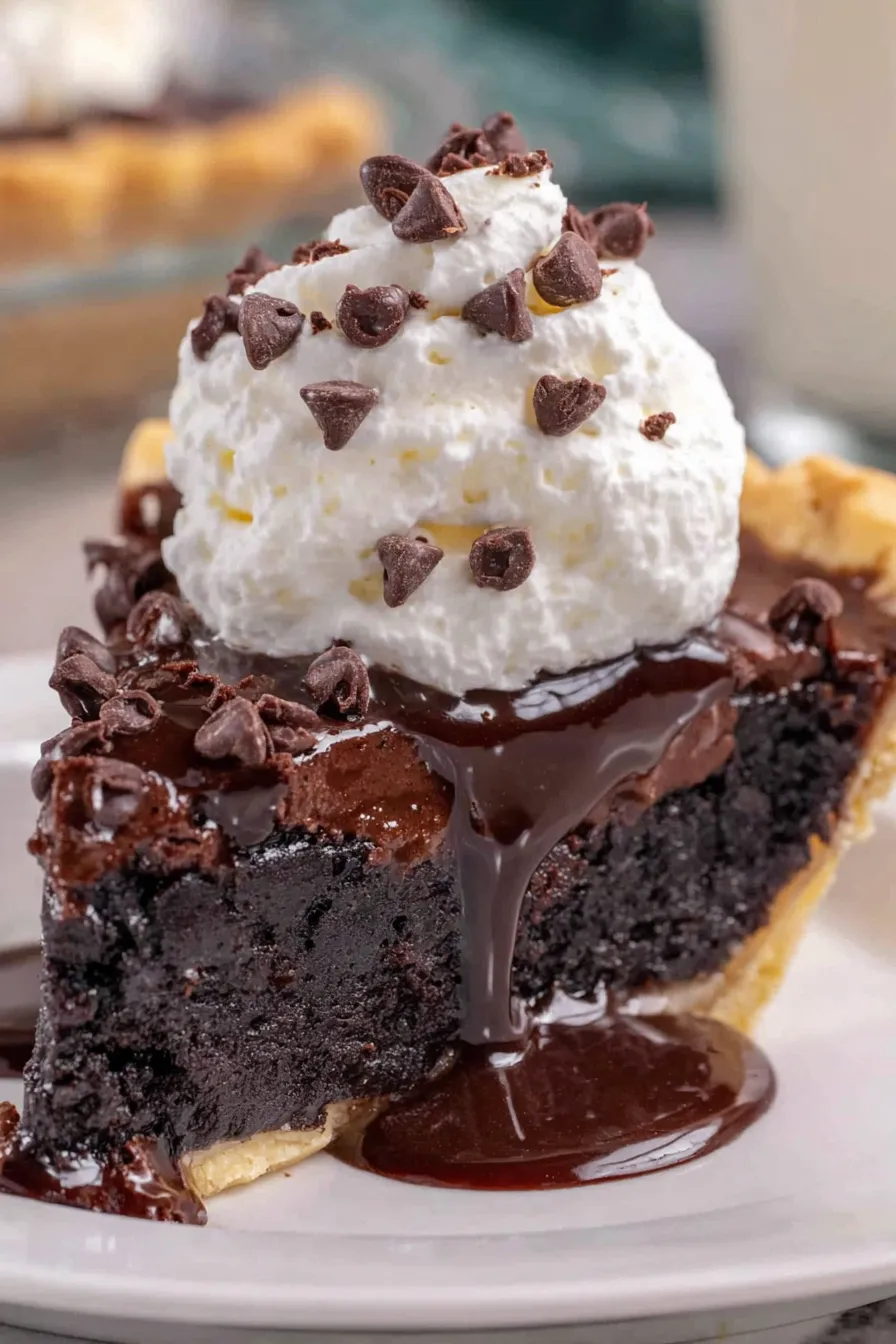
You Must Know
- The pie can be baked to two textures: remove it earlier for a fudgy, brownie-like center or bake longer for a firmer, sliceable texture; both are delicious.
- Store in an airtight container in the refrigerator for up to four days; freeze for up to three months wrapped tightly in plastic and foil.
- This dessert contains eggs, dairy, gluten, and tree nuts when walnuts are used; adapt as needed for allergies.
- Using warm melted butter and letting the sugar sit helps create the characteristic crackly top that looks professional but is very easy to achieve.
- Letting the pie cool before slicing gives cleaner slices; chilling overnight yields the firmest, neatest presentation.
One of my favorite things about this dish is how forgiving it is. I have baked it for weeknight guests and holiday gatherings and the results were consistently praised. A single pan makes eight generous slices, and I always keep an extra crust in the freezer so I can assemble this without fuss when company calls. The family especially loves it with a warm caramel drizzle.
Storage Tips
To preserve texture and flavor store leftover slices in an airtight container in the refrigerator for up to four days. For neat slices, chill the pie for at least two hours before cutting. To freeze, wrap tightly in plastic wrap then foil and freeze for up to three months. Thaw overnight in the refrigerator and bring to room temperature or warm briefly in a 300 degrees Fahrenheit oven for 8 to 12 minutes to revive the soft interior.
Ingredient Substitutions
If you need to adjust ingredients, swap the semisweet chips for milk chocolate for a sweeter finish, or use dark chocolate chips for an intense cocoa flavor. Replace walnuts with pecans or omit nuts entirely for a nut-free version. For a gluten-free adaptation, use a store-bought gluten-free pie shell and substitute 1:1 gluten-free flour in the batter; baking time may vary slightly by shell thickness.
Serving Suggestions
Serve warm with a scoop of vanilla ice cream and a drizzle of chocolate or caramel sauce for a classic pairing. For a lighter presentation, top with a spoonful of softly whipped cream and a sprinkle of flaky sea salt to balance sweetness. Garnish with toasted walnut halves or a dusting of powdered sugar for special-occasion plating. Pair with strong black coffee or a dessert wine to cut the richness.
Cultural Background
This hybrid of brownie and pie mirrors American dessert tradition of adapting familiar batter into novel vessels. Much like the skillet cookie or brookie, baking brownie batter in a pie shell showcases the versatility of classic ingredients—butter, sugar, eggs, chocolate. The idea likely evolved from home bakers experimenting with frozen crusts when convenience crusts became widely available in the late 20th century.
Seasonal Adaptations
In colder months add a pinch of cinnamon or a teaspoon of espresso powder to the batter for warmth and depth. For spring and summer serve chilled with fresh berries and a dollop of lemon-scented whipped cream to brighten the rich chocolate. Holiday versions can include orange zest in the batter or a layer of salted caramel between the crust and brownie batter for festive flair.
Meal Prep Tips
Assemble the batter up to one day ahead and store it covered in the refrigerator; let it come to room temperature for 15 minutes before pouring into the crust. Alternatively, fully bake and refrigerate; then slice and reheat single portions in the microwave for 10 to 20 seconds or in a low oven for a warmed serving. Portion into individual containers for easy dessert servings throughout the week.
This Brownie Pie is a reliable, flexible dessert that feels both homey and special. It rewards small attentions like using warm butter and allowing proper cooling, but it is forgiving enough for new bakers. Share it warmed with ice cream or chilled for tidy slices and make it your own with different chips, nuts, or toppings. Enjoy the simplicity and the smiles it brings.
Pro Tips
Let the warm melted butter sit with the granulated sugar for five minutes then whisk; this helps create a glossy, crackly top.
Chill the pie before slicing for the cleanest cuts; if serving warm, allow to set for at least 30 minutes.
Reserve a few chocolate chips to scatter on top before baking for pockets of melted chocolate.
This nourishing brownie pie recipe is sure to be a staple in your kitchen. Enjoy every moist, high protein slice — it is perfect for breakfast or as a wholesome snack any time.
FAQs about Recipes
How do I know when the pie is done?
Bake uncovered 20 to 30 minutes after removing the foil; for a fudgier center remove closer to 20 minutes, for a firmer center bake nearer 30 minutes.
How long does it keep?
Store in the refrigerator for up to four days in an airtight container; freeze tightly wrapped for up to three months.
Tags
Brownie Pie
This Brownie Pie recipe makes perfectly juicy, tender, and flavorful steak every time! Serve with potatoes and a side salad for an unforgettable dinner in under 30 minutes.
Ingredients
Crust
Filling
Instructions
Preheat
Position a rack in the lower third of the oven and preheat to 350 degrees Fahrenheit to promote even baking and a crisp bottom crust.
Combine sugar and butter
Place granulated sugar in a large bowl, pour warm melted butter over it, stir briefly, then let sit undisturbed for five minutes to begin dissolving the sugar.
Whisk in eggs and flavor
Whisk butter and sugar vigorously for 30 seconds, add whole egg, egg yolk, water, and vanilla extract, and whisk another 30 seconds until combined.
Add dry ingredients
Sprinkle cocoa powder, powdered sugar, flour, and salt over the butter mixture and fold with a rubber spatula until glossy and well combined; avoid overmixing.
Fold in chips and nuts
Gently fold in semisweet chocolate chips and chopped walnuts, reserving a few chips to scatter on top if desired for melted pockets.
Fill crust and cover
Pour batter into frozen pie crust and smooth. Lightly spray foil with nonstick spray and tent over the pie without pressing onto the batter.
Bake covered
Bake in the lower third of the oven, covered with foil, for 25 minutes to allow the center to begin setting without overbrowning the edges.
Finish uncovered
Remove foil carefully and continue to bake uncovered for 20 to 30 minutes more. For a fudgier center remove sooner; for a firmer slice bake longer.
Cool and serve
Place pie on a wire rack to cool. Serve slightly warm for a gooey center, room temperature for cleaner slices, or chilled for a firm texture.
Last Step: Please leave a rating and comment letting us know how you liked this recipe! This helps our business to thrive and continue providing free, high-quality recipes for you.
Nutrition
Did You Make This?
Leave a comment & rating below or tag
@paletina on social media!
Categories:
You might also like...

Chocolate Chunk Marshmallow Brownies
Ultra-fudgy brownies packed with chocolate chunks, crowned with gooey marshmallows and glossed with warm chocolate frosting for a decadent crowd-pleaser.

Buttery Pecan Pie Bars
Buttery shortbread crust topped with a gooey brown sugar-pecan filling. Ten minutes to prep, irresistibly crunchy edges, and perfect for make-ahead treats.

Creamy Pumpkin Cheesecake
Silky, crack-free pumpkin cheesecake with warm spice, buttery graham crust, and make-ahead convenience for showstopping holiday dinners.
Did You Make This?
Leave a comment & rating below or tag @paletina on social media!
Rate This Recipe
Share This Recipe
Enjoyed this recipe? Share it with friends and family, and don't forget to leave a review!
Comments (1)
This recipe looks amazing! Can't wait to try it.
Comments are stored locally in your browser. Server comments are displayed alongside your local comments.

Hi, I'm Isabella!
What's Popular

30-Minute Meals!
Join to receive our email series which contains a round-up of some of our quick and easy family favorite recipes.